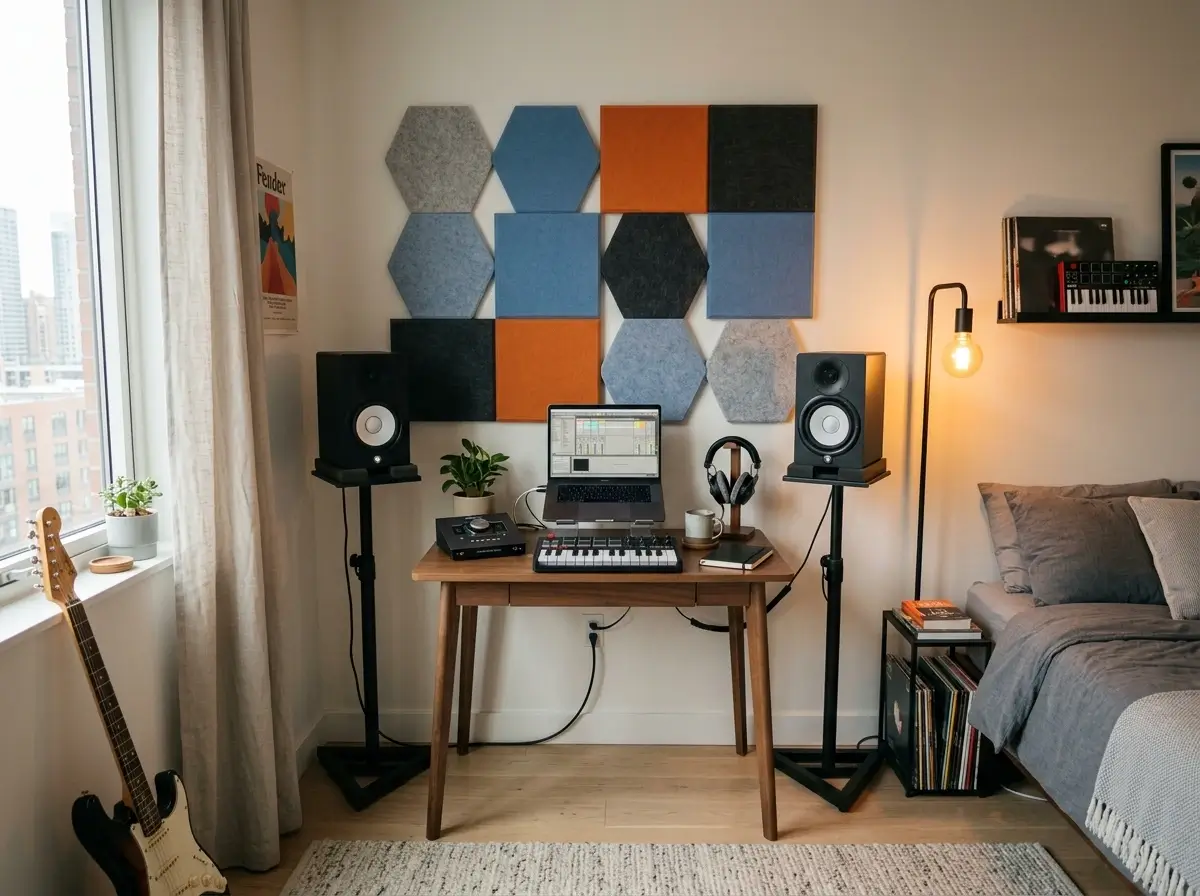
Setting up an audio production space in a rental apartment presents a unique set of challenges. Between hard parallel walls that create harsh echoes and strict leases that forbid heavy drilling, it is easy to feel limited.
A common mistake is assuming you need to permanently alter a room to achieve professional-sounding results.
In reality, smart gear placement and strategic, temporary treatments can completely transform your sound. By implementing the right small bedroom music studio ideas, you can build a highly functional creative hub without risking your security deposit.
This guide will walk you through the essential steps to maximize your square footage and tame unruly acoustics.
We will cover freestanding monitor placement, drill-free acoustic panels, temporary vocal booths, and clever gear storage.
Whether you are mixing tracks in a dedicated spare room or producing beats at the foot of your bed, these renter-friendly strategies will help you create your ideal setup.
1. Layout Planning: The Foundation of Good Small Bedroom Music Studio Ideas
When you start looking into small bedroom music studio ideas, the temptation is usually to jump straight into buying expensive gear or mounting acoustic foam.
However, the physical layout of your room dictates your acoustic success before a single speaker is ever plugged in. Because renters cannot tear down drywall to change a room’s geometry, finding the ideal listening position is your most powerful tool.
If you are currently repurposing a spare room for creative projects, clearing the clutter and mapping your dimensions should be step one. Do not rush this process.
Finding Your Room’s Symmetry
Audio production relies heavily on an accurate stereo field. If your desk is pushed against the left wall, the sound from your right speaker will bounce differently than the sound from your left.
This creates a lopsided mix where instruments sound improperly panned. For the most effective small bedroom music studio ideas, you must prioritize perfect symmetry.
Position your desk dead center along one of the walls so the distance to the left and right walls is completely identical.
Furthermore, you generally want your desk facing the shorter wall. Sound waves—especially lower bass frequencies—need physical space to travel and dissipate.
By firing your speakers down the longest length of the room, you give those heavy waves room to breathe, reducing nasty reflections right behind your head.
Avoiding the Corner Bass Trap
A common mistake is tucking the recording desk tightly into a corner to save floor space. While this makes perfect sense for a standard home office, it is an absolute disaster for audio production.
Room corners artificially amplify low-end frequencies, turning your listening position into a muddy, booming mess. If your mix sounds perfectly balanced in a corner, it will likely sound entirely lacking in bass when played in a car or on a phone.
To implement truly functional small bedroom music studio ideas, pull your desk out of the corner and away from the front wall.
Even a gap of twelve to eighteen inches can significantly decouple your monitors from the room’s boundaries.
Professional acousticians rely on established room acoustic measurement guidelines to determine optimal ratios, but the general rule for renters is simple: stay out of the corners and stay off the walls.
Mapping Your Listening Sweet Spot
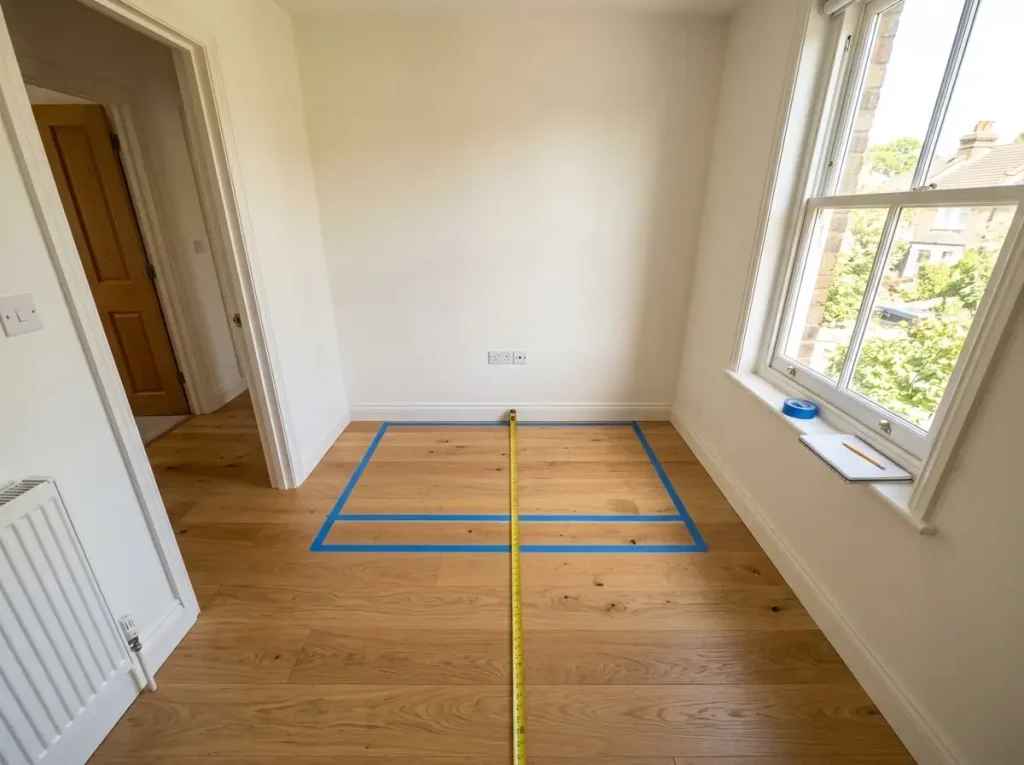
Before bringing in heavy desks or keyboard stands, take a moment to assess the empty space. The very best small bedroom music studio ideas always start with a simple measuring tape.
- Measure the room’s length and width: Identify the shorter wall to serve as your primary front wall.
- Find the exact center line: Mark the middle of the front wall; this is where the dead center of your desk and monitor will sit.
- Calculate the 38 percent rule: Ideally, your listening chair (and your ears) should sit roughly 38 percent of the way back from the front wall to avoid major acoustic dead zones.
- Check for hard parallel surfaces: Note any large glass windows, closet doors, or bare drywall sections directly to your left and right, as these will need targeted acoustic treatment later on.
Once the desk location is chosen and marked, the next priority is taming the reflections bouncing off those hard surfaces.
2. Renter-Friendly Acoustic Treatments Without Drilling
Once you have your layout locked in, the next major hurdle is the room’s sound. Bare drywall and hard floors bounce sound waves endlessly, creating harsh echoes that smear your mix.
For renters, the traditional advice of screwing heavy wooden acoustic panels directly into the wall studs is completely out of the question.
Fortunately, you do not have to forfeit your security deposit to get a professional sound. Some of the most effective small bedroom music studio ideas involve entirely temporary, drill-free acoustic treatments.
By targeting your early reflection points—the spots on the walls to your immediate left and right—you can dramatically tighten up your room’s acoustics without leaving a single hole behind.
Mounting Lightweight Foam Safely
Acoustic foam is a common starting point for beginners. It is incredibly lightweight, which makes it highly appealing for lease-friendly spaces.
To hang these panels safely, absolutely avoid cheap spray adhesives, which will leave a stubborn, gooey residue that ruins rental drywall.
Instead, attach your foam panels to small squares of rigid cardboard using standard glue. Then, apply heavy-duty removable adhesive strips (like Command strips) to the back of the cardboard.
This ensures the foam stays flat and allows you to peel the whole assembly off the wall cleanly when you eventually move out.
When researching small bedroom music studio ideas, remember that foam primarily absorbs high frequencies. It will stop the high-pitched “slapback” echo when you clap your hands, but it will not fix a muddy, booming bass problem.
Freestanding Absorption Alternatives
To truly control the problematic midrange and low-end frequencies, you need much denser materials.
Rigid fiberglass or rockwool panels are the industry standard for serious absorption. Because these panels are generally too heavy for removable adhesive strips, you have to get a bit more creative.
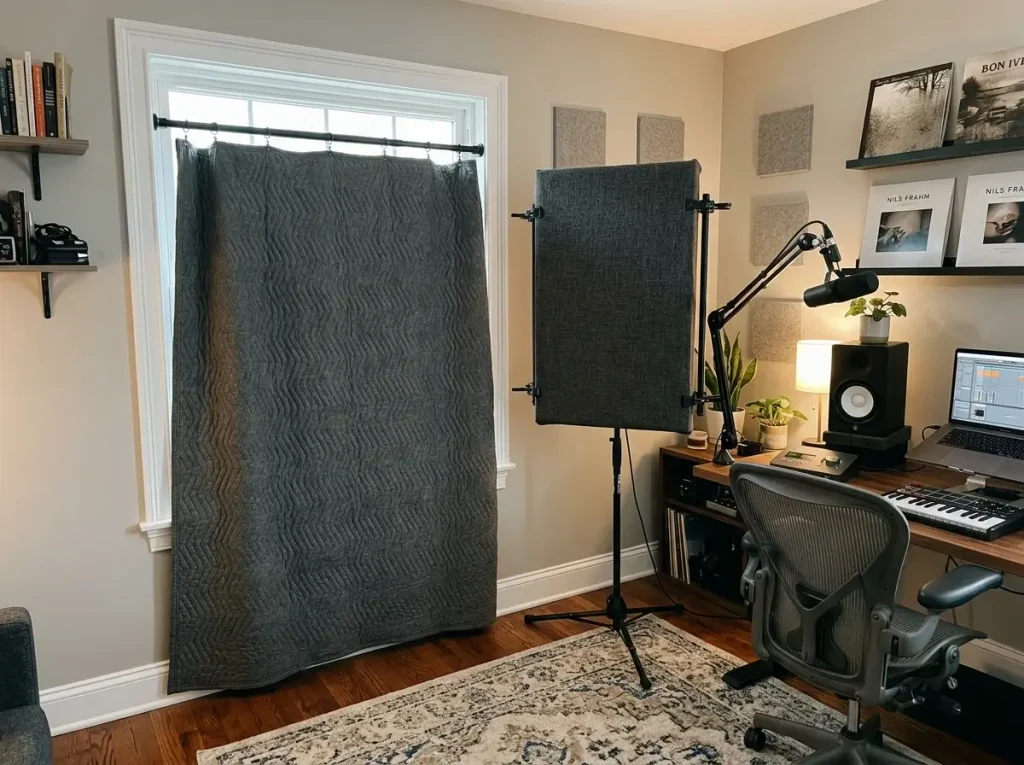
One of the cleverest small bedroom music studio ideas is to mount heavy fiberglass panels onto freestanding microphone stands. Using heavy-duty zip ties or specialized brackets, you can secure the panels to the stands and easily slide them right into the corners to act as bass traps.
When evaluating these denser materials, you can look up their noise reduction coefficient properties to see exactly how much sound they absorb at different frequencies.
Fiberglass outperforms cheap foam in almost every measurable category, making these freestanding traps incredibly valuable.
Taming Windows and Floors
Glass windows are acoustic nightmares, reflecting sound almost perfectly back into the room. You cannot stick panels to glass easily, but you can utilize the window frame itself.
Install a heavy-duty tension rod across the inside of the frame and hang thick acoustic blankets or heavy theater drapes from it. You can slide them open for natural light during the day and pull them tightly shut for critical listening sessions at night.
Finally, do not ignore the floor. Hardwood or laminate floors bounce sound directly up to the ceiling, creating what is known as a vertical flutter echo.
Rolling out a thick, plush area rug directly under your desk and listening chair will immediately deaden these reflections.
It is one of the simplest, cheapest small bedroom music studio ideas available, and it conveniently protects your rental floors from rolling office chair wheels at the exact same time.
3. Compact Studio Desk and Gear Formations
When you are piecing together your audio setup, horizontal surface area is your most precious commodity.
Between your computer screen, nearfield monitors, audio interface, and MIDI keyboard, a standard desk fills up incredibly fast. If you just lay everything flat on a tabletop, you will have zero room left for a notepad, let alone a comfortable place to rest your arms while mixing.
If you look at the most successful small bedroom music studio ideas, they all share one common trait: they do not rely on traditional flat-desk layouts. To fit a fully functional production suite into a tight rental space, you have to rethink how your furniture holds your gear.
Utilizing Vertical Desk Space
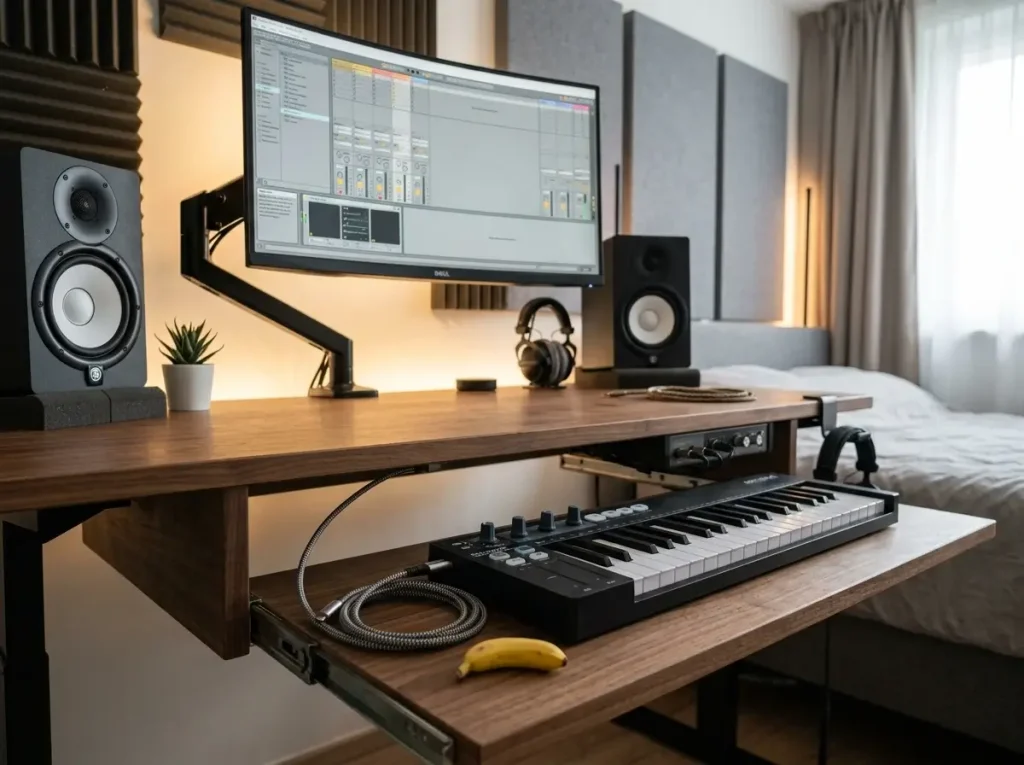
A 49-key or 61-key MIDI controller can easily consume the entire front edge of your workspace. Instead of sacrificing that premium real estate, invest in a desk with a sturdy, slide-out MIDI keyboard tray.
This allows you to tuck the keyboard completely out of sight when you are editing podcasts or mixing, and instantly pull it out when inspiration strikes to lay down a synth track.
Similarly, relying on the factory stand for your computer monitor is a massive waste of space. By installing a heavy-duty, clamp-on monitor arm to the back of your desk, you elevate the screen entirely.
This immediately frees up the space underneath for a mixing control surface, a drum pad, or simply a clean area for your computer keyboard and mouse.
Furthermore, if you use hardware compressors or preamps, look for desks that include built-in 2U or 4U rack mount spaces.
Keeping outboard gear stacked vertically, slightly angled toward your listening position, is crucial. When curating small bedroom music studio ideas, verticality is everything. It keeps your gear within arm’s reach without swallowing your room’s footprint.
Concealing Audio Interfaces
Audio interfaces are the central hub of your studio, but they are notoriously messy to look at. With heavy XLR microphone cables plugging into the front and thick quarter-inch monitor cables spilling out the back, leaving an interface on top of your desk creates instant visual clutter.
A fantastic, renter-friendly solution is to mount your audio interface directly underneath the desk surface. By using strips of heavy-duty industrial Velcro or simple drill-free under-desk brackets, you can secure the interface upside down.
This hides the messy cable runs while keeping the volume knobs and headphone jacks perfectly accessible right at your knees.
When browsing for new furniture or modifying what you already own, the best small bedroom music studio ideas incorporate these essential desk features:
- Slide-out instrument trays: Strong enough to hold the weight of a weighted MIDI keyboard without wobbling.
- Clamp-friendly rear edges: Desks with a lip that allows monitor arms and microphone boom arms to attach securely without drilling.
- Integrated rack mount spaces: Angled desktop racks that keep expensive outboard gear safe and visible.
- Under-desk cable management: Wire baskets or adhesive cable clips to route heavy audio snakes cleanly.
By organizing your gear thoughtfully, you can implement small bedroom music studio ideas that feel like a professional control room rather than a cluttered dorm space.
4. Monitor Placement Rules for Small Bedroom Music Studio Ideas
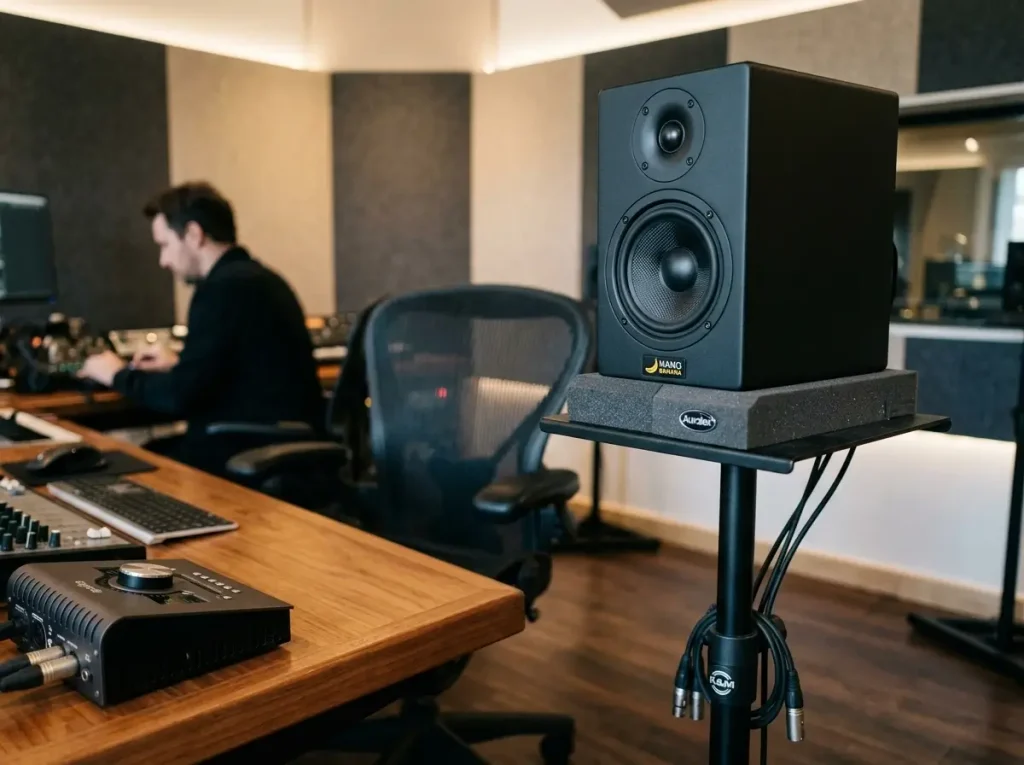
Even the most expensive studio monitors will sound terrible if they are positioned incorrectly. A common mistake beginners make is simply placing their speakers wherever they happen to fit on the desk.
When searching for the most effective small bedroom music studio ideas, getting your speaker geometry right is a completely free adjustment that makes the absolute biggest difference in your final sound.
Because you are working in a tight space, you are relying on nearfield monitors. These speakers are specifically designed to be listened to from a very close distance, which helps minimize the amount of room echo you hear.
However, sitting this close means you must be incredibly precise with their physical placement.
The Equilateral Triangle Rule
A foundational rule of all small bedroom music studio ideas is establishing a perfect equilateral triangle between your ears and the tweeters of your two monitors.
If this triangle is skewed, your stereo image will collapse, and you will not be able to accurately pan your instruments left or right.
Here is a step-by-step guide to measuring your speaker triangle:
- Measure the width: Measure the exact distance between the center of the left speaker’s tweeter and the right speaker’s tweeter. A common starting distance for small rooms is about 36 to 48 inches.
- Match the listener distance: Pull your chair back so that your head is exactly that same distance away from each speaker.
- Angle the monitors: Toe the speakers inward so they point directly at the spot just behind your head.
- Adjust the height: Raise or lower the monitors so the tweeters are perfectly level with your ears when you are sitting up straight.
Because you are sitting so close to the sound source within an untreated space, ear fatigue can happen quickly.
It is highly recommended to monitor at lower, conversational volumes and review safe listening volume exposure levels to protect your hearing during long sessions.
Decoupling Speakers from Furniture
One of the most overlooked small bedroom music studio ideas is decoupling your speakers from your workspace.
If you set your monitors directly onto a wooden desk, the bass frequencies will vibrate straight through the cabinet and into the wood. The desk itself acts as a giant resonant amplifier, turning tight bass lines into a muddy, blurry mess.
At the very least, you must place desktop isolation pads beneath your speakers. These high-density foam wedges or acoustic decoupling pucks absorb the physical vibrations before they can reach the desk surface.
However, the absolute best scenario is to remove the monitors from the desk entirely. Investing in a pair of freestanding, heavy-duty monitor stands allows you to place the speakers on the floor just behind your desk.
You can fill the hollow tubes of these stands with play sand to make them incredibly heavy, which stops vibrations dead in their tracks.
By applying these highly specific small bedroom music studio ideas, your mixes will translate perfectly to the outside world. While monitors cover the mixing phase, recording clean vocals requires a completely different approach to isolation.
5. Creating a Temporary Vocal Booth in a Rental Closet
While perfect monitor placement helps you mix existing tracks, recording clean, dry vocals requires a completely different acoustic approach.
A standard bedroom is filled with flat, reflective surfaces that create a distinct “room sound” on your recordings. If you want professional, radio-ready vocals, you need isolation.
When brainstorming the best small bedroom music studio ideas, people often assume they need to build a heavy, wooden vocal booth. For a renter, constructing a permanent room-within-a-room is simply not an option.
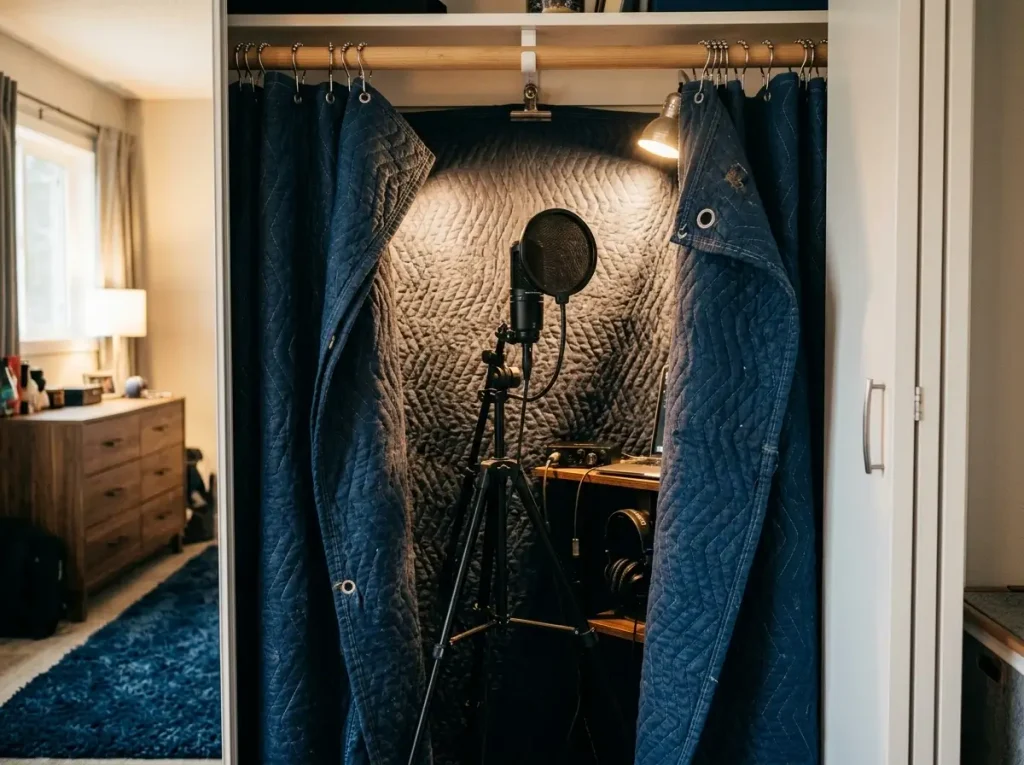
Fortunately, you likely already have the perfect architectural feature for vocal isolation: a standard clothing closet.
By combining the natural sound-dampening properties of hanging clothes with a few strategic additions, you can create a highly effective, temporary tracking space.
The Blanket-and-Rod Method
Converting a rental closet into a temporary vocal booth is surprisingly straightforward and completely reversible. The goal is to surround the microphone with dense, absorbent materials that catch your voice before it can bounce off the hard drywall.
One of the most popular small bedroom music studio ideas is the blanket-and-rod method. Here is how to execute it without using a single wall screw:
- Source heavy materials: Purchase two or three thick, heavyweight moving blankets. These are inexpensive and incredibly dense.
- Use the existing hardware: Pick up a pack of heavy-duty shower curtain rings. Clip the rings directly through the top edge of the moving blankets.
- Hang and slide: Slide the rings onto your existing closet rod, right alongside your hanging clothes.
- Treat the floor: Place a thick, plush rug on the floor inside the closet to kill any upward reflections bouncing toward your condenser microphone.
When it is time to record, simply step into the closet, pull the heavy blankets around you in a U-shape, and track your vocals. When you are done, slide them to the side just like a shower curtain.
Portable Reflection Shields
If your closet is simply too small to stand inside, you can still achieve great vocal isolation out in the main room. Portable reflection shields are excellent small bedroom music studio ideas for renters who need flexibility.
These curved, acoustic-foam-lined shields mount directly to your microphone stand, sitting just behind your microphone and pop filter.
They block the sound of your voice from hitting the wall directly in front of you, catching those initial early reflections. While a reflection shield will not block out the sound of a loud roommate or street traffic, it drastically reduces the “slapback” echo of a small, untreated room.
Managing Airflow and Heat
There is one critical danger to utilizing a small closet as a DIY vocal booth: ventilation. Stepping into a tightly sealed space surrounded by heavy blankets will cause the temperature to rise rapidly.
Without proper airflow, you will begin sweating within minutes, and carbon dioxide can build up quickly.
When utilizing enclosed small bedroom music studio ideas, your physical safety must come first. Never seal yourself in a closet for long periods without taking frequent breaks.
It is highly recommended to leave the closet door cracked open between vocal takes to allow fresh air to circulate, and you should review guidelines on maintaining safe indoor air quality if you plan on extended recording sessions.
A portable, battery-operated clip fan can keep you cool between takes, but remember to turn it off before hitting record to keep your audio clean.
6. Freestanding Storage Solutions for Instruments and Audio Gear
Once you have treated your room’s acoustics and positioned your monitors, the reality of physical gear sets in. Audio production requires a massive amount of physical items.
Between guitars, heavy XLR cables, delicate condenser microphones, and effect pedals, clutter accumulates rapidly. When curating the best small bedroom music studio ideas, storage is just as important as sound quality.
The primary challenge for renters is that you cannot simply drill heavy-duty wall hangers into the drywall to display your instrument collection.
You need sturdy, freestanding alternatives that keep your expensive gear safe and accessible without risking your security deposit or damaging the property.
Safe Instrument Display
A common mistake beginners make is leaning heavy bass guitars or acoustic instruments against the wall or leaving them resting on a bed.
This is a recipe for a broken instrument neck or a cracked body. Since traditional wall-mounted guitar hooks require drilling heavy lag screws directly into a wooden stud, renters must rely on floor-based solutions.
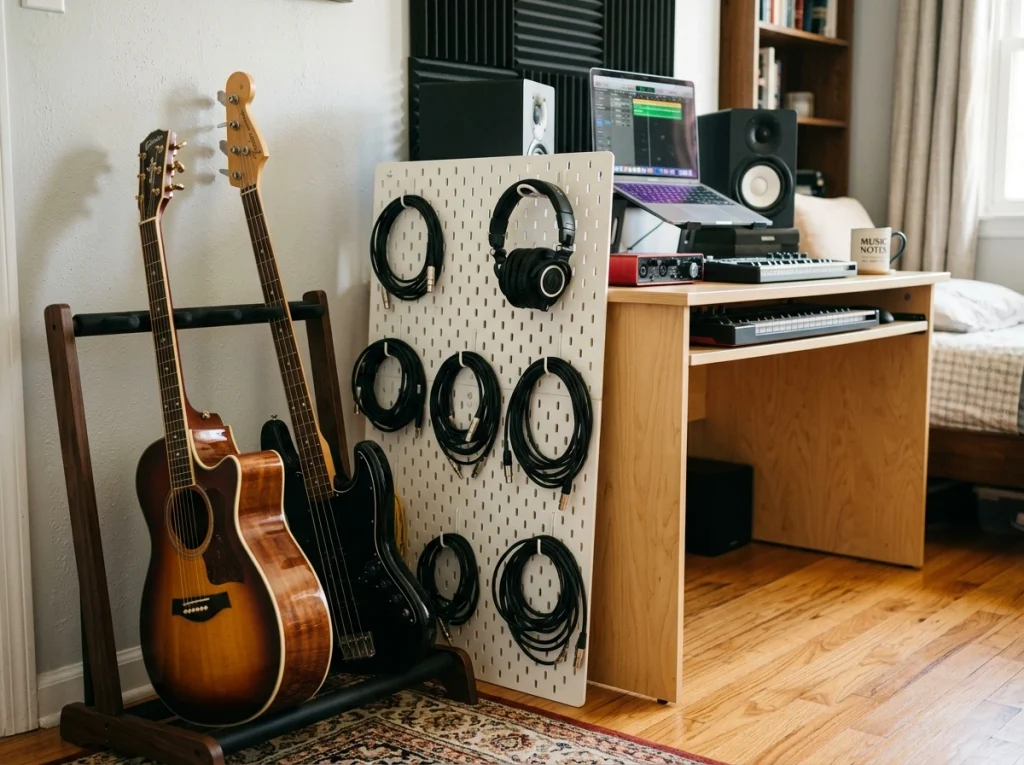
One of the most practical small bedroom music studio ideas is investing in a multi-guitar freestanding floor rack. These tiered racks hold three to five instruments vertically in a surprisingly tight footprint.
You can tuck them neatly into a corner or alongside your mixing desk. They are heavily padded to protect the delicate finish of your instruments and keep everything organized and within arm’s reach.
Never lean heavy items against unsupported drywall, as it only takes one accidental bump to send a heavy guitar crashing through a hollow wall.
Organizing Small Audio Components
Beyond large instruments, you will quickly find yourself drowning in smaller accessories like studio headphones, patch cables, and guitar pedals. Storing these items in a giant plastic bin leads to tangled wires and damaged connectors.
To create vertical storage without drilling into the walls, consider using a large, leaning pegboard.
By resting a solid wooden or metal pegboard on the floor and sandwiching it firmly between the wall and your heavy mixing desk, you create a massive, drill-free storage grid.
This is one of the most versatile small bedroom music studio ideas available. You can insert standard pegboard hooks to hang your studio headphones, coil your quarter-inch patch cables, and store spare microphone clips cleanly out of the way.
For delicate, expensive items like vocal microphones or boutique guitar pedals, utilize stackable, padded drawer units. Small metal machinist drawers lined with acoustic foam cut-offs create the perfect protective home for sensitive electronics that should not be left out to collect dust.
Routing Cables Without Damage
Finally, you must address the inevitable web of cables on the floor. A messy floor is not just an eyesore; it is a genuine tripping hazard in a tight bedroom. You need to route your power cables and audio snakes securely along the room’s baseboards.
Because duct tape leaves a permanent, sticky residue and heavy cable staples will destroy wooden trim, you must use renter-friendly adhesive clips.
If you are struggling with a massive mess of power strips and long wire runs crossing the room, you can check out our dedicated guide on safely managing complex cable runs for deeper, drill-free strategies.
By keeping your cables off the main walking path and your instruments securely racked, you ensure your small bedroom music studio ideas remain visually inspiring rather than chaotic and overwhelming.
7. Multipurpose Layouts: Combining Sleep and Small Bedroom Music Studio Ideas
Not every renter has a spare room to convert into a dedicated control room. For many producers, the studio must coexist directly alongside their sleeping area.
When you do not have the luxury of an empty flex space, implementing small bedroom music studio ideas right next to your bed becomes an absolute necessity.
Sharing your sleep space with your creative space presents a unique psychological and acoustic challenge.
You want to be able to relax at night without staring at flashing LED lights, tangled cables, and unfinished projects. Fortunately, with clever layout planning, you can build a highly functional workstation that does not dominate the entire room.
The Loft Bed Studio Setup
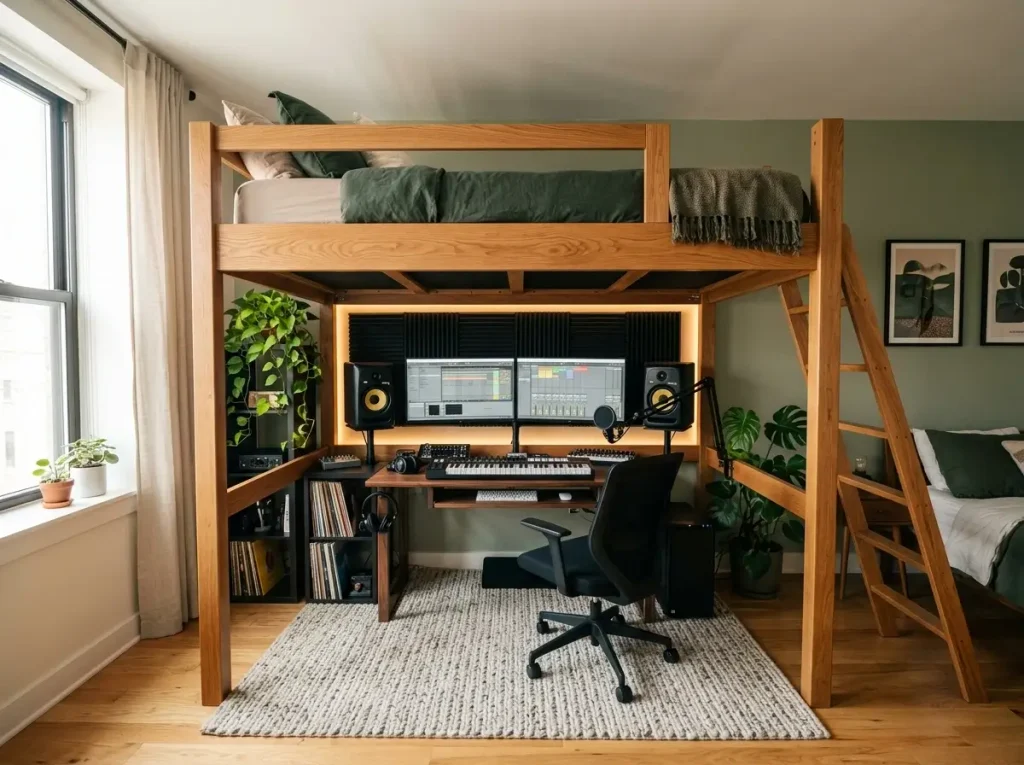
When square footage is extremely tight, your best option is to look up. One of the most efficient small bedroom music studio ideas for a shared sleeping space is utilizing a sturdy loft bed. By elevating your mattress, you completely reclaim the floor space underneath.
This creates a natural, cozy alcove perfectly sized for a mixing desk, a pair of studio monitors, and your instrument storage.
Because the mattress is positioned directly above your head, it actually acts as a massive acoustic cloud. It absorbs upward sound reflections before they can bounce off the hard ceiling, instantly improving your listening environment.
However, you must ensure the loft frame is incredibly stable. A wobbly frame will rattle annoyingly when you play deep bass frequencies through your monitors.
Always tighten the bolts securely and consider placing rubber isolation pads under the bedposts to decouple the metal or wood frame from the floor.
Using Furniture as Acoustic and Visual Dividers
If a loft bed is not your style, you have to find a way to separate the room horizontally. One of the best strategies for small bedroom music studio ideas is placing your desk at the foot of your bed, facing away from the mattress.
This ensures that when you are laying down to sleep, your monitors and computer screens are completely out of sight.
You can take this separation a step further by using tall, freestanding bookshelves placed right between the bed and the studio chair.
If you fill these shelves with dense books, they act as both a visual barrier and a functional acoustic diffuser that scatters sound waves. For a deeper dive into physically separating your spaces without building walls, you can explore utilizing freestanding room dividers.
Never underestimate the acoustic power of your bed itself. A thick, heavy mattress is essentially a giant bass trap. Leaving it in the room actually helps absorb low-end frequencies that would otherwise bounce uncontrollably around the drywall.
Managing Tech Clutter for Better Sleep
Audio interfaces, external hard drives, and MIDI keyboards are covered in bright, blinking LED lights. If your desk faces your bed, these lights will inevitably disrupt your sleep cycle.
Ultimately, the best small bedroom music studio ideas respect the room’s original purpose: providing a restful environment.
Make it a habit to power down your power strips completely at the end of the night. Invest in a master switch that kills the power to your entire studio rack with one click.
By physically and visually shutting down the studio, you create a healthy boundary between your creative workflow and your nightly rest.
Conclusion
Building a highly functional audio production space in a rental apartment is entirely possible with the right approach. By utilizing these small bedroom music studio ideas, you can tame unruly acoustics, organize your gear, and isolate your vocals without ever reaching for a power drill.
Remember that the foundation of a great-sounding room starts with symmetry and intelligent monitor placement, followed by targeted, temporary acoustic treatments.
If you are currently overhauling your entire apartment, you can explore even more ways to transform your living area by checking out our comprehensive guide to creating DIY flex spaces.
Take a moment today to evaluate your room’s dimensions and test out a new layout for your desk—your mixes will sound better for it.