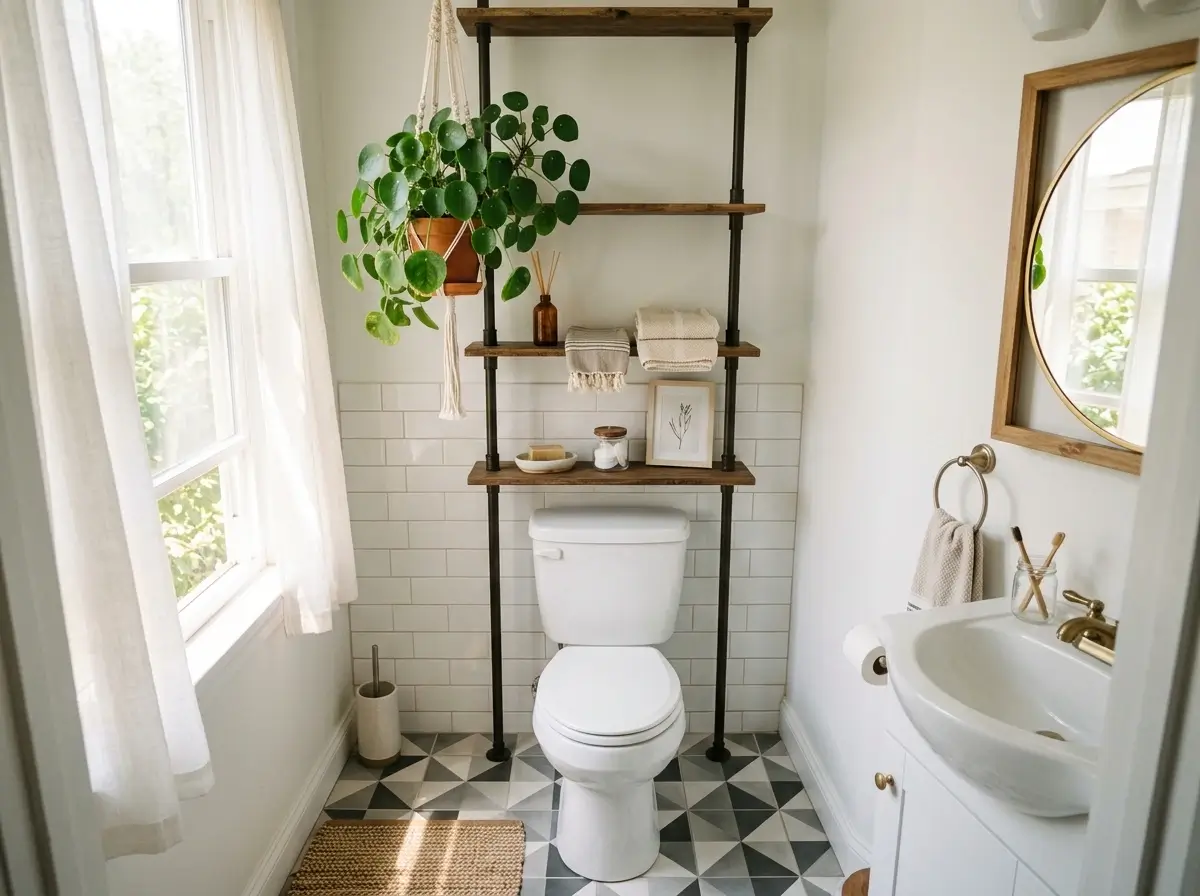
You stare at the same builder-grade fixtures and outdated tiles every morning, assuming your lease legally binds you to bad design. It doesn’t.
Transforming a cramped apartment bathroom doesn’t require power tools, a contractor, or risking your security deposit.
By leveraging tension-based storage, heat-removable adhesives, and premium portable hardware, you can completely mask the ugly bones of your unit.
Here are the most effective, fully reversible small bathroom renovation ideas to turn a generic rental layout into a modern sanctuary—while guaranteeing you get your money back on move-out day.
What bathroom upgrades can I do without asking my landlord for permission?
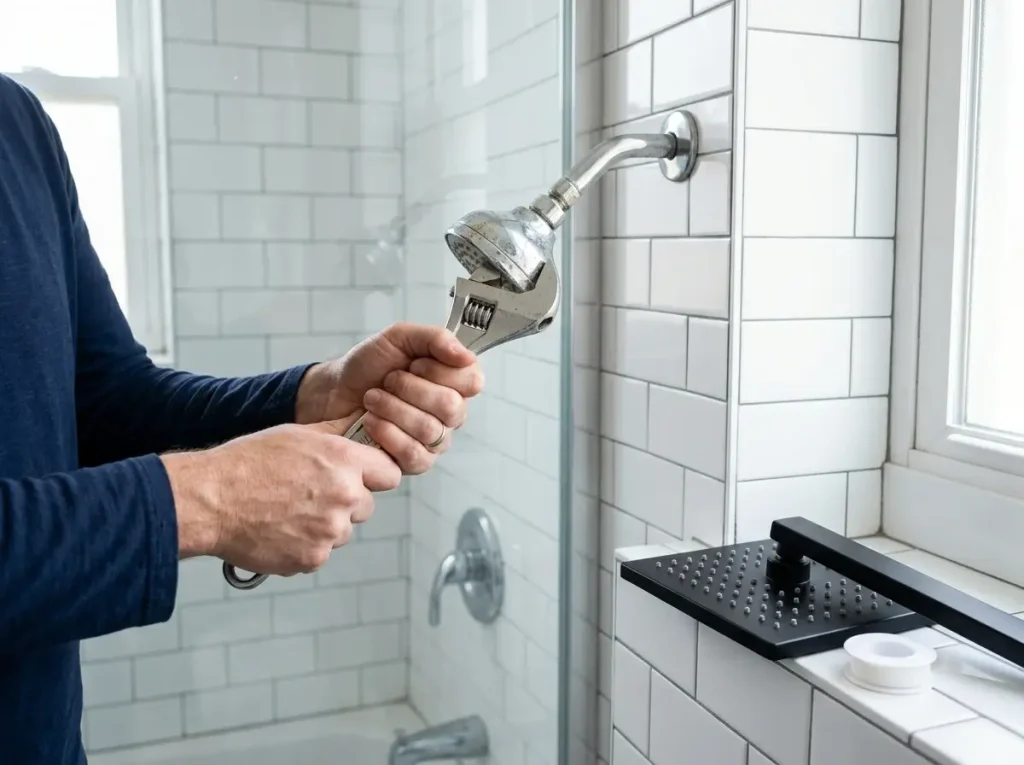
In most US rental agreements, you can safely perform cosmetic bathroom upgrades that do not require structural changes, plumbing alterations, or hardwiring.
Permitted updates typically include swapping the showerhead, changing cabinet knobs, installing tension-rod shelving, applying removable wallpaper, and replacing standard toilet seats, provided you keep the original items.
Understanding the legal boundaries of your lease is the crucial first step before implementing any small bathroom renovation ideas. Most standard US lease agreements contain an “alterations and improvements” clause.
This legal provision explicitly prohibits tenants from making permanent modifications without written consent.
However, it implicitly allows for reversible, cosmetic changes—often referred to legally as modifications that fall within the scope of returning the property to its original condition.
The golden rule of rental upgrading is simple: if you can remove it when your lease ends without leaving physical evidence it was ever there, it is generally safe to install.
The core mechanism that protects your security deposit is your ability to achieve a 100% reversal.
This means any hardware you remove—such as standard builder-grade drawer pulls, the original water-restricting showerhead, or the existing toilet seat—must be carefully stored, labeled, and reinstalled prior to your move-out inspection.
Proper storage prevents accidental loss, which is a leading cause of deposit deductions.
We recommend wrapping all original fixtures in microfiber cloths and storing them in a dedicated plastic bin at the top of a closet to prevent corrosion or misplacement over a 12-month lease cycle.
To provide clear boundaries, here is an exact breakdown of what standard US property management companies allow versus what will instantly violate your lease.
Strictly Permitted Upgrades (Reversible & Cosmetic)
- Replacing cabinet hardware: Swapping knobs and drawer pulls (must exactly match existing screw hole spacing to avoid drilling).
- Showerhead swaps: Changing the fixture for a filtered or high-pressure model using Teflon tape.
- Freestanding storage: Installing tension-based storage poles, over-the-door hanging organizers, or leaning ladders.
- Surface coverings: Applying high-quality, heat-removable peel-and-stick wallpaper or vinyl floor decals specifically rated for moisture.
- Toilet modifications: Replacing the standard toilet seat with a slow-close or bidet-attachment model.
- Textile swaps: Upgrading the shower curtain, tension rod, and rings.
Strictly Prohibited Upgrades (Permanent & Structural)
- Drilling: Creating new holes in ceramic tile, drywall, or cabinetry for towel bars or heavy mirrors.
- Electrical work: Replacing hardwired electrical fixtures (like sconces or overhead vanity lights) that require wire splicing.
- Painting: Painting existing vanity cabinets, tiles, or walls without prior written consent from the landlord.
- Flooring removal: Ripping up or replacing glued-down linoleum or original ceramic tiles.
- Chemical bonding: Re-caulking or re-grouting the bathtub, sink, or tiles without notifying property management.
- Plumbing alterations: Modifying any actual plumbing pipes behind the wall or beyond the visible showerhead arm.
When brainstorming small bathroom renovation ideas, tenants often underestimate the peripheral damage caused by poorly executed temporary upgrades.
For instance, while peel-and-stick products are generally permitted under cosmetic clauses, applying cheap adhesive to a poorly ventilated, high-humidity environment can strip the landlord’s original paint or leave a hardened, impossible-to-remove residue upon move-out.
Always cross-reference your plans with your lease’s specific language regarding adhesives and wall coverings.
By strictly adhering to these boundaries and consulting legal definitions of standard lease agreements, you can safely elevate your space without jeopardizing your deposit.
How do I make a tiny apartment bathroom feel bigger without tearing down walls?
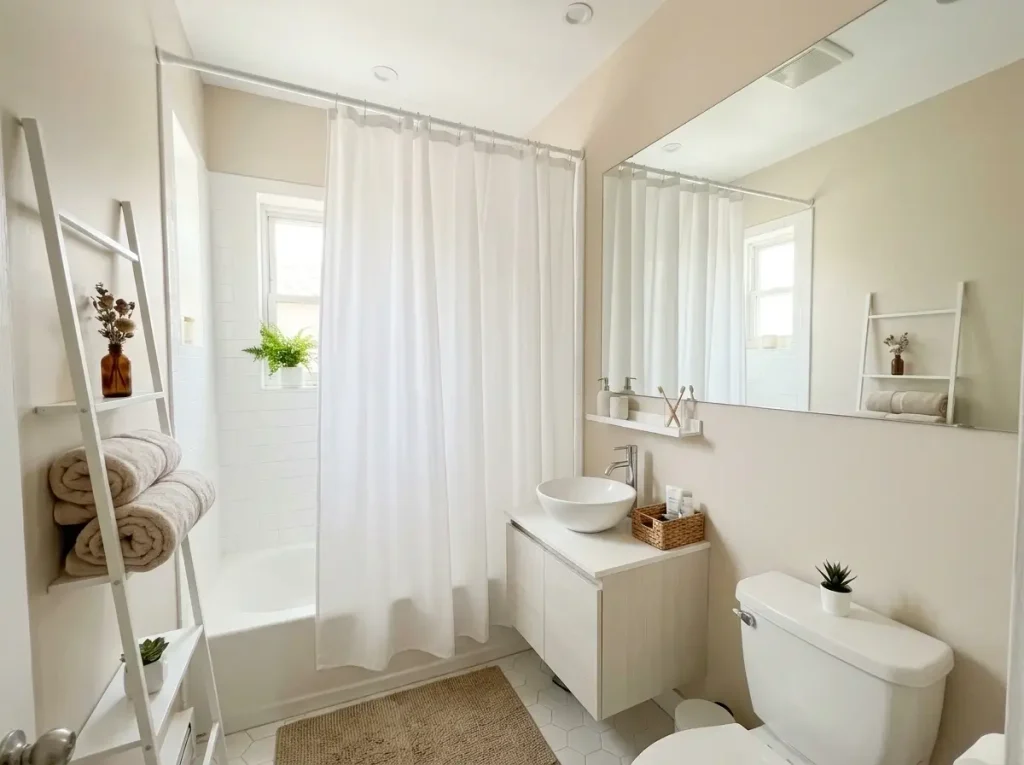
To make a tiny apartment bathroom feel larger, utilize high-contrast lighting and strategic mirror placement to bounce light across the room.
Elevate your shower curtain rod closer to the ceiling to draw the eye upward, and stick to a monochromatic color palette to eliminate visual clutter and boundaries.
When exploring small bathroom renovation ideas, renters frequently assume that increasing actual square footage or changing the floor plan is the only way to achieve a luxurious, spacious feel.
However, spatial perception is entirely dictated by light, sightlines, and color continuity.
By manipulating these three elements, you can visually double the footprint of your rental bathroom without ever touching the drywall, hiring a contractor, or violating your lease agreement.
One of the most effective and affordable tricks involves maximizing vertical space to alter the room’s proportions.
Standard shower curtains are typically hung at a height of 72 inches, which visually cuts the room in half and creates a low, artificial ceiling.
By purchasing an extra-long shower curtain and raising a tension rod to 80 or 84 inches, you immediately draw the eye upward, making the ceiling appear significantly taller. This unbroken vertical line is a foundational principle of interior design for tight, cramped spaces.
Lighting and reflection serve as your secondary tools for expansion. Standard builder-grade mirrors often fail to maximize light distribution and can make a room feel closed off.
Replacing a small medicine cabinet mirror with an oversized, safely secured temporary mirror reflects both natural and artificial light into the room’s darkest corners.
Pairing this with bright, cool-toned LED bulbs prevents the yellow, cavernous feel common in unventilated apartment bathrooms.
For deeper insights into how brightness affects spatial boundaries, authoritative design resources often explore the relationship between lighting and space perception.
Color palette discipline is equally critical to the illusion of space. High-contrast colors or busy patterns create harsh visual boundaries, telling your brain exactly where the walls stop and start.
A monochromatic color scheme—using varying shades of white, light gray, or soft beige—blurs these edges. When your towels, bath rug, and shower curtain closely match the wall color, the room reads as one continuous, expansive space rather than a chopped-up floor plan.
To execute these spatial illusions effectively, follow these specific measurement and placement guidelines:
- Shower Curtain Elevation: Mount your tension rod between 80 and 84 inches from the floor. This requires an extra-long (78 to 84-inch) fabric shower curtain to ensure the hem still gracefully grazes the tub base without leaving a gap.
- Mirror Dimensions: Opt for a vanity mirror that spans at least 75% of your vanity’s width and reaches a minimum of 36 inches in height to maximize light bounce and visual depth.
- Lighting Color Temperature: Use LED bulbs rated between 3000K and 4000K (neutral to cool white). This temperature range mimics natural daylight and successfully eliminates claustrophobic, yellow-toned shadows.
- Rug Placement: Use a single, continuous runner rug (such as a 24×60-inch mat) along the vanity or tub rather than multiple small bath mats to create a cohesive, unbroken floor plane.
- Clear Storage Containers: Decant everyday toiletries into matching, clear glass or acrylic dispensers. Transparent materials reduce visual weight in the room by allowing the eye to pass right through them.
Implementing these highly visual small bathroom renovation ideas proves that a high-end makeover is rarely about demolition. By controlling where the eye travels and how light behaves, you can instantly transform a cramped rental into a bright, airy retreat.
How can I renovate a rental bathroom for under $100?
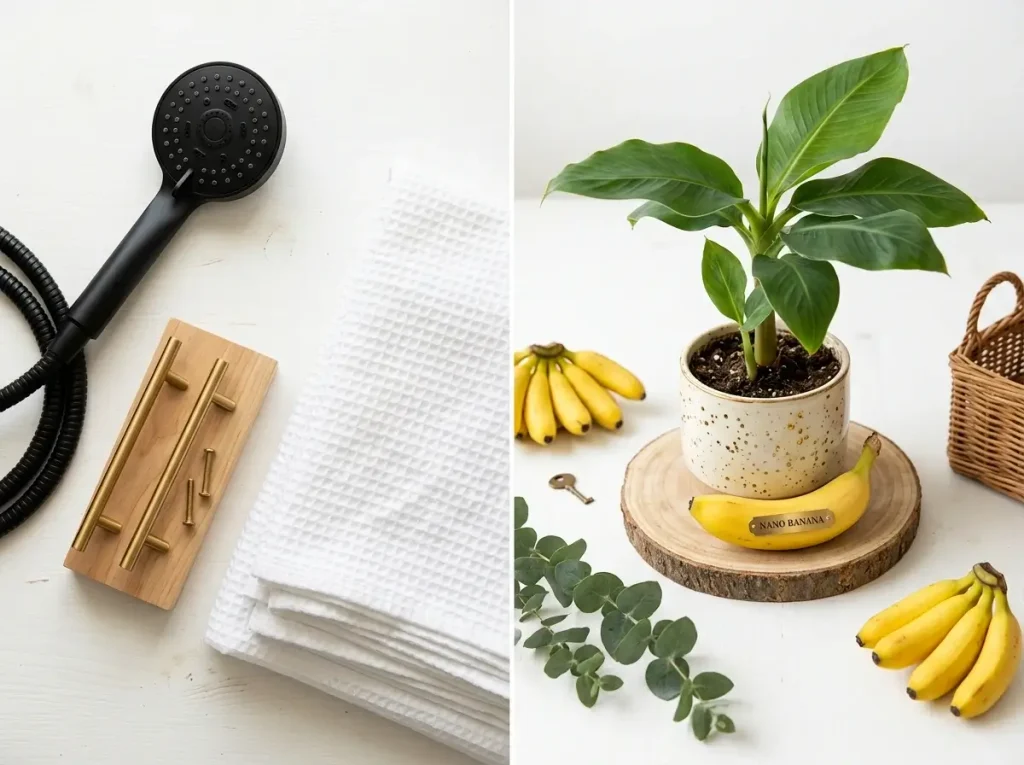
You can renovate a rental bathroom for under $100 by focusing exclusively on high-impact, low-cost cosmetic swaps.
Allocate $30 for a new luxury showerhead, $25 for drill-free tension shelving, $20 for modern cabinet pulls, and $25 for a heavy-duty fabric shower curtain and premium liner to instantly modernize the space without losing your deposit.
When searching for budget-friendly small bathroom renovation ideas, it is easy to get overwhelmed by expensive hardware and luxury materials.
However, if you are working with a strict $100 micro-budget, the secret is to replace the room’s “visual anchors”—the specific items your eyes naturally gravitate toward when you first walk through the door.
Builder-grade apartments often feature cheap plastic showerheads, yellowed or basic cabinet knobs, and non-existent storage solutions that lead to cluttered countertops.
By systematically replacing these specific daily touchpoints, you elevate the entire room’s perceived value without spending a fortune.
Let’s break down the financial strategy. First, the shower curtain represents the largest vertical surface area in the room other than the walls themselves.
Spending $25 on a heavy-weight, textured fabric curtain paired with a high-quality, mold-resistant liner instantly hides a dated bathtub and softens the acoustics of the room.
Next, allocate $30 to a high-pressure, matte black or brushed nickel showerhead. Not only does this drastically improve your daily routine, but it also completely changes the focal point of the shower enclosure.
The vanity area is another critical zone for cost-effective upgrades. For roughly $20, you can purchase a multipack of modern cabinet pulls.
Swapping out cheap plastic knobs for solid metal hardware is one of the most effective small bathroom renovation ideas because it adds physical weight and a premium, tactile feel every time you open a drawer.
Finally, use your remaining $25 on a sleek, rust-resistant tension pole caddy for the shower corner to eliminate bottle clutter.
Here is the exact breakdown of how to allocate your $100 budget for maximum return on investment:
| Upgrade Item | Budget Allocation | Expected Visual Impact | Required Tools |
|---|---|---|---|
| Fabric Shower Curtain & Liner | $25.00 | High (Creates a large, clean vertical plane) | None |
| Luxury Showerhead | $30.00 | High (Elevates the shower enclosure focal point) | Adjustable Wrench, Teflon Tape |
| Modern Cabinet Hardware | $20.00 | Medium (Modernizes the vanity and adds tactile weight) | Phillips-head Screwdriver |
| Tension-Pole Shower Caddy | $25.00 | Medium (Removes visual clutter from tub ledges) | None |
Why does this specific allocation work so well? It addresses both aesthetics and daily function simultaneously.
When operating on a strict budget, you cannot afford to waste capital on items that blend into the background, like replacement switch plates or minor paint touch-ups. You must direct every dollar toward items you physically interact with.
Furthermore, this strategy relies entirely on standard US sizing—meaning the hardware you buy will fit standard pre-drilled holes (usually 3 or 4 inches center-to-center for cabinet pulls) and standard half-inch plumbing threads for the showerhead.
To stay within these tight margins, avoid specialty boutique design stores. Instead, source your materials from large-scale home improvement retailers that offer bulk pricing on hardware multipacks.
You can easily find comprehensive selections of affordable, standardized budget bathroom hardware to complete this entire transformation in a single afternoon.
What renter-friendly bathroom upgrades are worth investing in if I move every year?
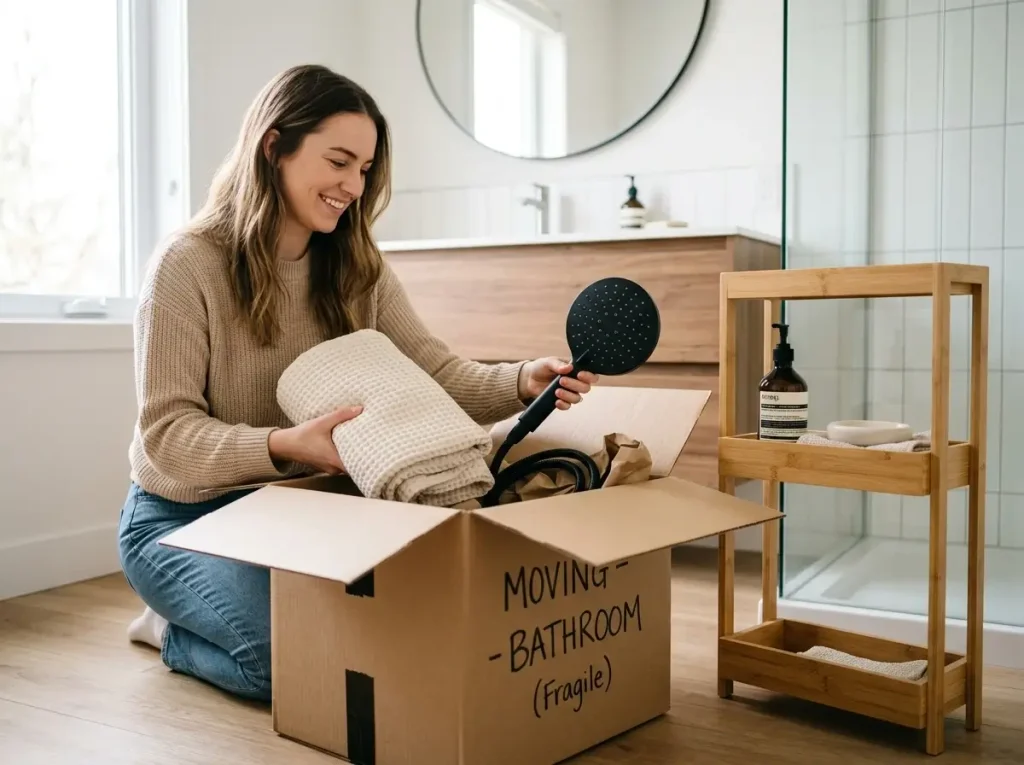
If you move annually, invest exclusively in portable, high-quality fixtures that travel easily and fit standard plumbing or dimensions.
Premium filtered showerheads, freestanding bamboo storage caddies, over-the-toilet leaning racks, and high-end bath linens provide the best return on investment because they require zero custom installation and leave no residue.
When evaluating small bathroom renovation ideas, frequent movers must calculate return on investment (ROI) differently than long-term tenants.
If you sign consecutive 12-month leases in different apartments, pouring money into custom-fitted, adhesive-based upgrades is a guaranteed financial loss.
The strategy for nomadic renters is to build a “portability portfolio.” This means every dollar spent must go toward items that can be packed in a moving box, transported without damage, and instantly deployed in a completely different floor plan.
One of the most common mistakes renters make is over-investing in custom-cut surface coverings.
While peel-and-stick wallpaper or vinyl floor tiles are excellent small bathroom renovation ideas for a three-to-five-year stay, they are terrible investments for an annual mover.
These materials must be meticulously trimmed to fit specific corners, vanity shapes, and baseboards. Once they are peeled off the wall, they lose their adhesive integrity and cannot be reused.
Instead of spending $150 on temporary tiles that will end up in a dumpster next year, redirect those funds toward high-end, freestanding elements that move with you.
Focus your budget on universally compatible hardware and premium textiles. A high-quality showerhead is the ultimate portable upgrade; because plumbing relies on standard half-inch NPT threads, a luxury showerhead will fit in almost any apartment.
Similarly, freestanding bamboo caddies or tiered leaning ladders do not rely on specific wall widths or ceiling heights like tension rods do. They simply lean against the wall or sit on the floor, ready to be picked up and placed in the next apartment.
Here is a detailed comparison of popular renter-friendly upgrades to help you maximize your investment over multiple moves:
| Upgrade Category | Initial Cost | Portability Rating | Reuse Potential (Next Apartment) | Investment Verdict for Annual Movers |
| Premium Showerheads | $30 – $80 | Excellent | 100% (Universal fit) | High ROI – Take it everywhere. |
| Freestanding Storage | $40 – $120 | High | 95% (Fits most floor plans) | High ROI – Easily packed and moved. |
| Luxury Bath Linens | $50 – $100 | Excellent | 100% (Fits anywhere) | High ROI – Instantly elevates any space. |
| Tension-Rod Shelving | $30 – $60 | Moderate | 70% (Depends on new ceiling height) | Moderate ROI – May require new extensions. |
| Peel-and-Stick Wallpaper | $60 – $200 | Zero | 0% (Custom cut, loses stickiness) | Poor ROI – Avoid for 12-month leases. |
| Removable Floor Tiles | $50 – $150 | Zero | 0% (Custom cut, traps debris on move) | Poor ROI – Avoid for 12-month leases. |
Furthermore, investing in premium textiles—such as oversized Turkish cotton towels, high-thread-count shower curtains, and plush, anti-slip bath rugs—offers a portable way to dictate the room’s color palette.
Because you cannot paint the walls, your textiles become the primary vehicle for interior design. When you move to a new apartment with an entirely different tile color, a cohesive set of high-quality textiles can quickly neutralize ugly builder-grade finishes.
Ultimately, adopting a portability-first mindset ensures that your renovation budget builds long-term value, rather than being thrown away at the end of every lease cycle.
How can I maximize vertical storage in a rental bathroom without using a drill?
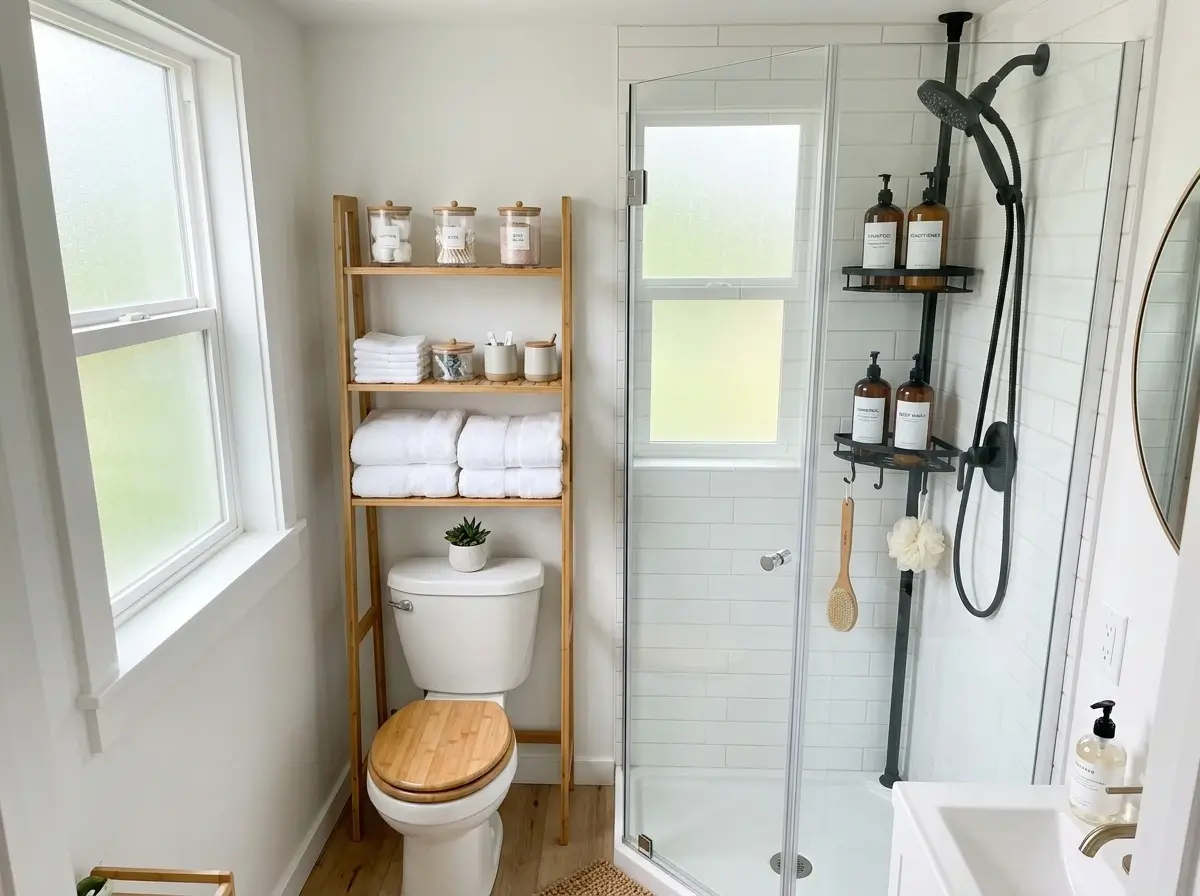
Maximize vertical storage in a rental bathroom by utilizing the negative space above the toilet and inside the shower enclosure.
Employ spring-loaded tension poles for shower corners, over-the-door hanging racks for towels, and freestanding tiered shelving units over the toilet to add cubic feet of storage without piercing the drywall.
When approaching small bathroom renovation ideas, tenants often focus too heavily on floor space or vanity countertops while completely ignoring the room’s most valuable asset: vertical real estate.
In tight quarters, the walls and ceiling height offer massive organizational potential. Because drilling into drywall or ceramic tile is strictly prohibited in almost all standard lease agreements, you must rely on physics—specifically, gravity, tension, and friction—to build upward safely.
The most underutilized zone in any bathroom is the wall directly above the toilet tank. Standard builder-grade bathrooms leave this area entirely blank.
Instead of leaving it empty, introduce a freestanding over-the-toilet étagère or a leaning bamboo ladder shelf.
Because these units transfer their weight directly to the floor rather than the wall, they provide a safe, high-capacity zone for extra toilet paper, rolled towels, and daily skincare routines without requiring a single wall anchor.
Moving into the shower enclosure, the lack of built-in niches usually results in a cluttered, chaotic tub ledge. Spring-loaded tension poles are the industry standard for safe shower organization.
They use an internal compressed spring to wedge a metal pole firmly between the tub ledge and the ceiling, supporting multiple adjustable baskets.
However, it is crucial to understand the physical limitations of drill-free hardware to avoid damaging your landlord’s property or breaking your personal items. Here is a breakdown of the most reliable drill-free storage options and their standard safe weight capacities:
- Freestanding Over-the-Toilet Shelves: Safely supports 20 to 30 lbs per shelf. Since the weight rests on the floor, this is your primary heavy-duty storage zone for glass jars and bulk items.
- Spring-Loaded Shower Tension Poles: Supports 10 to 15 lbs total across all baskets. Distribute heavy shampoo bottles evenly to prevent the pole from bowing or slipping under pressure.
- Heavy-Duty Suction Cup Caddies: Supports 5 to 8 lbs maximum. Must be applied to non-porous, smooth, flat glass or glazed ceramic tiles; they will fail entirely on textured surfaces or painted drywall.
- Over-the-Door Towel Racks: Supports 15 to 25 lbs. Ensure you use padded foam backing on the hooks to prevent gouging or scratching the landlord’s wooden door frame when closing it.
- Adhesive Hook Systems (e.g., Command Hooks): Supports 3 to 5 lbs per hook, depending on the commercial rating. Ideal for loofahs and lightweight hand towels, but strictly avoid hanging heavy, soaking-wet bath towels on adhesive hooks placed over drywall, as the moisture and weight will eventually rip the paper facing off the wall.
By respecting these weight limits, your organizational systems will remain stable and secure for the duration of your lease.
Integrating these clever small bathroom renovation ideas ensures your daily routine is streamlined without risking property damage.
For an even deeper dive into solving extreme organizational challenges, you can explore exactly how to maximize space in a tiny rental bathroom.
Additionally, you can find a wealth of visual inspiration for renter-friendly storage to see how these drill-free solutions function in beautifully styled spaces.
What are the safest ways to cover ugly rental bathroom floors and tiles?
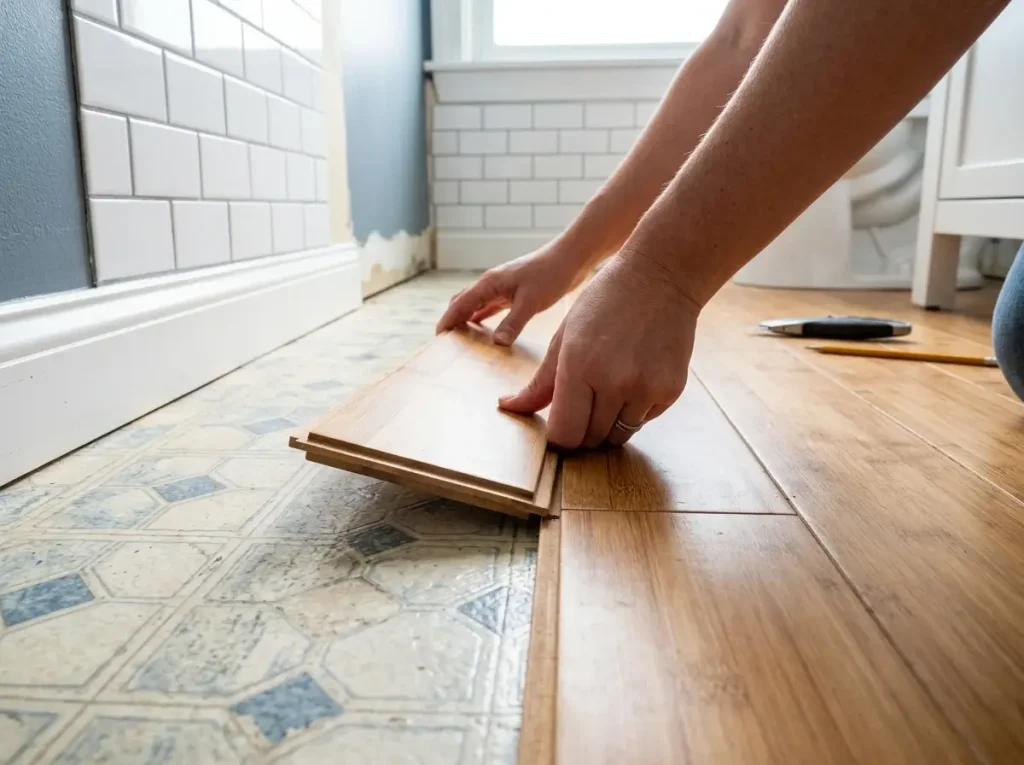
The safest ways to cover outdated rental bathroom floors and tiles involve utilizing high-quality, renter-friendly adhesives and floating systems.
Water-resistant peel-and-stick vinyl decals work well for dry wall areas, while interlocking teak or bamboo floor tiles provide a damage-free, mold-resistant floating floor solution that completely masks ugly linoleum.
Living with pink 1950s wall tiles or heavily stained, peeling linoleum floors is often the most frustrating aspect of apartment living.
When exploring small bathroom renovation ideas, renters frequently assume they simply have to live with these eyesores.
However, completely masking these ugly surfaces is entirely possible and lease-compliant if you strictly choose materials engineered for high-humidity environments and safe removal.
The core challenge in any bathroom is trapped moisture. What works perfectly in a dry bedroom hallway will quickly peel, warp, or harbor dangerous black mold in a steamy, poorly ventilated bathroom.
Therefore, your surface covering selection must be dictated primarily by water resistance and the integrity of the landlord’s original materials.
For flooring, floating systems are universally superior to adhesive-based solutions. Interlocking teak, bamboo, or composite deck tiles simply snap together over the existing floor.
Because they feature a raised plastic grid on the bottom, they hover slightly above the old linoleum, allowing trapped moisture and splashed shower water to evaporate safely.
They require absolutely zero glue, meaning there is zero risk of tearing up the landlord’s original flooring when you move out.
For walls, backsplashes, and shower surrounds, high-quality, moisture-rated peel-and-stick vinyl is the industry standard. Unlike traditional paper-based temporary wallpaper, vinyl acts as an impenetrable moisture barrier.
However, the success of this upgrade relies entirely on preparation. The existing tile must be degreased completely using a TSP (trisodium phosphate) substitute before application; otherwise, the adhesive will fail and peel off after a few hot showers.
Here is a detailed breakdown of the safest surface covering materials to use in a rental bathroom:
| Material | Best For | Moisture Resistance | Removal Difficulty |
| Interlocking Teak/Bamboo Tiles | Flat floors, covering ugly linoleum | High (Wood must be oiled/sealed) | Very Low (Simply pick them up) |
| Peel-and-Stick Vinyl Tiles (Thick) | Backsplashes, dry wall areas | High (Waterproof surface) | Moderate (Requires heat gun/hairdryer) |
| Removable Vinyl Wallpaper | Upper walls (outside the shower) | Medium (Can peel at seams in high humidity) | Low to Moderate |
| Tile Decal Stickers | Covering individual ugly ceramic tiles | High | Moderate |
| Standard Contact Paper | Inside vanity drawers only | Low (Will warp and peel if wet) | High (Leaves sticky residue) |
While covering surfaces yields the most dramatic visual transformation of all small bathroom renovation ideas, execution is where many renters jeopardize their security deposits.
Applying cheap, unrated contact paper to a heavily textured wall or ignoring proper bathroom ventilation will result in a disastrous teardown process.
If you need to dive deeper into specific adhesive brands, specialized grouting techniques for vinyl decals, and watertight sealing methods, read our comprehensive breakdown on how to cover ugly rental bathroom tiles.
Additionally, when it comes time to move out, understanding the nuances of proper adhesive softening is vital. You can find excellent step-by-step guides on safe peel-and-stick tile removal to ensure the underlying original surfaces are left absolutely pristine.
How do I upgrade my rental showerhead and lighting without violating my lease?
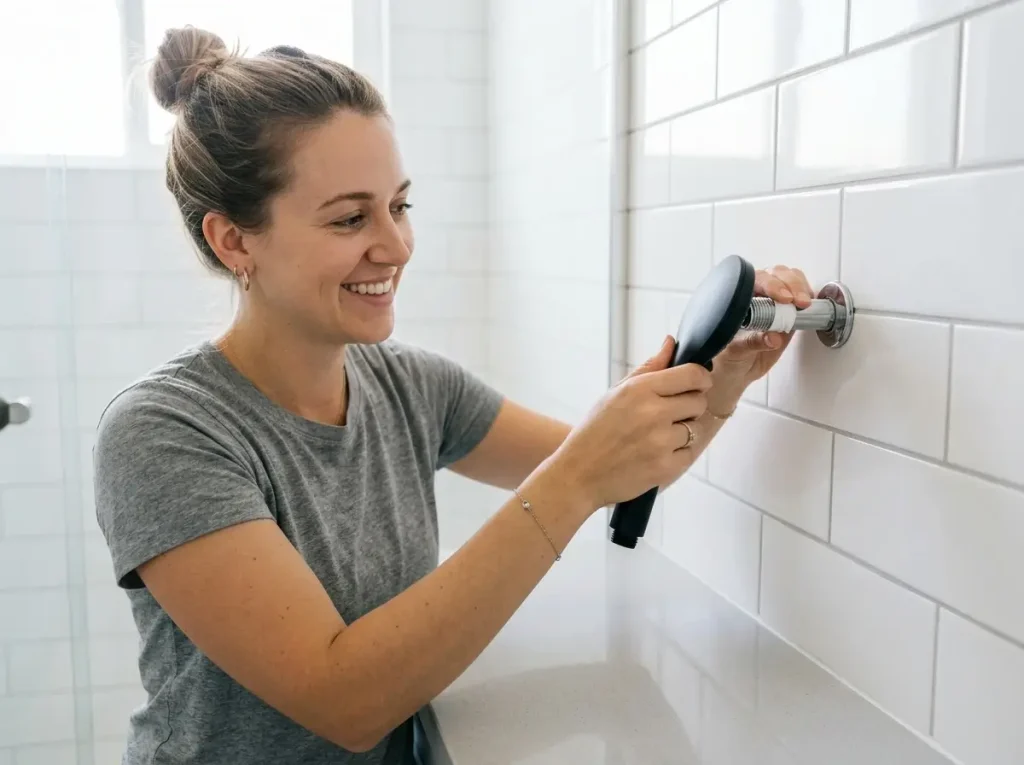
You can safely upgrade your rental showerhead by unscrewing the original fixture with an adjustable wrench, applying fresh Teflon tape, and threading on a new standard half-inch NPT showerhead.
For lighting, bypass hardwiring entirely by utilizing battery-operated LED sconces or plug-in pendant lights suspended from heavy-duty ceiling hooks.
When compiling a list of highly effective small bathroom renovation ideas, changing the showerhead should be at the very top.
Builder-grade showerheads are notoriously inefficient, often coated in hard water scale, and provide terrible water pressure.
Because almost all residential plumbing features standard half-inch NPT (National Pipe Thread) fittings, this is a universal swap that requires zero plumbing experience.
However, the key to staying compliant with your lease is ensuring the original pipe arm extending from the wall is not damaged during the swap.
Equally important in your portfolio of small bathroom renovation ideas is addressing the lighting. Rental bathrooms frequently suffer from harsh, fluorescent overhead vanity lights that cannot be painted over or easily removed.
Modifying hardwired electrical fixtures is a strict violation of almost every standard lease agreement, as it poses a significant fire hazard and liability for the property owner. Instead, you must layer your lighting using plug-and-play solutions.
Battery-operated LED sconces with adhesive mounts can be placed on either side of the mirror to provide flattering, cross-directional lighting.
Alternatively, you can use a plug-in pendant light on a toggle switch, suspended from a heavy-duty swag hook in the ceiling, completely bypassing the wall’s internal wiring.
If you choose to tackle the showerhead swap, execution and preservation are your primary goals.
If you lose or break the landlord’s original fixture, they will deduct the cost of a replacement (and potentially the labor) from your security deposit. Follow this exact numbered sequence to safely remove and store the hardware:
- Protect the Finish: Wrap a thick microfiber cloth or a rubber band around the base of the landlord’s original showerhead where it meets the shower arm to prevent scratching the chrome finish.
- Break the Seal: Clamp an adjustable wrench over the cloth-covered base. Turn counterclockwise (left) with gentle, steady pressure to break the mineral or sealant bond. Never yank or force it, which could snap the pipe behind the drywall.
- Clean the Threads: Once removed, use an old toothbrush and white vinegar to scrub the exposed threads of the shower arm, removing old plumber’s tape, rust, and calcium buildup.
- Apply Fresh Tape: Wrap new Teflon tape clockwise around the clean threads two to three times. Wrapping clockwise ensures the tape does not unravel when you screw on the new fixture.
- Install and Test: Hand-tighten your new showerhead onto the arm. Turn on the water to check for leaks; if water drips from the connection, give it one quarter-turn with the wrench.
- Store the Original: Place the dry, original showerhead in a labeled ziplock bag (“Apartment Master Bath Showerhead”) and store it safely in a designated moving bin so it is ready for reinstallation upon move-out.
By understanding standard pipe dimensions—which you can verify through official resources on standard plumbing thread sizes—you can ensure any retail showerhead will fit perfectly.
For a much more comprehensive breakdown of selecting the right sprayers, dealing with stubborn rust, and detailed lighting product recommendations, explore our full guide on changing rental bathroom showerheads.
What is the best process for reversing bathroom upgrades to ensure I get my security deposit back?
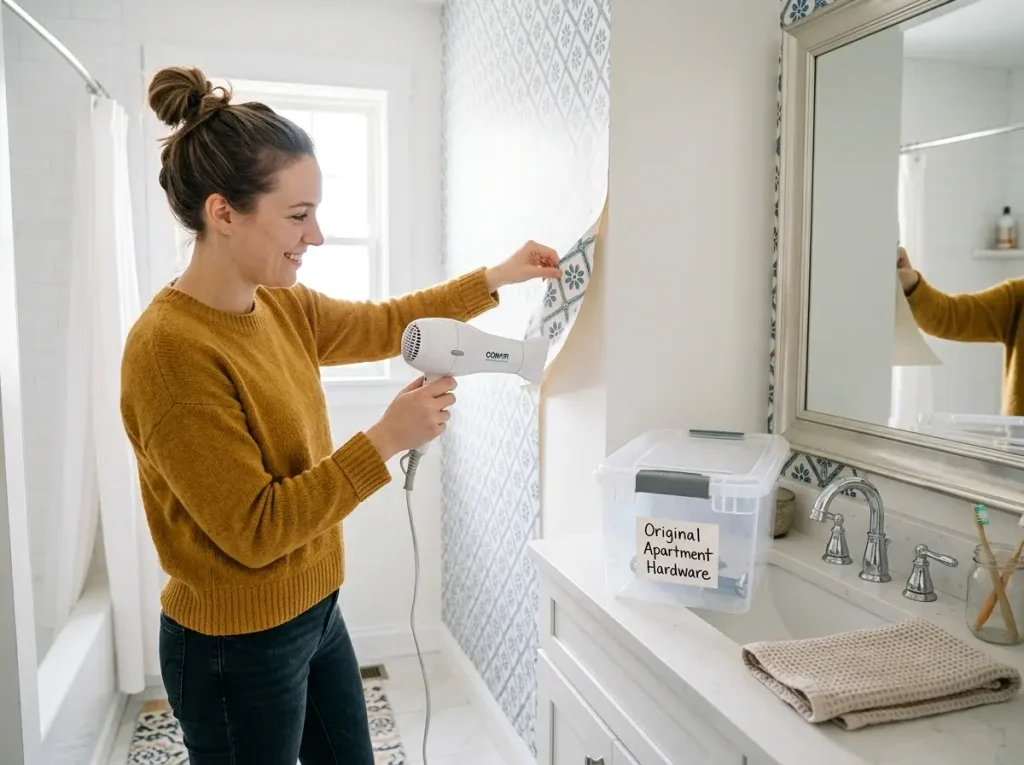
To guarantee the return of your security deposit, document the bathroom’s original state with time-stamped photos before making any changes.
When moving out, systematically reverse your upgrades by using a hairdryer to soften adhesive residues, reinstalling the original showerhead and hardware, and thoroughly cleaning surfaces to erase all evidence of modification.
The most critical phase of executing renter-friendly small bathroom renovation ideas is the exit strategy.
Many renters successfully install beautiful, temporary upgrades only to panic on moving day, haphazardly ripping down adhesives and leaving behind sticky residues that prompt the landlord to withhold hundreds of dollars.
The key to a flawless reversal is heat, patience, and a strict timeline.
A proper teardown should never be rushed. If you wait until the moving truck arrives to start peeling off vinyl flooring or unscrewing tension rods, you are highly likely to cause accidental property damage.
To protect your deposit, you must initiate the reversal process exactly seven days before your final lease date. This buffer allows you to carefully address stubborn adhesives and reinstall original fixtures without the pressure of an impending walkthrough.
Follow this exact numbered timeline to systematically reverse your bathroom upgrades:
- Day 7 – Remove Adhesives with Heat: Never rip peel-and-stick wallpaper or vinyl tiles directly off a surface. Set a standard hairdryer to medium heat and hold it six inches from the material. Work in small sections, allowing the heat to soften the glue for 30 to 60 seconds before gently pulling at a 45-degree angle. This prevents the adhesive from taking the landlord’s original drywall paper or paint with it.
- Day 5 – Reinstall Original Hardware: Retrieve the designated storage bin containing the apartment’s original fixtures. Carefully unscrew your luxury showerhead, wipe down the pipe threads with a towel, and re-apply fresh Teflon tape before screwing the original showerhead back onto the pipe arm. Reinstall the original cabinet pulls and the standard toilet seat using a standard screwdriver.
- Day 3 – Solvent Cleanup: Inspect walls, floors, and vanities for any remaining sticky residue. Avoid harsh, abrasive chemicals like pure acetone, which can melt the finish on cheap apartment vanities. Instead, use a mild, citrus-based adhesive remover. Always test the solvent on an inconspicuous area first, then apply it with a soft microfiber cloth to dissolve lingering glue spots safely without ruining the original finish.
- Day 1 – Deep Cleaning and Photo Verification: Scrub the tub, sink, and floors to remove any dust or debris generated during the teardown. Once the room is perfectly clean and back to its builder-grade condition, take time-stamped photographs of the entire space, mirroring the exact angles of the photos you took on move-in day.
Planning your exit before you even buy materials is what makes these small bathroom renovation ideas truly viable and risk-free.
If you want a comprehensive look at packing your upgrades, transporting bulky mirrors, and avoiding common deposit traps, read our full move-out manual to successfully reverse rental bathroom upgrades.
Furthermore, understanding federal and state guidelines regarding what constitutes “normal wear and tear” versus “property damage” is essential for tenant protection.
You can review official security deposit laws to ensure your landlord’s assessment of the reversed space is legally compliant.
How can replacing standard bathroom accessories instantly modernize an outdated rental space?
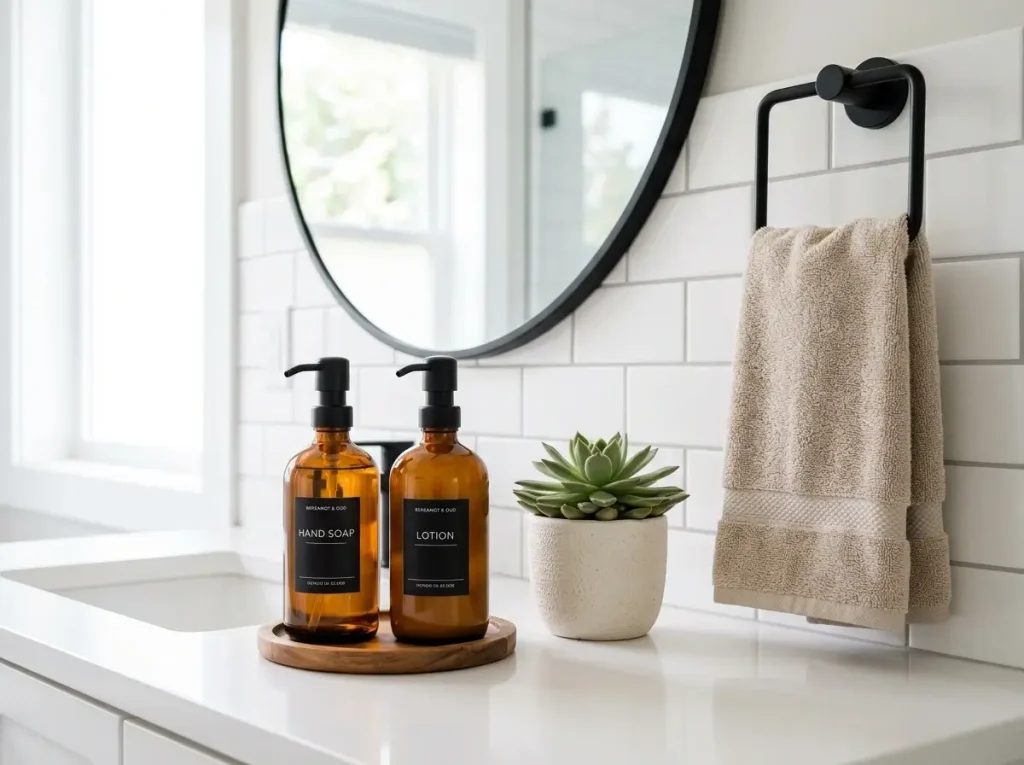
Replacing standard, builder-grade bathroom accessories immediately modernizes a rental space by introducing cohesive design elements.
Swapping a yellowed plastic toilet seat for a slow-close wooden or ceramic model, hiding a medicine cabinet with an oversized leaning mirror, and layering plush, highly textured bath rugs drastically elevates the room’s aesthetic value.
When researching small bathroom renovation ideas, many tenants overlook the smaller, highly interactive touchpoints in the room.
Landlords and property management companies typically purchase bathroom accessories in bulk, prioritizing cost and durability over aesthetics.
This results in apartments fitted with mismatched plastic toilet seats, flimsy aluminum towel rings, and cheap plastic trash cans.
Because these are the items you physically interact with every single day, upgrading them provides an immediate psychological and visual lift to the entire space, all without violating any standard lease agreements.
One of the most impactful upgrades you can make is replacing the toilet seat. A heavy, slow-close enameled wood or ceramic toilet seat instantly changes the tactile experience of the room and eliminates the jarring sound of a slamming lid.
Before purchasing a replacement, you must measure your existing bowl, as US toilets come in two distinct shapes. Understanding these technical specifications ensures your new hardware will align properly with the existing ceramic bowl.
Here is the breakdown of measurements for standard US toilet dimensions to guarantee a perfect fit:
- Standard Round Bowls: Typically measure 16.5 inches from the center of the mounting holes to the extreme front edge of the bowl.
- Elongated Bowls: Typically measure 18.5 inches from the center of the mounting holes to the extreme front edge of the bowl.
- Bolt Spread (Hinge Spacing): In the United States, the standard distance between the two mounting holes at the back of the bowl is universally 5.5 inches for both round and elongated models.
Beyond the toilet, consider the hardware mounted to your walls. If your rental features an outdated, rusted towel bar or a cheap plastic toilet paper holder, you do not have to live with them.
Assuming they are held in by standard set screws (often hidden on the underside of the mounting bracket), you can easily unscrew them, store them in your move-out bin, and replace them with modern matte black or brushed brass alternatives that use the exact same mounting bracket footprint.
By matching the existing footprint, you avoid drilling new holes in the drywall, making accessory replacement one of the most effective small bathroom renovation ideas for strict leases.
Textiles and standalone accessories serve as the final layer of modernization, allowing you to establish a custom color palette without painting the walls.
Swap out standard bath mats for an oversized, heavily textured runner rug that stretches the length of your vanity or tub. This visually widens the floor space while masking old linoleum.
Replace the standard open plastic wastebasket with a heavy step-pedal metal bin with a lid to conceal trash. Decant hand soaps, mouthwash, and daily lotions into matching amber glass or frosted acrylic pump bottles.
These cohesive, deliberate design choices signal intentionality and luxury, effectively masking the builder-grade shell of the room.
By hiding branded packaging and introducing uniform materials, the bathroom immediately feels bespoke rather than temporary.
To verify standard hardware specifications and ensure a perfect fit for your new fixtures, always consult official manufacturer guidelines on standard toilet dimensions before making a purchase.
What are the legal differences between a cosmetic upgrade and an unauthorized alteration in a US lease agreement?
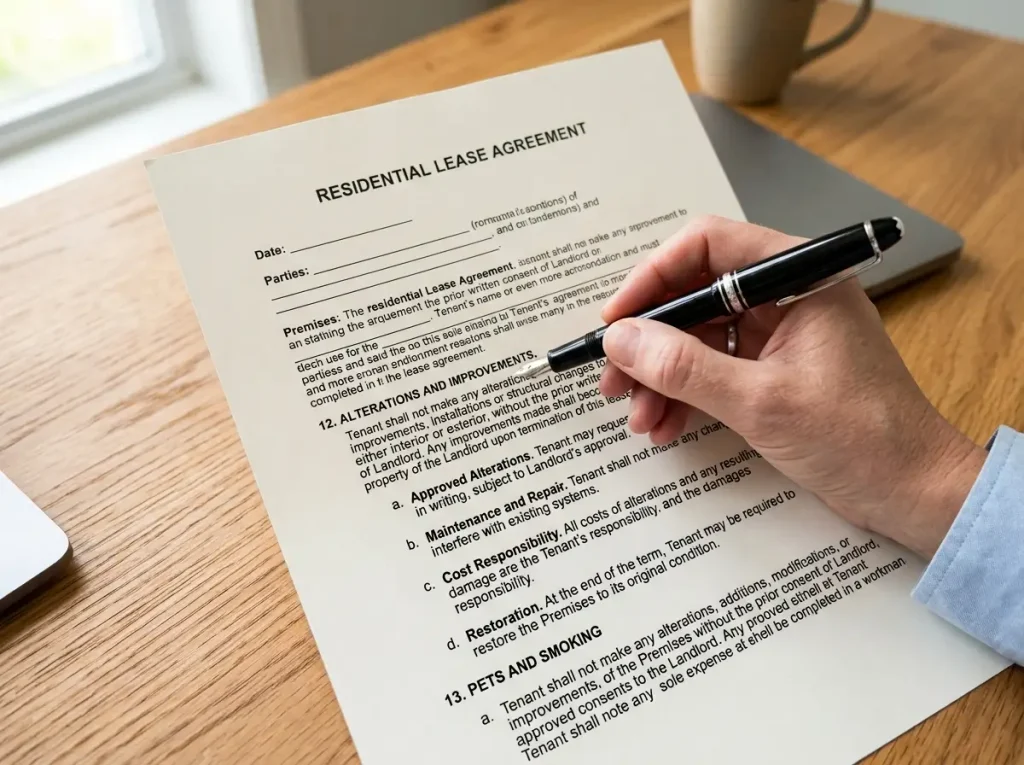
In US lease agreements, a cosmetic upgrade is legally defined as a temporary, fully reversible change that does not affect the property’s structure, plumbing, or electrical systems.
Conversely, an unauthorized alteration involves permanent modifications, such as drilling into tile, replacing hardwired lighting, or painting cabinets, which give landlords the right to withhold your deposit.
When exploring small bathroom renovation ideas, tenants often blur the line between personalizing their space and violating their rental contract.
Standard residential leases in the United States contain specific provisions governing modifications, designed to protect the property owner’s investment from unapproved construction.
Understanding the distinct legal differences between a permissible cosmetic upgrade and a lease-breaking unauthorized alteration is the only way to safeguard your security deposit while improving your living space.
The core legal distinction hinges on the concept of permanence and the property’s underlying systems.
A cosmetic upgrade sits entirely on the surface. It relies on tension, friction, or temporary adhesives that can be safely removed using standard household methods, leaving the original materials completely intact.
More importantly, cosmetic upgrades do not interfere with the building’s infrastructure. If you can revert the room to its exact move-in state in a single afternoon without hiring a licensed contractor, the courts generally view it as a reversible cosmetic change.
Unauthorized alterations, on the other hand, change the fundamental nature, structure, or fixtures of the property.
Landlords legally categorize these as property damage, even if the tenant subjectively believes the change improved the room’s value.
Replacing a hardwired electrical vanity light, applying permanent epoxy grout, painting wooden cabinets without written consent, or drilling into ceramic tile are all textbook examples of unauthorized alterations.
If the removal process risks damaging the original drywall, plumbing, or wiring, it crosses the legal boundary.
Executing small bathroom renovation ideas without understanding these legal boundaries is the fastest way to face eviction warnings or the complete forfeiture of your security deposit.
To clarify these boundaries, here is a breakdown of how the law typically classifies common bathroom modifications:
| Modification Category | Legal Classification | Reversibility | Examples | Security Deposit Risk |
| Tension-Rod Shelving | Cosmetic Upgrade | 100% Reversible | Shower poles, leaning ladders | Zero |
| Showerhead Swaps | Cosmetic Upgrade | 100% Reversible | Changing standard NPT fixtures | Zero (if original is kept) |
| Peel-and-Stick Tiles | Cosmetic / Borderline | Highly Reversible | Heat-removable vinyl decals | Low (requires careful removal) |
| Drilling / Anchoring | Unauthorized Alteration | Permanent Damage | Heavy mirrors, towel bars | High |
| Hardwired Lighting | Unauthorized Alteration | Structural Change | Swapping electrical sconces | High (safety liability) |
| Painting Cabinets | Unauthorized Alteration | Permanent Change | Changing vanity color | Extreme |
Another vital legal concept to master is the difference between “normal wear and tear” and “property damage.”
Standard US tenant law dictates that landlords cannot deduct from your deposit for the natural deterioration of the property that occurs over time, such as minor scuffs on the floor or fading paint.
However, if a tenant improperly removes a temporary backsplash and tears the drywall paper facing, that crosses over into property damage. Even if a landlord verbally agrees to a modification, you must get it in writing.
An oral agreement is notoriously difficult to prove in small claims court if a new property manager takes over the building midway through your lease.
To fully protect yourself, you should always request written permission via email for any borderline upgrades, and familiarize yourself with standard definitions of tenant rights and alterations.
Documenting everything with time-stamped photographs before, during, and after your tenancy provides an airtight legal defense if a dispute arises.
Conclusion: Transforming Your Rental Bathroom Safely
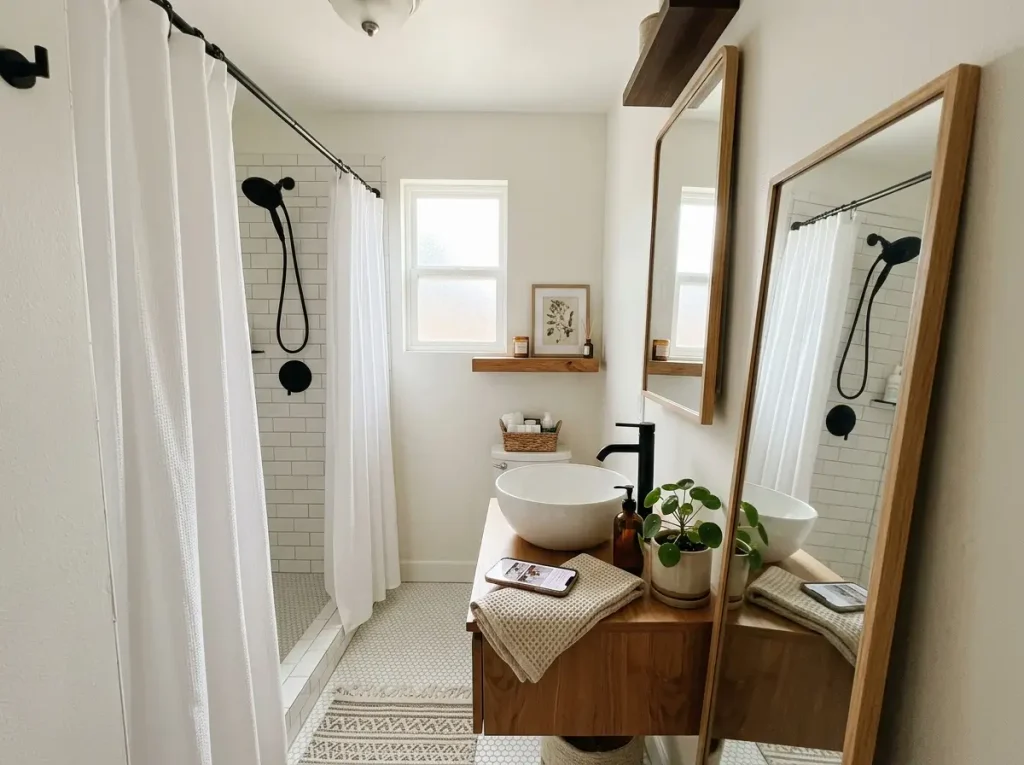
Upgrading your apartment bathroom shouldn’t mean sacrificing your security deposit.
By focusing on fully reversible, drill-free, and adhesive-safe small bathroom renovation ideas, you can instantly modernize a dated space while remaining completely compliant with standard lease agreements.
The key is planning your upgrades with portability and a strict move-out teardown process in mind.
Navigating the fine line between interior design and lease violations is the ultimate challenge for renters.
However, as we have explored throughout this guide, the most effective small bathroom renovation ideas do not require a contractor, power tools, or permanent structural changes.
By strategically maximizing your vertical space with tension poles, masking ugly floors with floating interlocking tiles, and swapping out standard builder-grade fixtures for premium portable hardware, you take complete control of your environment.
Remember that the success of these renter-friendly upgrades relies entirely on your exit strategy.
Always document your space on day one, safely store every original fixture in a dedicated moving bin, and give yourself at least a week before moving out to reverse your installations using safe heat applications and mild solvents.
When you treat your upgrades as a temporary installation rather than a permanent construction project, you protect your finances and ensure a completely stress-free move-out inspection.
If you found these reversible small bathroom renovation ideas helpful and want to help others avoid costly security deposit deductions, please share this article!
Send this guide directly to a friend, roommate, or family member who is preparing to move into a new apartment, or share it across your social media channels to help fellow renters upgrade their spaces safely and affordably.