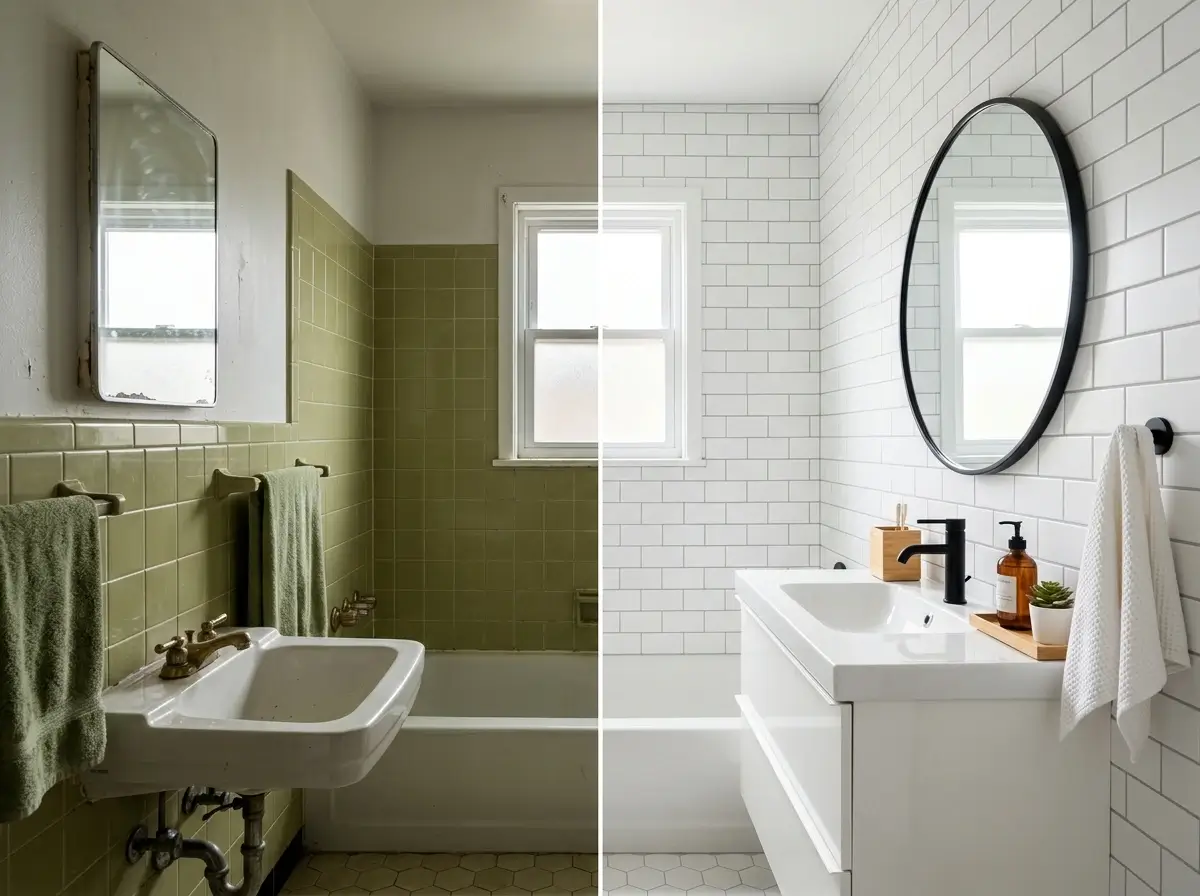
Staring at a sea of cracked, mustard-yellow ceramics every morning is a quick way to ruin your routine, but a full renovation is strictly off-limits for tenants.
The good news? You can completely cover rental bathroom tiles, outdated floors, and unsightly vanities using temporary, damage-free materials.
The real challenge is surviving the moisture. A poorly ventilated bathroom is a breeding ground for mold and peeling adhesives.
In this guide, we break down exactly which surface covers can withstand the steam, which ones will ruin your deposit, and how to safely transform your space for good.
The Short Answer: How to Cover Ugly Rental Bathroom Tiles and Floors (Without Damaging Them)
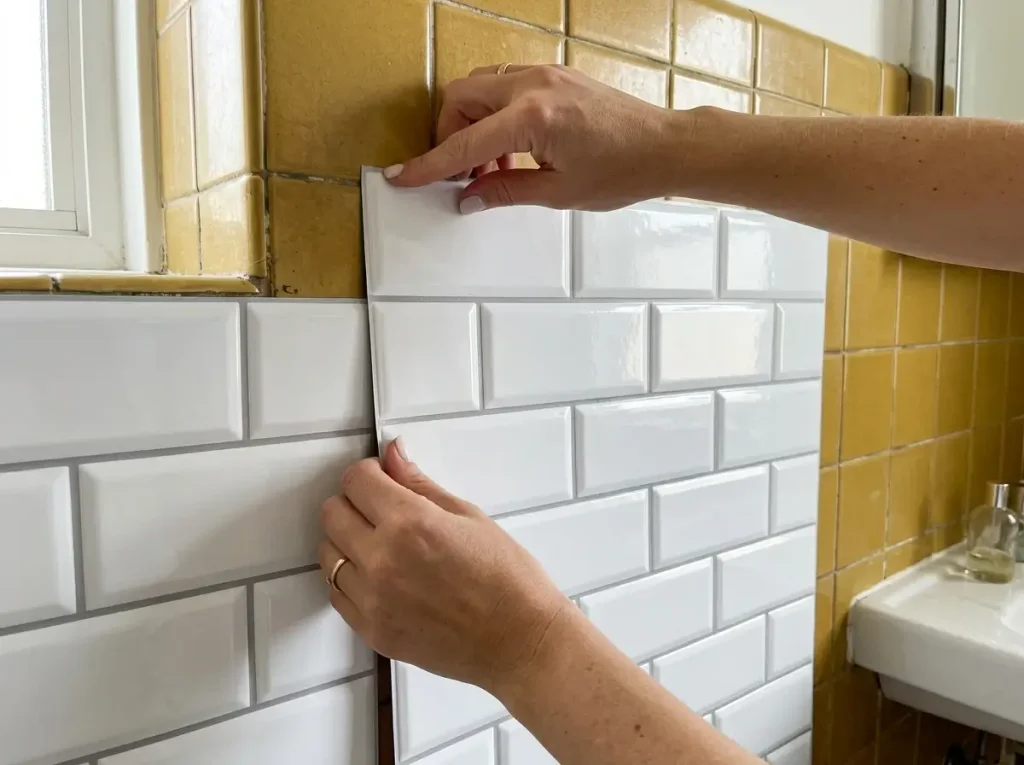
To safely cover rental bathroom tiles and floors without causing damage, use high-quality vinyl peel-and-stick tiles for walls, and floating interlocking vinyl planks or slatted grids for the floor.
Always avoid paper-based wallpapers and cheap adhesives, as trapped moisture will destroy the underlying drywall and ruin your security deposit.
Bathrooms are the harshest environment in any apartment. The constant cycle of heat, steam, and condensation creates a uniquely hostile zone for temporary materials.
When you decide to cover rental bathroom tiles, you cannot use the same aesthetic contact paper you might safely apply in a dry bedroom or hallway. The primary enemy here is moisture intrusion.
If steam penetrates the seams of your temporary covering, the adhesive backing will re-emulsify, causing catastrophic peeling.
Worse, trapped moisture will cultivate toxic black mold against the landlord’s original grout lines or drywall, guaranteeing a hefty deduction from your deposit when you move out.
To guarantee you protect the original property while still achieving a stunning modern aesthetic, you must adhere to the Top 3 Universal Rules for Rental Bathroom Coverings:
- Rule 1: Exclusively utilize 100% vinyl-based materials. Standard wallpapers are constructed with a porous paper backing that absorbs ambient humidity like a sponge. Instead, choose premium vinyl wall tiles with a minimum thickness of 1.5mm to 3mm. These heavy-duty decals often feature a polyurethane or epoxy gel-resin surface that creates a completely impermeable barrier against water splashes and ambient humidity.
- Rule 2: Prioritize floating floors over heavy adhesives. Attempting to glue temporary flooring directly onto existing ceramic or linoleum is a massive risk. Heavy-duty construction adhesives or aggressive floor tapes will permanently etch or stain the landlord’s original floor finish. The safest method is to install a floating floor system. Use interlocking luxury vinyl planks (LVP) that are at least 4mm thick with an integrated waterproof core, or employ rigid PVC plastic drainage grids that snap together cleanly without a single drop of glue.
- Rule 3: Strictly manage ambient humidity. Even the strongest vinyl adhesive will eventually fail if the bathroom remains a steam room for hours on end. You must actively manage the climate. According to proper bathroom ventilation standards, exhaust fans should run actively during the shower and for at least 20 to 30 minutes afterward to properly vent the moisture. If your rental lacks an exhaust fan, you must crack a window, leave the door open, or run a plug-in dehumidifier to protect your temporary surfaces.
Before applying any adhesive product, it is crucial to properly audit and prepare the current state of the walls. Never apply peel-and-stick tiles directly over crumbling drywall, flaking paint, or heavily textured surfaces.
The adhesive requires a completely smooth, degreased surface to form a secure, long-lasting bond.
We recommend aggressively scrubbing the original tiles with a heavy-duty degreaser or a tri-sodium phosphate (TSP) substitute to strip away years of invisible soap scum and aerosolized body oils.
Wiping the surface down with 90% isopropyl alcohol as a final step guarantees the strongest possible adhesion, preventing those frustrating curled corners halfway through your lease.
Approaching your space with these strict material constraints ensures your DIY project remains entirely temporary.
If you want to explore beyond surface coverings and see how to swap out hardware or maximize your tiny footprint, explore our comprehensive guide on renter-friendly bathroom upgrades.
Are peel-and-stick wallpapers safe for humid, unventilated rental bathrooms?
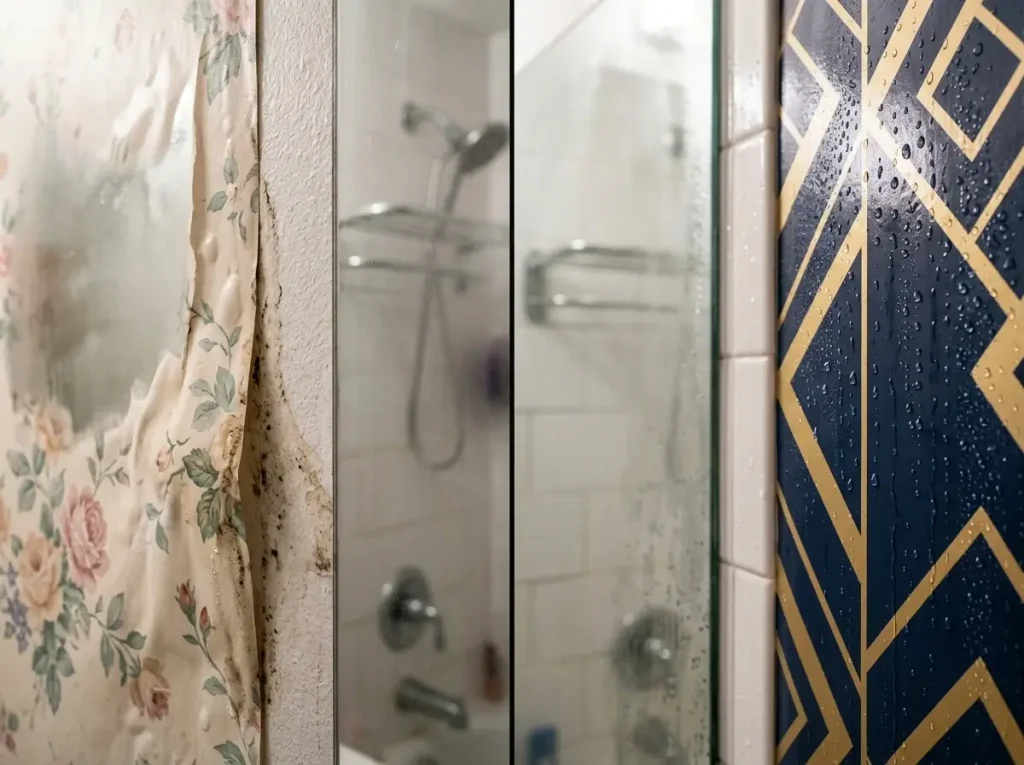
Traditional peel-and-stick wallpaper is highly vulnerable in unventilated bathrooms. Steam quickly compromises standard adhesive backing, leading to bubbling, peeling, and mold growth between the paper and the wall.
If you must use it, exclusively select 100% vinyl-based, moisture-rated wallpapers and apply them only on walls outside the immediate splash zone.
When looking for an affordable way to cover rental bathroom tiles or unsightly drywall, many tenants mistakenly reach for standard removable wallpaper because of the endless, appealing patterns available online.
However, putting standard paper- or fabric-backed wallpaper in a bathroom that lacks a high-powered exhaust fan is a recipe for disaster.
The core issue lies in the thermodynamics of a tiny, enclosed bathroom. When you take a hot shower, the ambient humidity spikes to nearly 100%, and the temperature in the room rises. The air becomes saturated with vapor.
Once you turn off the shower, the air rapidly cools, and that vapor turns into heavy condensation on your walls.
Standard peel-and-stick adhesives are typically water-based or lightly tackified acrylics designed for climate-controlled living rooms (usually around 30% to 50% ambient humidity).
Under the constant assault of bathroom steam, these standard adhesives will re-emulsify—meaning they return to a sticky, wet state and completely lose their structural grip.
Worse than peeling edges is the risk of structural damage to the landlord’s property. Paper-backed wallpapers act like a sponge. They absorb the condensation, trapping moisture tightly against the underlying drywall or tile grout.
In a dark, warm, and constantly damp environment, this creates the perfect incubator for toxic black mold. Preventing this requires extreme caution; as noted in guidelines for preventing mold on drywall, moisture must not be allowed to permeate the surface layer of your walls.
If mold takes root behind your temporary wallpaper, you will almost certainly lose your entire security deposit to cover professional remediation and drywall replacement.
If you absolutely must use wallpaper to cover rental bathroom tiles or upper walls, you must purchase heavy-duty, moisture-rated vinyl.
These products are manufactured from PVC, creating a completely impermeable barrier that water droplets simply roll off of.
Even with vinyl, you must strictly observe the “splash zone” rule: never install any removable wallpaper inside the shower enclosure or directly behind a sink where standing water frequently pools against the bottom seams.
Standard Wallpaper vs. Vinyl Moisture-Rated Wallpaper
To ensure you are selecting the correct material for a high-humidity environment, review the structural differences below before making a purchase:
| Feature | Standard Peel-and-Stick Wallpaper | Vinyl Moisture-Rated Wallpaper |
| Material Composition | Woven polyester fabric or traditional paper. | 100% PVC (Polyvinyl Chloride) or thick vinyl film. |
| Moisture Resistance | Low. Porous surface absorbs airborne humidity and direct splashes. | High. Completely non-porous; actively repels water droplets and steam. |
| Adhesive Type | Water-soluble acrylic (fails rapidly under heat/condensation). | Heat-tolerant, heavy-duty polymer adhesive designed for high adhesion. |
| Safe Bathroom Placement | Do not use in full bathrooms. Powder rooms (no shower/tub) only. | Safe for upper walls and vanity backsplashes (avoid direct shower walls). |
| Mold Risk Profile | Severe risk. Traps moisture against drywall, feeding fungal spores. | Low risk. If seams are tightly smoothed, moisture cannot penetrate behind the vinyl. |
| Removal Process | Often tears into tiny shreds if weakened by prolonged moisture damage. | Generally peels off in large, clean sheets with the assistance of a hairdryer. |
Peel-and-stick tiles vs. removable wallpaper: Which is better for rental bathrooms?
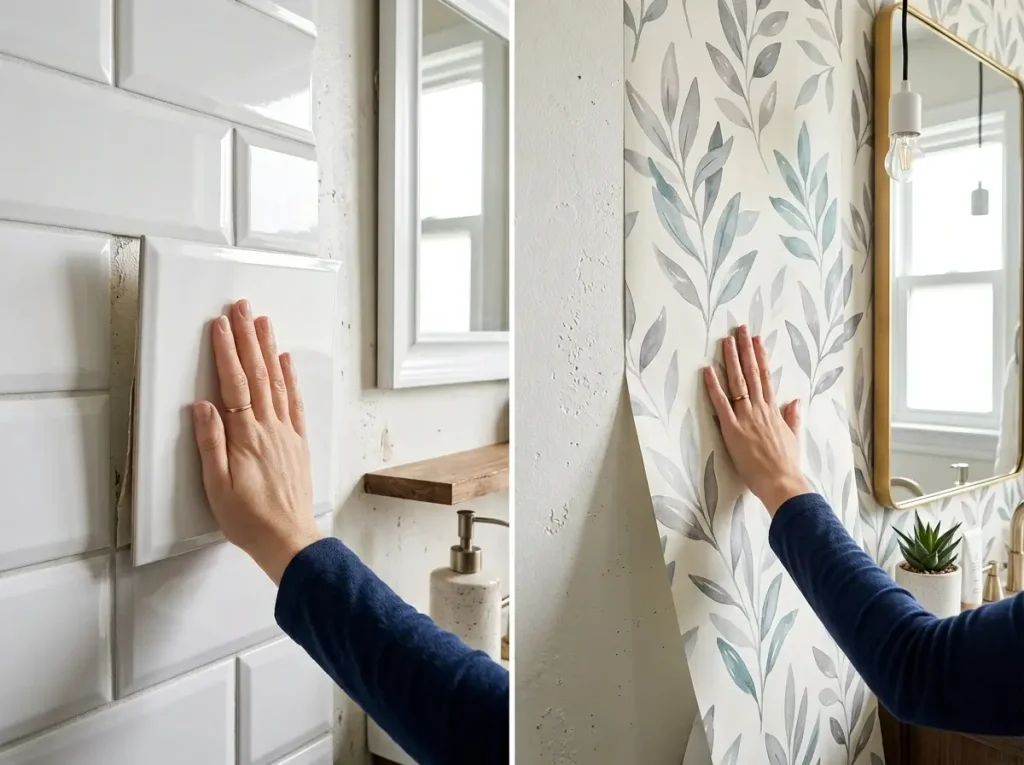
When deciding the best way to cover rental bathroom tiles, vinyl peel-and-stick tiles are far superior to standard removable wallpaper.
Tiles are thicker, explicitly designed to repel water, and feature stronger, heat-resistant adhesives that withstand daily shower steam.
While wallpaper offers more intricate, sprawling patterns, it is significantly thinner and highly susceptible to moisture warping near sinks and tubs.
Let’s break down the physical differences that dictate performance. The average peel-and-stick wallpaper is practically paper-thin, measuring around 0.1mm to 0.3mm in thickness.
This means every single grout line, crack, or chip in the landlord’s original wall will telegraph right through the material, ruining the illusion of a smooth surface.
Conversely, premium 3D gel peel-and-stick tiles are typically 1.5mm to 3mm thick.
This added density is crucial when you want to seamlessly cover rental bathroom tiles because the rigid polyurethane resin easily bridges the gaps over old, deeply recessed grout lines, creating a smooth, convincing finish that looks like authentic ceramic masonry.
The bathroom is an inherently high-heat, high-humidity environment that attacks adhesives.
According to durability evaluations on testing peel and stick tile adhesives, high-quality vinyl tiles utilize heavy-duty polymeric adhesives specifically engineered to tolerate temperatures up to 120°F (49°C) and resist immediate splash damage.
Removable wallpaper, on the other hand, typically uses a low-tack, water-based acrylic adhesive.
The moment steam from a hot, unventilated shower permeates the edge of a wallpaper seam, that acrylic adhesive will liquefy, causing the paper to slide right down the drywall.
The biggest fear for any renter is losing their security deposit upon move-out. Both options are marketed as completely “damage-free,” but the reality of the removal process tells a different story.
Because 3D vinyl tiles use a significantly stronger adhesive, you cannot simply rip them off the wall cold.
You must apply direct, sustained heat from a hairdryer on a high setting for 10 to 15 seconds per tile to soften the backing before gently peeling it away at a 45-degree angle.
Wallpaper is theoretically easier to peel cold, but if it has absorbed bathroom moisture and steam over a one-year lease, the structural integrity of the paper is compromised.
It will likely tear into hundreds of frustrating little shreds, leaving a sticky, impossible-to-remove residue behind.
To make the best choice for your lease terms, consider this direct comparison:
| Comparison Metric | Vinyl Peel-and-Stick Tiles | Removable Wallpaper |
| Water Resistance | Exceptional. Non-porous gel surface repels direct splashes and high humidity. | Poor. Easily absorbs ambient moisture, leading to warping and mold risk. |
| Heat Tolerance | High. Withstands shower steam and ambient temperatures up to 120°F. | Low. Steam re-emulsifies the acrylic adhesive, causing peeling edges. |
| Installation Difficulty | Moderate. Requires exact measuring and cutting with a heavy-duty utility knife or shears. | Easy. Applied in large vertical sheets; can easily be pulled up and repositioned during install. |
| Deposit Safety (Removal) | Safe if heated. Must use a hairdryer to melt the adhesive before pulling to protect the wall. | Risky in bathrooms. Moisture damage often causes it to tear and leave heavy residue. |
How to temporarily upgrade bathroom floors using peel-and-stick vinyl?
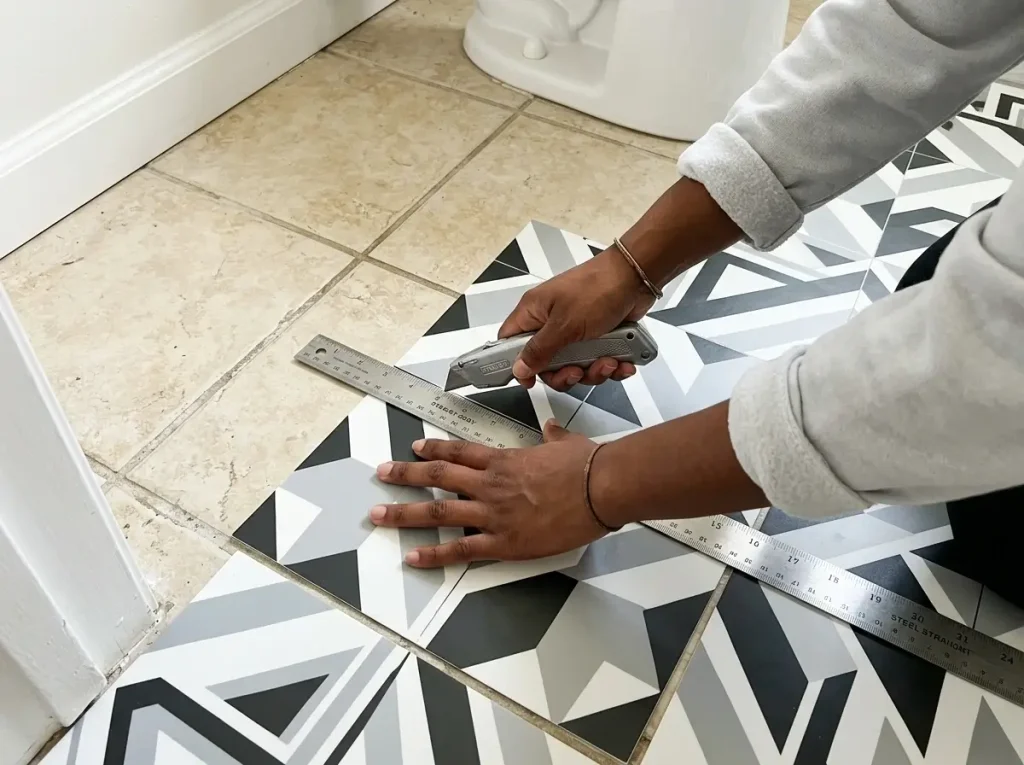
To safely upgrade bathroom floors using peel-and-stick vinyl, never apply the adhesive directly to natural stone or porous grout, as it will leave a permanent, gummy residue.
Instead, thoroughly clean the existing floor, lay down a protective grid of renter-friendly double-sided floor tape, or use thick vinyl decals specifically rated for temporary application over existing ceramic.
While walls get most of the attention, a truly transformative makeover requires addressing the floor.
When you decide to cover rental bathroom tiles on the floor, the stakes are significantly higher than on the walls.
Constant foot traffic, standing puddles from the shower, and the shifting weight of bathroom furniture mean your temporary flooring takes a relentless beating.
The biggest mistake renters make is buying cheap, ultra-sticky floor decals that eventually fuse to the landlord’s original linoleum or ceramic.
Upon move-out, ripping these up can actually tear the original finish or leave a hardened adhesive shadow that guarantees a massive security deposit deduction.
If a completely floating interlocking vinyl floor is out of your budget, you can safely use heavy-duty peel-and-stick floor tiles, but meticulous preparation and a barrier layer are everything.
Before applying any adhesive, you must master the art of safe floor cleaning prep. Dirt and grease act as a lubricant, while residual soap scum acts as a chemical repellent. Both will cause your new floor to slide out of place within weeks.
To ensure your temporary floor survives your lease and peels up cleanly when you leave, follow this strict installation sequence:
- Deep Clean and Degrease: Sweep, vacuum, and mop the existing floor with a strong, heavy-duty degreaser. Follow up by vigorously scrubbing the old tiles and grout lines with a stiff-bristled brush and 90% isopropyl alcohol to remove invisible body oils. The floor must be bone dry before proceeding.
- Establish a Safety Barrier: If the original floor is natural stone, unsealed terracotta, or heavily textured, do not stick vinyl directly to it. Adhesives will sink into the stone’s pores and become impossible to remove. Instead, lay down a crisscross grid of renter-safe double-sided carpet tape designed specifically for temporary event installations. Apply your peel-and-stick tiles to this tape grid, not the raw floor.
- Plan the Layout: Start from the most visible threshold (usually the doorway or directly in front of the vanity) and work your way backward. This ensures that any awkward, custom-cut puzzle pieces end up hidden behind the toilet or tucked under the baseboards where they are less noticeable.
- Cut with Precision: Do not try to fold or snap thick vinyl by hand. Use a fresh, heavy-duty utility knife and a heavy metal straight-edge. Score the surface deeply two or three times, then firmly bend the tile along the line to snap it cleanly.
- Seal the Perimeter (Crucial step): Temporary floor tiles are highly vulnerable at their outermost edges. Once installed, run a tiny, thin bead of clear, 100% silicone caulk around the perimeter where the new floor meets the bathtub and the baseboards. Use a wet finger to smooth it out. This stops shower water from seeping under the tiles and growing mold. (When your lease ends, silicone caulk easily peels off the tub in one satisfying, long strip).
Following this exact procedure ensures you can successfully cover rental bathroom tiles on the floor without creating a toxic moisture trap or permanently ruining the property beneath.
For ongoing maintenance, strictly avoid using steam mops. The intense, localized heat will immediately soften the adhesive backing and cause your new floor to shift. Instead, maintain the surface using a barely-damp microfiber mop and a gentle pH-neutral cleaner.
Bamboo vs. plastic temporary bathroom flooring grids: Which is more hygienic?
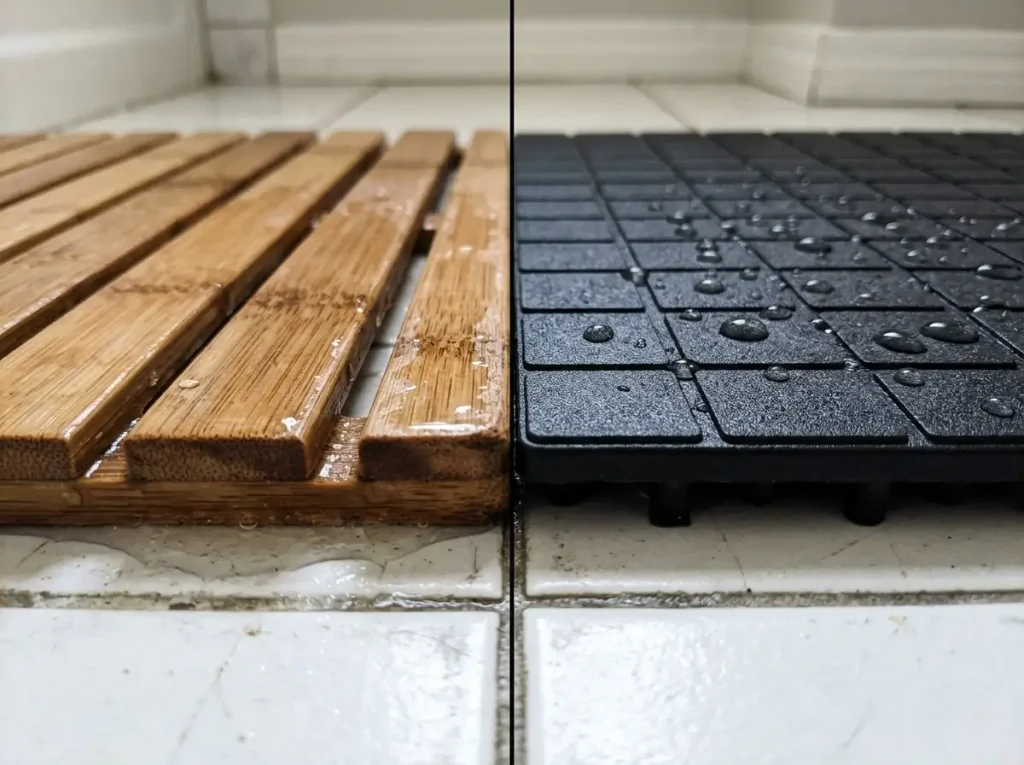
Plastic interlocking drainage tiles are significantly more hygienic than bamboo grids in a wet rental bathroom.
While bamboo offers a luxury spa aesthetic, it is highly porous and prone to trapping black mold underneath if not lifted and dried weekly. Rigid PVC plastic grids allow continuous airflow and can be easily sanitized with bleach.
When looking for an adhesive-free way to cover rental bathroom tiles, tenants often turn to floating slatted floor grids.
These systems are brilliant because they require absolutely zero tape, glue, or permanent modification to the landlord’s original property.
You simply lay them over the existing floor, and they mask the ugly ceramic underneath. However, the material you choose dictates whether your bathroom remains a clean sanctuary or becomes a toxic, mold-infested hazard.
Bamboo is undoubtedly the most visually appealing option, instantly transforming a sterile, outdated apartment bathroom into a Balinese-inspired spa. However, tenants must remember that bamboo is organic material.
Even when factory-treated with a polyurethane sealant, the constant exposure to hot shower steam, aerosolized soaps, and standing water puddles will eventually degrade its protective barrier.
If you use a bamboo mat over an unventilated floor, you must actively lift it at least once a week to dry the underlying original tiles. If left unchecked in a humid environment, standing water will cultivate severe fungal growth.
As noted in expert guides on cleaning mold from wood surfaces, once mold spores penetrate the porous organic grain of the bamboo itself, the mat is virtually impossible to fully sanitize and must usually be thrown away.
To maintain any level of water resistance, bamboo grids require heavy maintenance, including the application of tung oil or mineral oil every three to four months.
Conversely, high-density polyethylene (HDPE) or rigid PVC plastic drainage tiles are entirely synthetic and engineered for harsh, wet environments.
These interlocking tiles feature raised drainage pegs on the underside, creating a permanent half-inch gap between your feet and the old floor.
This gap allows standing water to channel seamlessly toward the drain while maintaining continuous, active airflow beneath the surface. Because PVC is 100% non-porous, it cannot absorb humidity, making it inherently hostile to mold and mildew.
Furthermore, if you want to safely cover rental bathroom tiles without losing the ability to deep-clean your space, plastic is the only logical choice.
When soap scum inevitably builds up on the plastic grids or the original grout lines beneath them, you can simply spray the entire PVC floor with a heavy-duty bleach solution or a foaming shower cleaner, let it sit for ten minutes, and rinse it away.
You cannot use harsh chemical cleaners on bamboo without instantly stripping its finish and bleaching the wood.
To determine the best fit for your lease, review the side-by-side mechanical and hygienic differences below:
| Feature | Bamboo Slatted Mats | PVC / Plastic Drainage Grids |
| Porosity & Water Absorption | High. Absorbs ambient steam; swells if left in standing water. | Zero. Completely non-porous; repels all water and steam. |
| Mold & Mildew Risk | Severe risk. Traps moisture against original floors; susceptible to rot. | Low risk. Elevated peg design allows continuous sub-floor airflow. |
| Cleaning Chemical Tolerance | Low. Damaged by bleach, ammonia, and abrasive scrubbers. | Exceptional. Can be soaked in bleach and scrubbed vigorously. |
| Maintenance Requirements | Must be lifted weekly to dry; requires oiling every 3-4 months. | Virtually zero maintenance; rinse with shower head periodically. |
| Structural Connectivity | Often sold as a single roll-out mat; can slide underfoot. | Snaps together securely via interlocking edge tabs to form a single, rigid floating floor. |
How can I cover up an ugly vanity without replacing it?
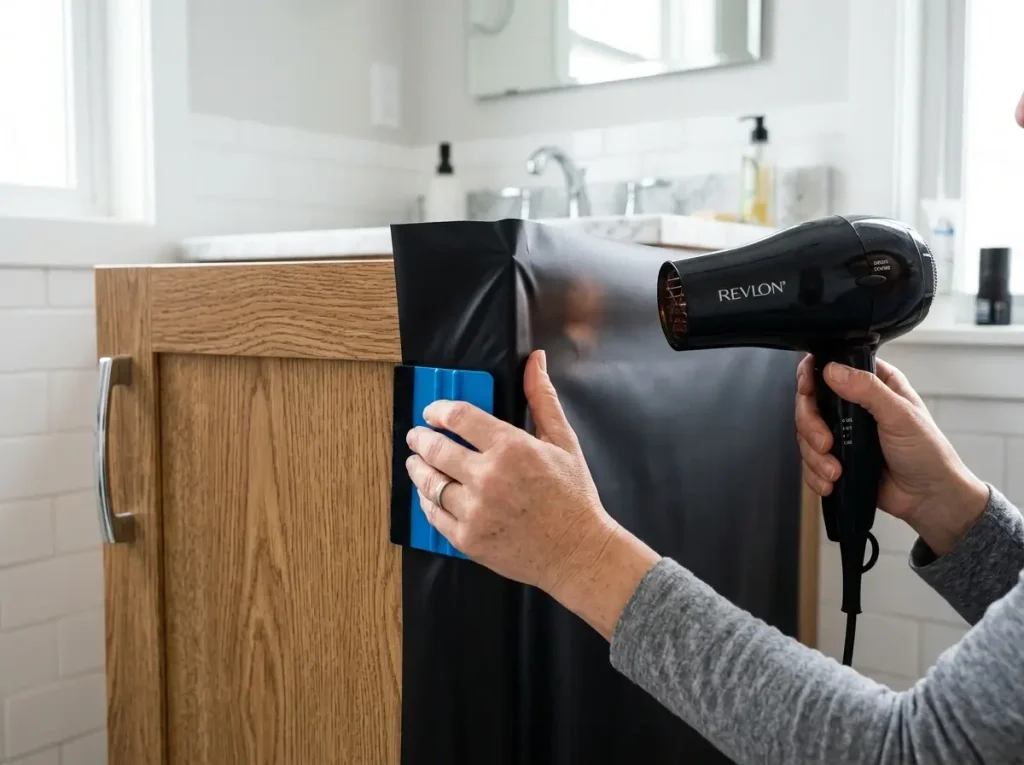
You can instantly cover an ugly vanity by wrapping the cabinet doors in heat-applied architectural vinyl film and swapping the standard knobs.
For damaged countertops, apply a thick, waterproof marble-effect vinyl wrap, using a utility knife to safely trim around the existing sink basin and faucet fixtures.
When you take the time to safely cover rental bathroom tiles on your walls and floors, leaving a chipped, faux-oak 1990s vanity exposed will instantly ruin your modernized aesthetic.
Because landlords will absolutely not allow you to detach plumbing to install a new sink, the secret to a complete bathroom transformation is working with what you already have.
Upgrading the vanity with temporary architectural film is the most cost-effective way to hide outdated cabinetry without risking your security deposit.
Cabinet doors are usually flat and relatively easy to wrap. But to achieve a seamless, factory-like finish that doesn’t look like a cheap DIY project, you must master the edges.
Architectural vinyl film is heat-activated. According to architectural vinyl wrap specifications, applying targeted heat allows the PVC material to stretch up to 130% of its original size without tearing or losing its pattern.
By using a standard hairdryer on a high-heat setting, you can pull the warmed vinyl taut over the sharp 90-degree corners of your cabinet doors. This eliminates bulky, folded seams that would otherwise peel off after a few weeks in a humid bathroom.
Countertops require a bit more precision because you must navigate around the integrated sink basin and the faucet base. To safely wrap a bathroom vanity top, follow this exact procedure:
- Remove hardware and degrease: Take off all cabinet knobs. Clean the entire vanity top and cabinet face with a heavy-duty degreaser, finishing with a wipe-down of 90% isopropyl alcohol. The surface must be completely free of grease and soap scum.
- Measure and cut with a margin: Unroll your thick, waterproof vinyl wrap (such as a faux marble or concrete finish) and cut a piece that is at least 3 to 4 inches larger than the countertop in all directions.
- Anchor and smooth: Peel back just the first two inches of the paper backing. Anchor the sticky vinyl to the back edge of the vanity (near the backsplash) and slowly pull the backing away. Simultaneously smooth the surface with a felt-edged squeegee to push out any trapped air bubbles.
- Heat and stretch around the sink: When you reach the sink basin, do not try to cut the hole immediately. Use your hairdryer to soften the vinyl, allowing it to gently drape down into the bowl without wrinkling.
- Trim and seal the excess: Using a razor-sharp utility knife, carefully trace the outer lip of the sink basin and the base of the faucet hardware to remove the excess material. To ensure it is 100% waterproof, run a microscopic bead of clear silicone caulk around the sink edge.
Beyond wrapping the surfaces, the easiest damage-free upgrade is swapping the cabinet hardware.
Replacing corroded plastic knobs with modern matte black or brushed brass pulls takes less than five minutes with a screwdriver. Always place the original hardware and screws in a labeled bag and store them under the sink so you can reinstall them before your lease ends.
If your newly wrapped vanity looks stunning but still lacks practical drawer space, you can easily maximize space with drill-free bathroom storage solutions like tension-rod shelves and heavy-duty suction caddies.
By combining clever vertical organization with a freshly wrapped vanity, your entire space will perfectly complement the work you did to cover rental bathroom tiles, creating a cohesive, luxury feel that peels right off on move-out day.
When it is finally time to leave, never rip the vinyl off the vanity cold, as this can delaminate the landlord’s original cabinet finish. Instead, hold your hairdryer about six inches away from the surface, working in small sections to re-melt the adhesive.
Once warmed, the vinyl will pull away smoothly in one large sheet.
Conclusion: Final Thoughts on Temporary Rental Bathroom Upgrades
Hiding outdated surfaces doesn’t require a demolition crew or permission from a difficult landlord.
By choosing the right moisture-resistant 3D vinyls and rigid floating floor grids, you can securely cover rental bathroom tiles and floors without jeopardizing your security deposit. Always prioritize active ventilation to protect your upgrades against steam and mold.
If you found this renter-friendly guide helpful, please share it with fellow tenants looking to upgrade their space!
The ultimate test of any temporary apartment hack is move-out day. It is incredibly satisfying to hide ugly avocado green walls when you move in, but it can quickly become a nightmare if you leave behind a sticky, damaged mess.
When you use adhesives to cover rental bathroom tiles, you are making a calculated bet on your ability to remove them cleanly at the end of your lease.
Landlords are notorious for rigorously inspecting grout lines, drywall surfaces, and original linoleum for any signs of unauthorized DIY modifications or hidden water damage.
To ensure you get your full security deposit back in hand, you must approach the removal process with the exact same level of care and precision as the installation.
Never wait until the morning the moving truck arrives to start peeling things off the walls. Plan to allocate at least two to three hours specifically for adhesive reversal.
Follow this definitive Move-Out Adhesive Removal Checklist to protect the original surfaces:
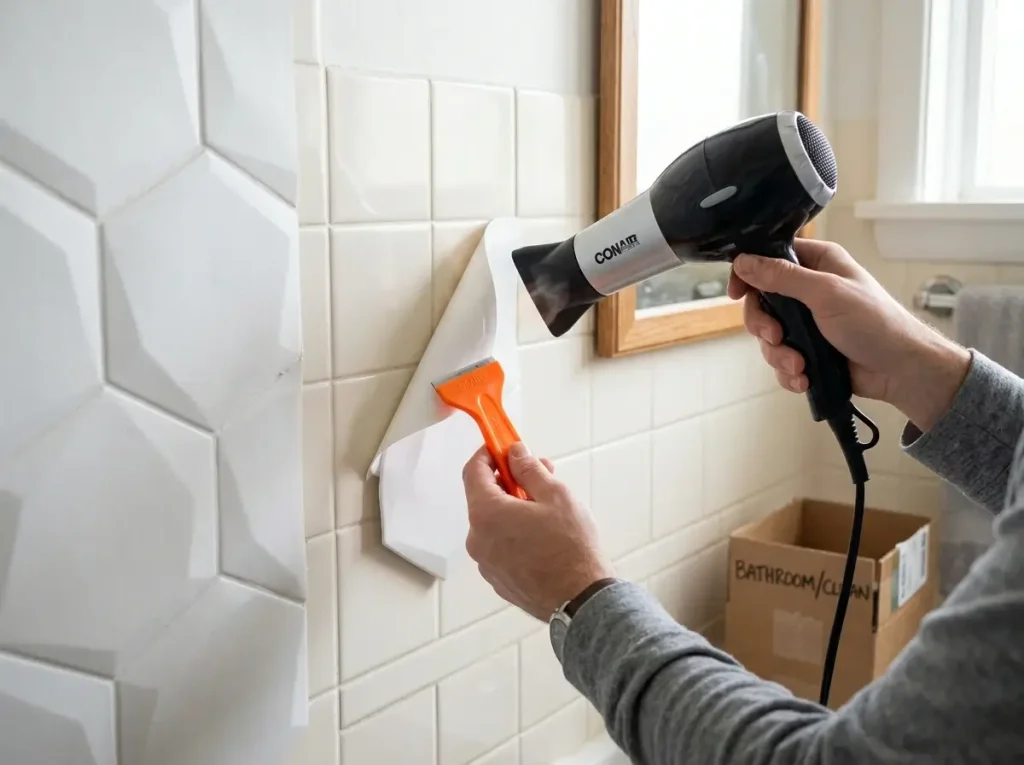
- Always Apply Directed Heat: Never pull adhesive vinyl off a wall cold. Cold adhesive is rigid and will either rip the top layer of drywall paper or snap the vinyl into tiny, frustrating shards. Hold a standard hairdryer on high heat about 3 to 4 inches away from the surface for 15 to 20 seconds per tile. Once the thick gel backing softens, pull the material slowly at a 45-degree angle.
- Utilize Plastic Razor Blades: If a stubborn piece of adhesive remains stuck to the landlord’s ceramic, never use a metal putty knife or a standard steel razor blade. Metal will permanently scratch porcelain finishes and slice through soft linoleum. Instead, purchase a pack of polycarbonate plastic scraper blades. They provide the sharp edge needed to wedge under the glue without scratching the delicate surface beneath.
- Deploy Citrus-Based Solvents: For any lingering sticky residue, skip the standard soap and water. Spray a heavy-duty citrus-based adhesive lifter (or 90% isopropyl alcohol) directly onto the gummy spot. Let it sit undisturbed for 3 to 5 minutes to chemically break down the bonding polymers before wiping it away with a rough microfiber cloth.
- Remove Perimeter Silicone: If you properly sealed your temporary floor with clear silicone caulk around the tub and baseboards to stop water intrusion, you must remove it. Use your plastic scraper to lift one end, then gently pull the entire bead of silicone away in one continuous, elastic strip.
- Check the Sub-Floor: If you used floating plastic drainage grids, unsnap them, carry them to the tub, and rinse them down. Thoroughly sweep and mop the original floor beneath to ensure no dust bunnies, hair, or hidden moisture spots are left behind for the landlord to find.
Transforming a tiny, outdated bathroom is an empowering project that dramatically improves your daily routine.
Once you have the aesthetic surfaces handled, the final step is conquering the clutter. Be sure to explore our complete guide on drill-free storage solutions to organize your new space beautifully—without putting a single permanent hole in the wall.