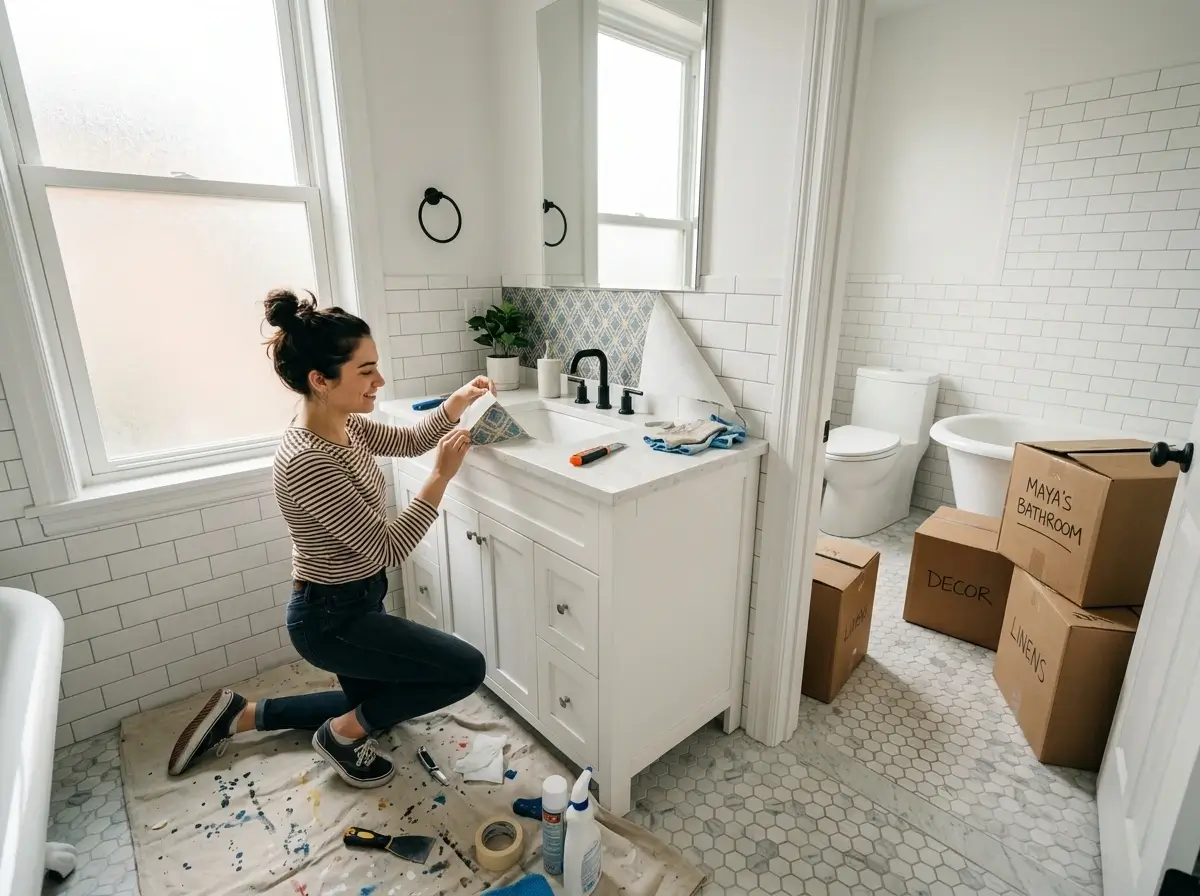
Moving out of an apartment is stressful enough without panicking over the safety of your security deposit.
If you spent the last year customizing your space, it is time to safely reverse rental bathroom upgrades and restore the room to its original condition.
Removing temporary adhesives, boxing up bulky storage, and swapping plumbing fixtures back to the landlord’s standard requires the right technique.
In this guide, we’ll walk you through a damage-free teardown process to ensure you leave the bathroom spotless and secure your full deposit refund.
The Short Answer: How to Safely Remove Temporary Rental Bathroom Upgrades
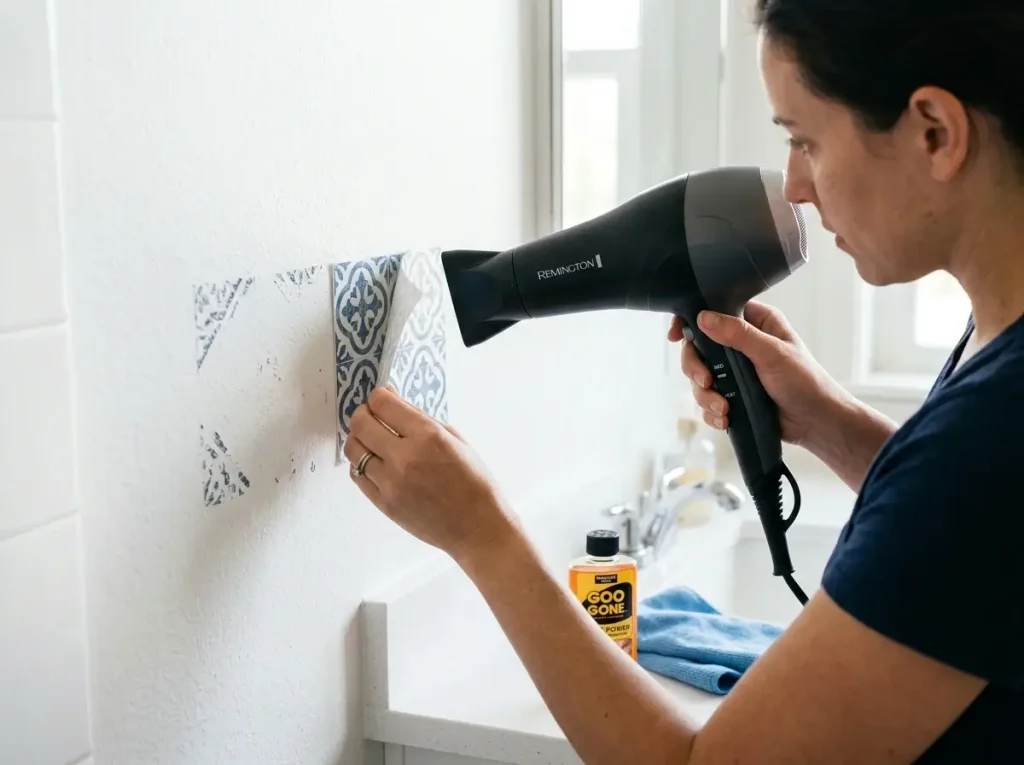
To safely reverse rental bathroom upgrades, systematically apply medium heat to soften temporary adhesives before pulling at a 45-degree angle.
Next, use an adjustable wrench and Teflon tape to reinstall the landlord’s original plumbing fixtures.
Finally, collapse drill-free storage units and scrub all surfaces with residue remover to guarantee full lease compliance and protect your deposit.
Tackling your apartment teardown without a rigid plan is the fastest way to lose track of hardware or accidentally strip the vanity finish.
If you want to reverse rental bathroom upgrades efficiently and completely, you cannot rely on chaotic, random packing. A systematic, top-to-bottom teardown methodology ensures that no trace of your customizations is left behind for the move-out inspector.
Here is the exact, ordered sequence you must follow for a flawless, damage-free teardown:
1. Isolate the Plumbing and Reinstall Original Fixtures
Always begin with the plumbing while the bathroom is still clean and dry. Turn off the main water valve to the shower or sink before attempting any fixture swaps.
Carefully use a 10-inch adjustable wrench to loosen your custom showerhead. Once removed, take an old toothbrush and aggressively scrub the pipe threads to clear away old tape and hard mineral deposits.
Wrap the shower arm tightly with two to three layers of fresh Teflon tape in a clockwise direction.
Finally, hand-tighten the landlord’s original showerhead back onto the pipe. Test the water flow immediately to verify there are absolutely no leaks behind the wall.
2. Apply Thermal Disassembly for Peel-and-Stick Upgrades
Never rip temporary wallpaper or vinyl floor tiles while they are cold; doing so will almost certainly tear the drywall paper or splinter laminate cabinets.
Instead, use a standard hairdryer set to medium heat (or a heat gun kept strictly at its lowest setting, held at least 6 inches away).
Apply heat to the surface of the tile for exactly 30 seconds to reactivate and soften the glue.
Grab the corner and pull slowly at a 45-degree angle flush to the wall—never pull straight out toward yourself, as this maximizes the tension on the paint.
3. Collapse and Remove Drill-Free Storage Units
Once the walls and floors are clear, move on to the bulky items. Disassemble tension rod shower caddies by twisting the main pole counter-clockwise to relieve the internal spring pressure.
For heavy-duty suction cup hooks, do not pry them off with a metal screwdriver.
Slide a thin piece of dental floss or a flexible plastic putty knife cleanly behind the rubber seal to gently break the vacuum bond without gouging the fiberglass surround or scratching the glass shower doors.
4. Eradicate Remaining Chemical Residue
Even the most renter-friendly upgrades will leave a faint, sticky ghost layer behind. You must dissolve this chemically.
Apply an oil-based citrus solvent or dedicated safe adhesive removal tools to target the stubborn mounting tape residue.
Let the solvent sit for 3 to 5 minutes so it can fully penetrate the polymers. Never use abrasive scouring pads on acrylic tubs or laminate vanities.
Instead, wipe the dissolved glue away with a clean microfiber cloth, followed by a vigorous scrub using hot water and a heavy grease-cutting dish soap.
By strictly adhering to this ordered teardown protocol, you eliminate the risk of late-stage plumbing disasters or drywall tears, ensuring your bathroom passes the final inspection.
How Do I Remove Peel-and-Stick Bathroom Tiles Without Leaving Sticky Residue?
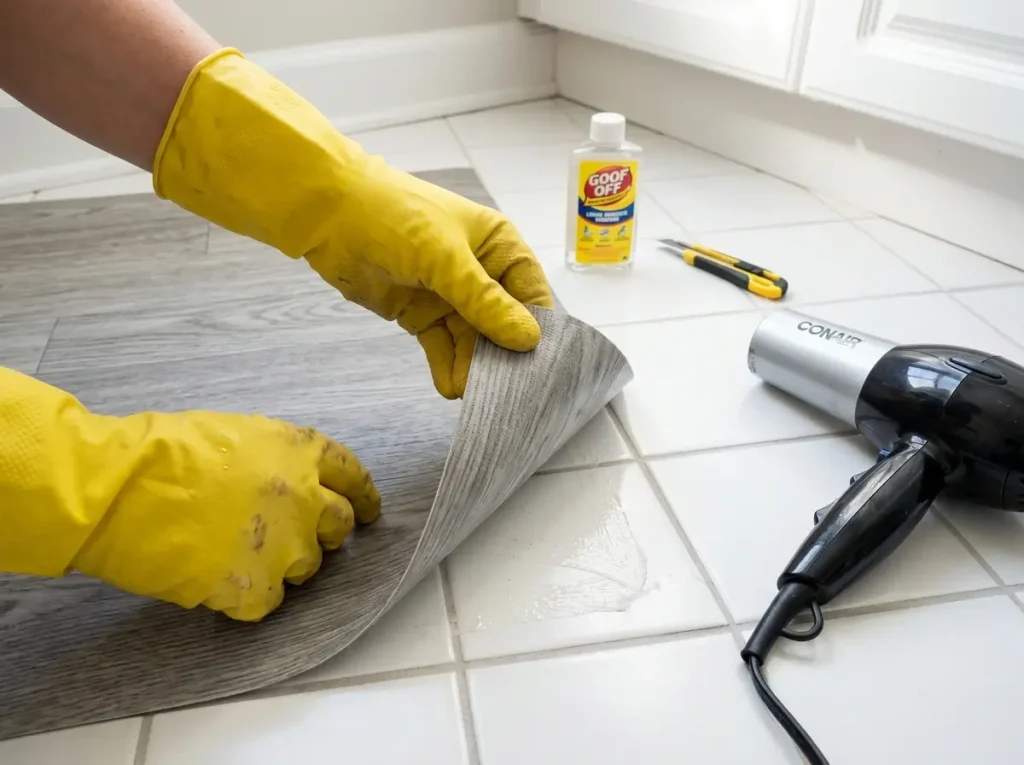
The secret to removing peel-and-stick tiles without leaving a stubborn, sticky residue is applying targeted heat.
Use a standard hairdryer on medium heat for 30 seconds per tile to soften the adhesive backing, then pull the vinyl slowly at a 45-degree angle.
Eliminate any remaining glue with an oil-based adhesive remover, followed by a thorough wipe-down with dish soap and warm water.
When the time comes to reverse rental bathroom upgrades, dealing with vinyl wall or floor adhesives is usually the most anxiety-inducing task.
If you previously followed guides on how to cover ugly rental bathroom tiles and floors, you know that these temporary vinyl products are explicitly designed to stay put in highly humid, wet environments.
Because they are engineered to resist constant moisture and temperature fluctuations, they form an incredibly aggressive bond with the landlord’s original drywall, laminate vanities, or linoleum floors.
Ripping them off while the bathroom is cold is a guaranteed way to tear the top layer of drywall paper or permanently splinter a cheap wooden cabinet. To safely detach the vinyl and dissolve the glue, follow this exact, four-step thermal and chemical process:
1. The Thermal Release Protocol
Heat is your greatest ally when you need to reverse rental bathroom upgrades safely. Turn a standard hairdryer to medium heat (never use the high setting, which can melt thin vinyl and create a worse, gooey mess).
Hold the nozzle exactly 4 to 6 inches away from the surface and sweep it continuously over a single tile for 30 to 45 seconds. Do not hold the heat completely stationary in one spot, as you want to warm the entire adhesive footprint evenly.
2. The 45-Degree Extraction
Once the tile feels noticeably warm and pliable to the touch, use a plastic putty knife to gently lift one corner. Grab the loosened corner with your fingers and pull slowly at a strict 45-degree angle flush to the wall or floor.
Never pull the tile straight outward toward your body at a 90-degree angle. Pulling straight out creates maximum upward tension that will inevitably snap the vinyl tile into pieces or rip the underlying paint right off the drywall.
3. The Chemical Dissolve
Even with perfect heat application and pulling technique, you will likely encounter stubborn patches of gummy adhesive left behind on the original surfaces.
Do not scrape these patches with metal tools or razor blades. Instead, apply a commercial residue remover specifically formulated for heavy-duty glues.
Spray or dab the solvent directly onto the sticky spots and—this is critical—let it sit for 3 to 5 full minutes. The chemical compounds require this precise dwell time to successfully break down the polymer bonds in the glue.
4. The Final Degreasing Wash
Oil-based adhesive removers do an excellent job of melting glue, but they will leave a slick, greasy film behind.
If a property manager runs their hand over the wall during the move-out inspection and feels this grease, they may still charge a hefty cleaning fee.
Mix a bucket of hot water with two tablespoons of heavy-duty, grease-cutting dish soap. Use a non-abrasive sponge to scrub away the solvent residue, then dry the area completely with a clean microfiber towel.
What Temporary Adhesives Will Permanently Stain Bathroom Vanity Cabinets?
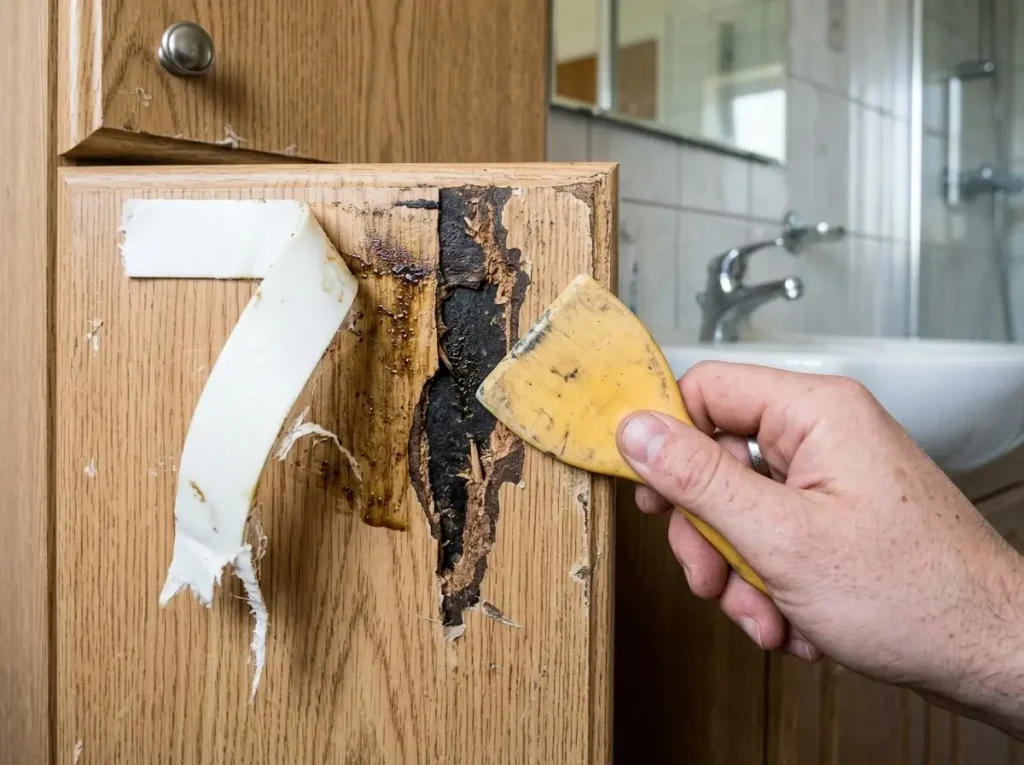
Avoid using heavy-duty mounting tapes, cyanoacrylate super glues, or cheap double-sided foam tapes on bathroom vanity cabinets.
Wood veneer and laminate surfaces easily absorb oils from these adhesives, leading to permanent discoloration or ripped finishes that landlords will immediately charge against your security deposit during the move-out inspection.
When the time comes to reverse rental bathroom upgrades, many renters are horrified to discover that the “temporary” hooks they attached to the inside of their cabinet doors have left behind dark, oily stains or ripped the faux-wood finish clean off.
To understand why this happens, you have to look at how rental bathrooms are built. The vast majority of apartment bathroom vanities are not constructed from solid, sealed hardwood.
Instead, they are made from Medium Density Fiberboard (MDF) or particleboard wrapped in a micro-thin layer of thermoplastic laminate or cheap wood veneer.
These porous, budget-friendly materials are highly susceptible to chemical damage. Never use any adhesive that cures rock-hard or relies on heavy acrylic oils.
Cyanoacrylate (commonly known as super glue), polyurethane construction adhesives, and epoxy-based glues quite literally melt the top layer of a laminate finish to form a microscopic physical bond.
When you try to pry or scrape these glues off, the cabinet’s finish will snap off in rigid chunks right along with the hook.
Similarly, standard double-sided foam tape—the kind often included for free in the packaging of cheap bathroom organizers—is a massive liability.
The acrylic glue used on heavy-duty foam tape is highly acidic and contains oils that will permanently seep into unsealed wood veneers over the course of a 12-month lease.
This chemical reaction leaves dark, greasy squares on the vanity door that no amount of dish soap, baking soda, or solvent will ever remove.
Here is a breakdown of the exact damage risks associated with common household adhesives when applied to rental bathroom cabinets:
| Adhesive Type | Common Bathroom Use | Damage Risk on Laminate/Veneer |
| Double-Sided Foam Tape | Included with cheap plastic caddies | HIGH: Leaves permanent oily stains; rips peeling laminate upon removal. |
| Cyanoacrylate (Super Glue) | Fixing broken drawer pulls | EXTREME: Fuses chemically with plastic; snaps finish off upon removal. |
| Construction Adhesive | Mounting heavy floating shelves | EXTREME: Will tear MDF down to the bare, exposed particleboard. |
| Hot Glue | Attaching temporary fabric sink skirts | MODERATE: Can warp thin thermoplastic laminate via high heat. |
| Stretch-Release Strips | Hanging lightweight hooks and organizers | LOW: Safe if pulled strictly parallel to the surface; no oil seepage. |
If your ultimate goal is to cleanly reverse rental bathroom upgrades and secure your full deposit refund, you must exclusively use damage-free hanging strips engineered with stretch-release technology.
These specialized products utilize a silicone-based adhesive that creates a strong grip through friction and surface tension, rather than chemical melting or oil penetration.
Always perform a spot test before fully committing. Even if a mounting strip explicitly claims to be “renter-friendly,” stick a small piece of it to the inside, hidden lip of a cabinet door.
Leave it in place for 48 hours, and then perform the removal process. If it leaves a shiny ghost mark, discolors the wood, or pulls at the laminate edge, do not use it to hang your inside-the-cabinet styling tool organizers or heavy acrylic shelves.
How Do I Reinstall My Landlord’s Original Showerhead Before Moving Out?
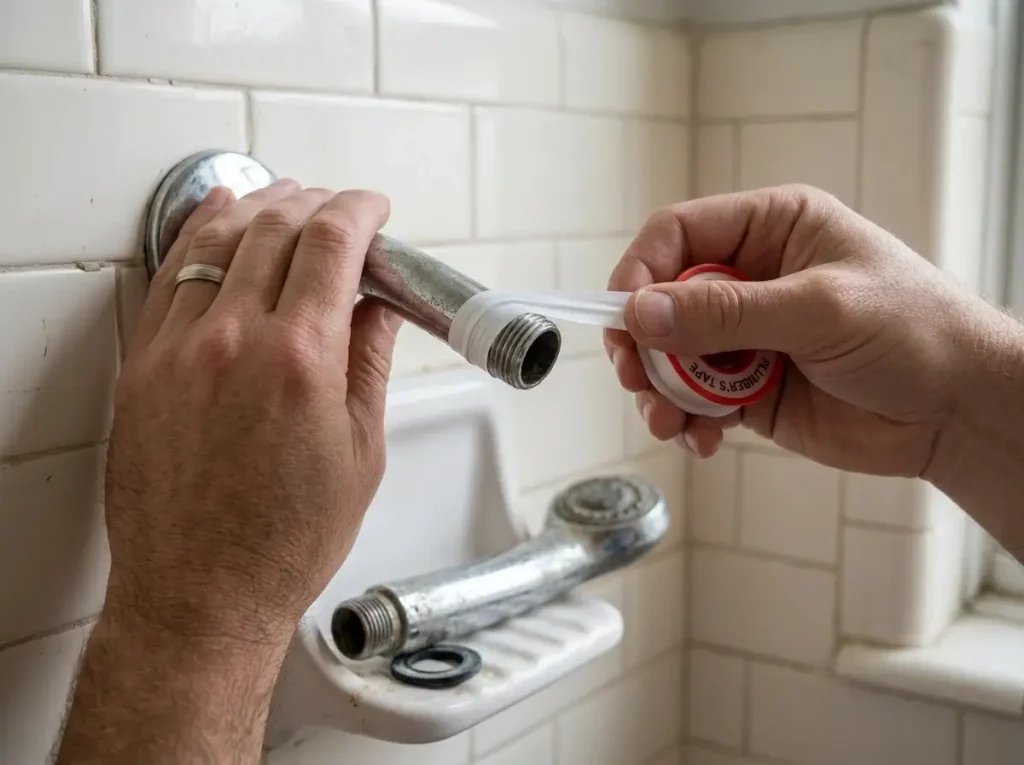
To reinstall the original showerhead, use an adjustable wrench to carefully unscrew your upgraded fixture.
Clean the shower arm threads with an old toothbrush, wrap them with two to three layers of fresh Teflon plumber’s tape, and hand-tighten the original landlord’s showerhead back into place. Test for leaks before packing your tools.
When renters initially read our guide on changing your rental showerhead, they quickly realize it is one of the highest-impact, lowest-effort improvements you can make.
However, when it is time to pack up, many tenants rush the teardown process and either lose the landlord’s original fixture, forget the internal washer, or inadvertently cause a slow, hidden drip behind the drywall.
If you want to seamlessly reverse rental bathroom upgrades, handling the plumbing with extreme care is non-negotiable. Property managers will absolutely check for active leaks and correct fixture swaps during the final walk-through.
Here is the exact step-by-step procedure to safely swap the plumbing fixture back to its original state without incurring water damage fees:
1. Prepare the Area and Gather Tools
Ensure the shower knobs are completely turned off (shutting off the main water valve to the apartment is generally unnecessary for a simple showerhead swap).
Close the shower drain or place a thick towel over the drain hole. This simple precaution prevents dropped screws, rubber washers, or old pieces of tape from falling down the pipe and causing a massive clog.
You will need a microfiber rag, an old toothbrush, fresh plumber’s tape (Teflon tape), and a set of standard adjustable plumbing wrenches.
2. Remove Your Custom Fixture Safely
To avoid scratching your expensive luxury showerhead before packing it away, wrap a thin microfiber cloth around the connecting metal nut.
Clamp your adjustable wrench directly over the cloth and turn it counter-clockwise to break the tension. Once the fixture is loose enough, set the wrench aside and finish unscrewing the unit entirely by hand.
3. Scrub the Pipe Threads Bare
This is the step most renters skip when they try to quickly reverse rental bathroom upgrades. Once your custom showerhead is off, you will see the bare metal threads of the shower arm protruding from the wall.
There will likely be shredded pieces of old white Teflon tape and crusty, white calcium buildup caught deeply in the grooves.
Take a dry, stiff-bristled toothbrush and scrub the threads aggressively until the bare metal is completely clean. Applying new plumber’s tape over old debris will guarantee an uneven seal and an eventual leak.
4. Apply Fresh Teflon Tape
Teflon tape is essential for creating a watertight seal between the wall pipe and the showerhead.
Hold the roll of tape in one hand and wrap it tightly around the clean threads in a clockwise direction (the exact same direction you will turn the new showerhead). Wrap the pipe with exactly two to three layers of tape.
Pull the tape taut so it sinks deeply into the metal grooves, then tear the end off flat against the pipe.
5. Reinstall the Landlord’s Fixture
Retrieve the original showerhead that you (hopefully) stored safely in a labeled ziplock bag at move-in.
Check the inside of the connector nut to ensure the black rubber O-ring washer is still sitting flat inside.
Screw the showerhead onto the taped pipe by hand, turning it clockwise. Hand-tighten it as firmly as you possibly can.
Never use a wrench to crank down the original showerhead.
Over-tightening can easily snap the old, brittle pipe behind the drywall, resulting in thousands of dollars in hidden water damage that your security deposit will certainly not cover.
6. Perform the Drip Test
Before you put away your tools, turn the water on full blast. Shine a flashlight at the very back of the showerhead exactly where the nut meets the wall pipe.
If you see water weeping, dripping, or spraying from the connection, turn the water off immediately.
Unscrew the head, apply one more tight layer of tape, and try again until the connection is bone dry.
Properly completing this test is a critical milestone when you reverse rental bathroom upgrades and prepare to hand over the keys.
Easiest Ways to Disassemble and Pack Bathroom Storage Units and Temporary Mirrors
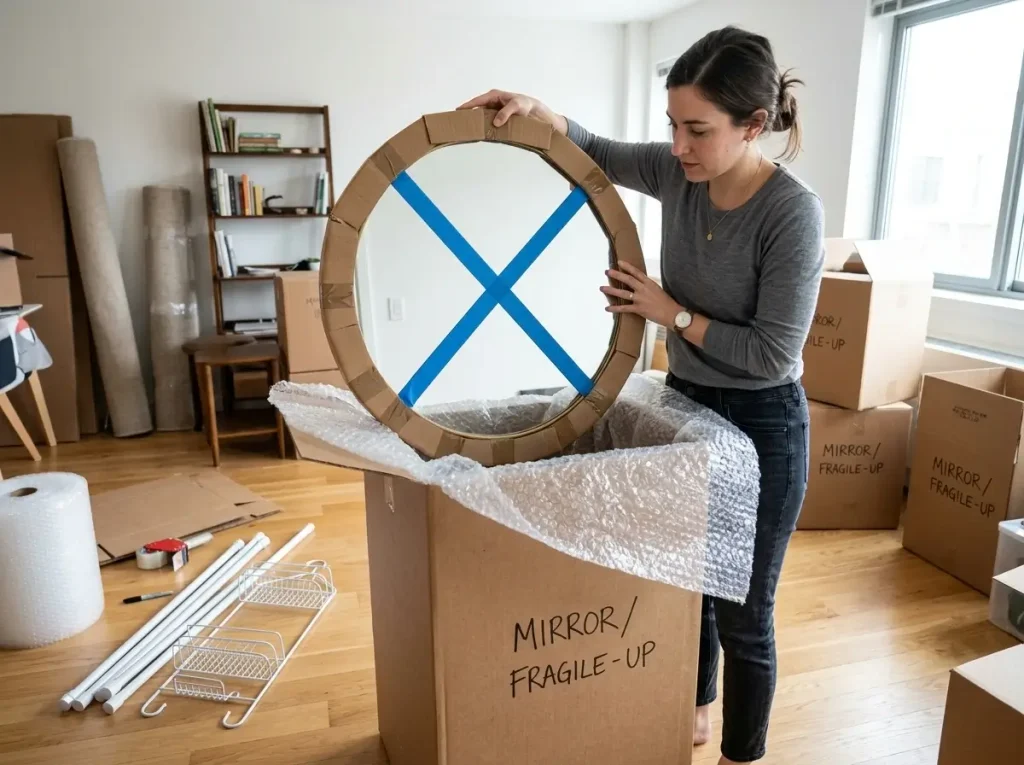
Tension rod shelves and rolling utility carts are the easiest storage units to disassemble because they require no tools to collapse.
Pack temporary mirrors by wrapping them in thick bubble wrap, securing the corners with cardboard protectors, and sliding them vertically between soft linens in a sturdy moving box.
When you prepare to reverse rental bathroom upgrades, dealing with bulky physical items often causes the most logistical headaches.
Unlike peeling off simple adhesive hooks, full-sized drill-free bathroom storage solutions and fragile decorative mirrors require a strategic breakdown and specialized packing materials.
Rushing this process usually results in cracked glass, lost assembly screws, or bent tension poles that cannot be reused in your next apartment.
Taking apart bathroom storage racks requires a methodical approach so you do not lose the small connective hardware or snap brittle plastic components. Here is how to tackle the most common temporary storage units:
- Tension Rod Shower Caddies: Because these rely on an internal spring, they are the easiest to take down. Firmly grasp the main vertical pole and twist it counter-clockwise to release the spring tension. Push down slightly to collapse the pole, then pull it away from the ceiling. Never force the plastic shelves off the metal pole. Instead, unclip the rubber O-rings underneath each shelf so they slide off smoothly.
- Over-the-Toilet Racks: These units are notoriously wobbly and require careful disassembly. Work from the top down, removing the highest shelf first. As you extract the Allen-wrench bolts, place them immediately into a heavy-duty ziplock bag. Tape this bag directly to the longest metal leg of the rack so the hardware stays inextricably linked to the furniture piece.
- Rolling Utility Carts: Empty all heavy liquid bottles first. Pull the caster wheels out of the bottom frame (most are friction-fit and simply require a firm tug). Stack the wire or plastic baskets inside one another to save space, and bind the vertical support poles together using heavy-duty rubber bands or zip ties.
To successfully reverse rental bathroom upgrades that involve large, fragile glass components—like temporary vanity mirrors or heavy acrylic shelving—you must change your packing orientation.
Never pack mirrors or glass shelves flat. When laid horizontally, any weight stacked on top will cause the glass to flex and shatter during transit. Instead, glass must always be transported vertically.
Follow this exact protocol for packing mirrors and glass:
- Tape the Glass (The “X” Method): Take a roll of blue painter’s tape and run strips diagonally from corner to corner across the face of the mirror, forming a giant “X”. If the mirror suffers an impact during the move, this tape holds the glass shards together, preventing a dangerous mess inside your box.
- Apply Cardboard Edge Protectors: The corners of a mirror are its most vulnerable structural points. Slide thick, heavy-duty cardboard corner protectors onto all four edges. If you do not have pre-made protectors, cut and fold scrap cardboard and secure it tightly with packing tape.
- Wrap and Box Vertically: Wrap the entire mirror tightly in two to three layers of heavy-duty, large-bubble cushioning. Slide the wrapped mirror vertically into a narrow specialty box. Fill any void space with soft bathroom towels or purchase proper moving boxes and bubble wrap to ensure the mirror cannot shift or lean inside the carton during transport.
What Are the Most Common Ways Renters Lose Their Deposit When Upgrading a Bathroom?
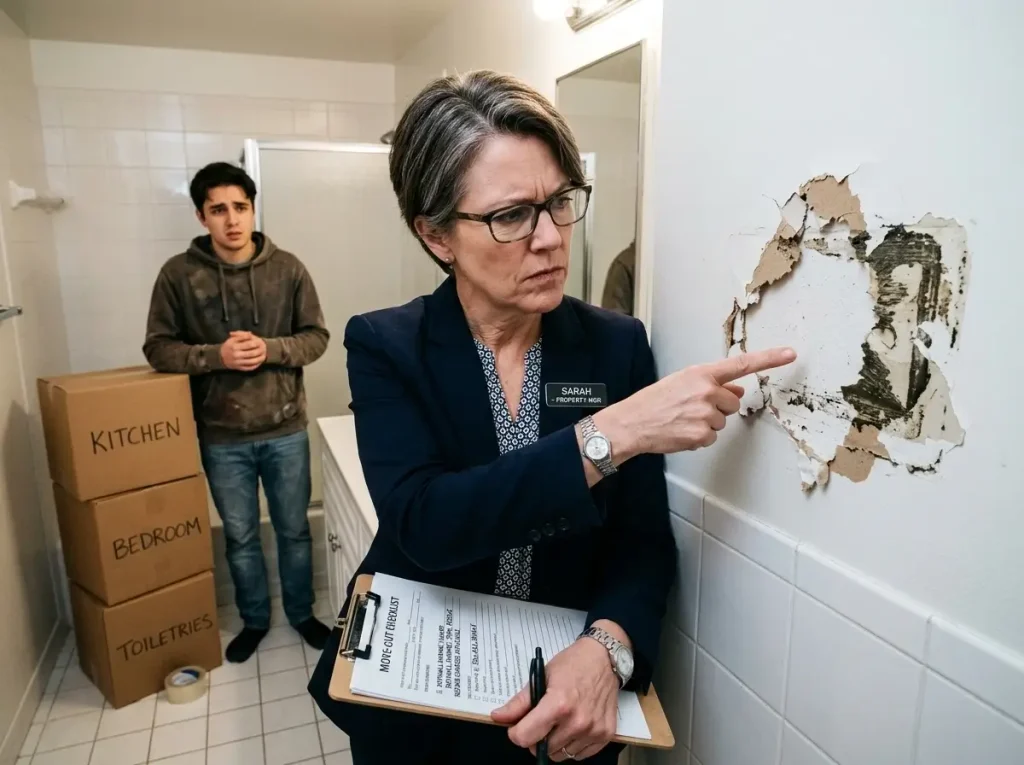
Renters most frequently lose their deposits by accidentally ripping drywall paper with improperly removed mounting strips, leaving hard water damage inside the original showerhead, or discarding the landlord’s original cabinet hardware.
Properly storing and reinstalling every original fixture is mandatory for passing your final move-out inspection.
When you set out to reverse rental bathroom upgrades, you are usually racing against the clock.
The stress of packing boxes, renting moving trucks, and cleaning floors often leads tenants to rush the teardown phase.
Unfortunately, property managers and landlords are specifically trained to spot the exact mistakes that rushed, exhausted renters make during move-out week.
If a landlord has to hire a professional handyman or commercial cleaner to fix your abandoned DIY projects, they will legally pull those funds straight from your security deposit, in strict accordance with your state’s security deposit deduction laws.
During the final walk-through inspection, landlords check for structural integrity, cleanliness, and the presence of original property. Here are the top three ways renters inadvertently forfeit their deposits:
- Top Deduction #1: Extensive Drywall Repair and Repainting This is the single most common penalty. If you do not reverse rental bathroom upgrades using the thermal release method discussed earlier, pulling heavy-duty double-sided tapes and vinyl tiles will rip the top layer of paper right off the drywall. Landlords do not simply touch up these torn patches. Because peeling paper cannot be painted over smoothly, they will charge you for a contractor to cut out the torn paper, apply joint compound, sand the wall flat, and repaint the entire wall corner-to-corner so the finish matches. This simple mistake easily costs between $150 and $300 in labor.
- Top Deduction #2: Replacing Lost or Corroded Original Fixtures When tenants upgrade to luxury rainfall showerheads, install modern matte black cabinet pulls, or swap out cheap plastic light switch covers, they often toss the original builder-grade fixtures into a damp cardboard box under the bathroom sink. By move-out day, those original fixtures are either severely rusted, missing vital mounting screws, or thrown away entirely. Even if a replacement builder-grade showerhead only costs the landlord $15 at a hardware store, they will charge you an additional $75 to $100 in maintenance labor to go buy it and install it.
- Top Deduction #3: Hidden Water Damage from Poor Reinstallation Swapping out plumbing fixtures, such as handheld sprayers and bidet attachments, is relatively easy, but incorrectly reinstalling the landlord’s original hardware often leads to slow, hidden leaks behind the wall. If you cross-thread the metal shower arm, forget to insert the small black rubber washer, or fail to apply fresh plumber’s tape, a slow drip will silently rot the drywall and breed mold over the following weeks. This can lead to catastrophic structural deductions that easily consume your entire deposit.
Before you even begin modifying your apartment, your absolute best defense against these hefty move-out fees is prevention.
Make sure you fully understand the strict boundaries outlined in our primary guide to risk-free rental bathroom renovations.
Knowing exactly what modifications are safe to install in the first place makes the inevitable move-out process infinitely smoother and far less expensive.
Conclusion: Final Thoughts on Reversing Rental Bathroom Upgrades
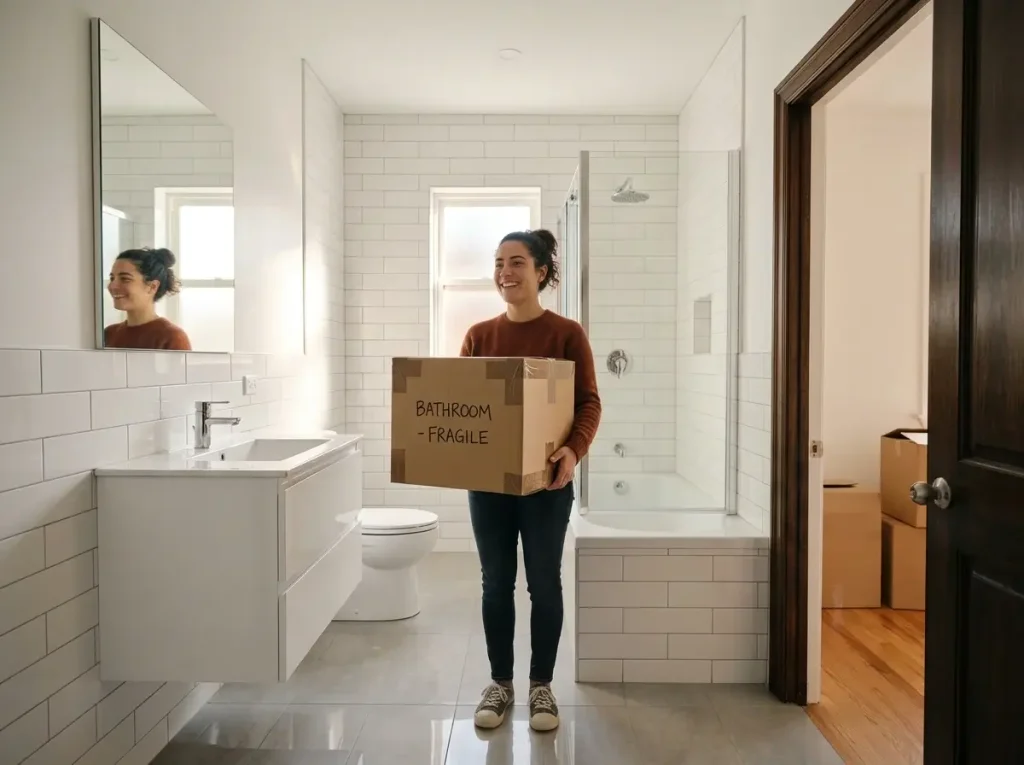
Successfully reversing your bathroom modifications comes down to patience, proper heat application, and knowing exactly where you stored the original fixtures.
Take your time during the teardown to ensure you leave the space exactly as you found it. If you found this move-out guide helpful, please share it with fellow renters preparing for their next big move!
When it is time to finally reverse rental bathroom upgrades, the physical labor is often less taxing than the mental stress of a looming move-out inspection.
The bathroom is heavily scrutinized by property managers because it contains the most expensive components in a standard apartment: active plumbing, sealed laminate cabinetry, and moisture-sensitive drywall.
Attempting to tear down custom mirrors, peel-and-stick tiles, and luxury showerheads in a rushed, frantic hour before you hand over the keys almost always results in careless damage.
By approaching the process methodically, you protect both the apartment and your wallet. To guarantee a flawless final walk-through, use this final teardown checklist before turning off the lights for the last time:
- Confirm All Plumbing is Leak-Free: Do not just swap the showerhead and walk away. Always run the water for a full two minutes after reinstalling the landlord’s original fixture. Shine a flashlight at the junction behind the wall pipe to ensure your new Teflon tape is holding back the water pressure perfectly.
- Perform the Tactile Wall Test: Do not rely strictly on your eyes to check for leftover glue. Run your bare hands over the drywall, vanity cabinets, and ceramic tiles where your temporary adhesives used to live. If you feel any sticky patches or a slick oily film from the chemical remover, scrub the area again with heavy-duty dish soap and hot water.
- Consolidate All Storage Hardware: Ensure that every Allen wrench, metal bolt, and rubber O-ring used for your drill-free storage units is sealed in a heavy-duty ziplock bag. Tape this bag securely to the largest piece of the disassembled unit so the hardware survives the chaotic transit in the moving truck.
- Verify Original Hardware Placement: Open every drawer and cabinet door to ensure the landlord’s original builder-grade pulls are reinstalled securely. Check the bathroom door stopper, the toilet paper holder, and the light switch plates to ensure nothing was accidentally packed away in your personal moving boxes.
- Wipe Down the Exhaust Fan: As a final touch of goodwill, use a dry microfiber cloth to wipe the dust off the bathroom exhaust fan cover. A pristine ceiling fan gives the property manager an immediate psychological impression that the entire bathroom was immaculately maintained.
Learning how to safely reverse rental bathroom upgrades is just as important as knowing how to install them in the first place.
Property managers appreciate tenants who respect the structural integrity of the space and return it exactly as it was leased.
Take a deep breath, follow the strict thermal and chemical teardown rules, pack your upgraded luxury fixtures safely, and walk into your final move-out inspection with total confidence.