
More than 400,000 Active Duty servicemembers face a Permanent Change of Station (PCS) every single year.
While military families are known for their resilience, the sheer volume of logistics can overwhelm even the most organized household.
The difference between a smooth relocation and a stressful nightmare usually comes down to when you start planning. A standard military move generally follows a 90-day framework.
You need a reliable system. By utilizing a phased pcs move timeline checklist, you can remove the guesswork, protect your entitlements, and break massive tasks down into actionable steps.
Phase 1: The 90-Day PCS Move Timeline Checklist (Planning & Orders)
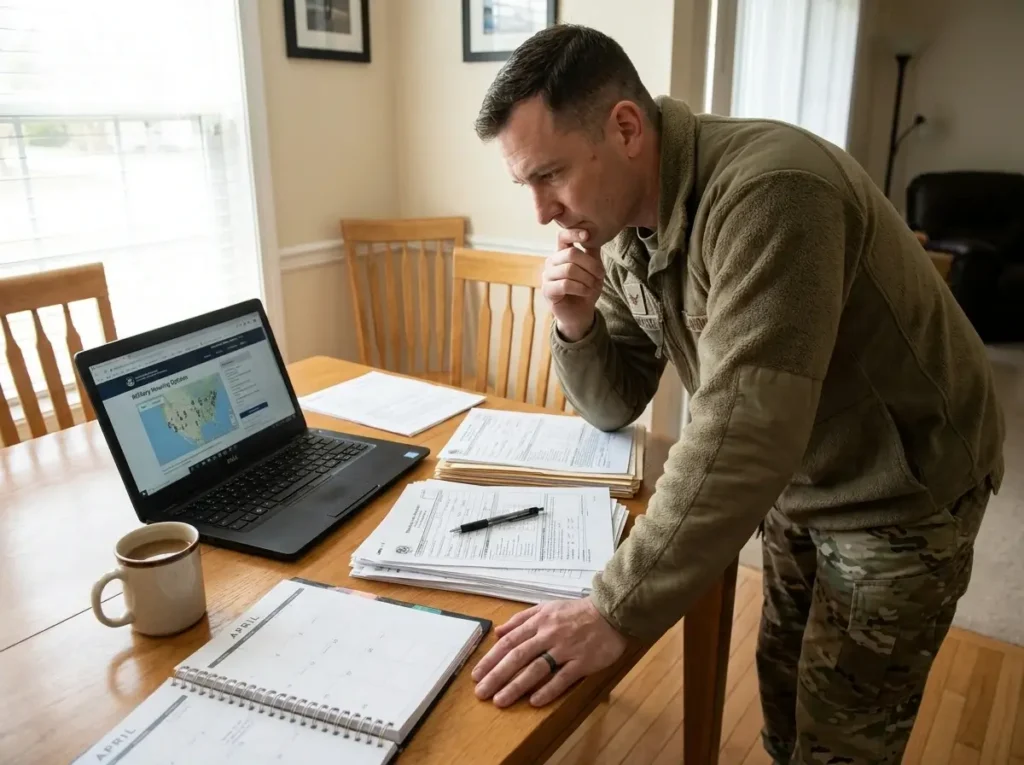
Receiving your official orders is the starting gun for your relocation. This is exactly where your pcs move timeline checklist begins in earnest.
With roughly three months to go, your focus should be entirely on administrative planning and big-picture decisions. Getting these early steps right prevents compounding stress later in the process.
Review and Process Your Orders Immediately
Before you start browsing real estate apps or packing boxes, review your military orders line by line. It is a common mistake to simply assume the government paperwork is flawless.
Check the exact spelling of your name and ensure all of your authorized dependents are explicitly listed. Verify your reporting dates, your current rank, and the precise gaining installation.
If you spot even a minor error, submit the document to your S1 or administrative team right away for amendments. You cannot schedule government movers, apply for base housing, or request travel advances without hard copies of accurate, funded orders. Delays here will stall your entire move.
Choose Your Relocation Strategy (HHG, PPM, or Partial)
Once your orders are finalized in the system, you must decide how your belongings will physically get from point A to point B. This is a critical junction in your pcs move timeline checklist, as it dictates how much physical labor you will be responsible for.
You generally have three primary options to consider:
- Government-Procured Move (HHG): The military hires contracted movers to pack, load, transport, and deliver your Household Goods. This is the most hands-off option, though it requires flexibility with scheduling.
- Personally Procured Move (PPM): Formerly known as a DITY (Do-It-Yourself) move. You rent the trucks, pack the boxes, and drive the route. The government reimburses you based on the certified weight of what you haul.
- Partial PPM: A highly popular hybrid approach. The government movers handle the bulk of your heavy furniture, while you get paid to haul a specific amount of weight (like your clothing, electronics, and valuables) in your personal vehicles.
Many seasoned military families find that a Partial PPM offers the best balance. It allows you to keep tight control over your high-value items while avoiding the exhaustion of driving a massive box truck across the country.
Start Your Destination Research
With your move type selected, shift your focus to your new community. The 90-day mark on your pcs move timeline checklist is the ideal time to gather intelligence on your gaining installation.
Start by looking up the current Basic Allowance for Housing (BAH) rates for your rank and new zip code. This figure dictates your entire housing budget.
Next, look into the base housing waitlists by contacting the destination’s housing office. Wait times can vary drastically—sometimes spanning several months—so getting your name on the list early is crucial to your timeline.
If you plan to live off-base, begin researching local neighborhoods. Cross-reference available rental properties with the local public and private school districts to ensure your children are situated in the right zones before school registration deadlines pass.
Note: If this is your very first time going through this process, the acronyms alone can feel completely overwhelming. Be sure to check out our first pcs move tips post for general advice on decoding military jargon and managing the initial emotional shock of moving.
Phase 2: The 60-Day Action Plan (Scheduling & Housing)

At the two-month mark, your relocation shifts from paperwork and research into physical preparation. This is often considered the most labor-intensive stretch of your pcs move timeline checklist.
By staying disciplined at 60 days out, you prevent a chaotic scramble during move week. Here is exactly what needs to happen during this critical phase.
Lock In Your Moving Dates in DPS
If you opted for a government-procured move or a partial PPM, you need to secure your transportation dates immediately. Log into the Defense Personal Property System (DPS) to request your preferred pack and pickup schedule.
Wait times for government-contracted movers can be notoriously long, especially during the peak summer PCS season. Many families find that waiting too long results in forced date changes or living in an empty house longer than expected. Complete your self-counseling module and get your preferred dates hard-coded into the system before the calendar completely fills up.
Execute a Ruthless Decluttering Strategy
The military dictates exactly how much weight you are allowed to move based on the sponsor’s rank and dependent status. Moving unnecessary items not only clutters your next house, but it can also push you over your weight allowance, resulting in hefty out-of-pocket fees.
Initiate a brutal, whole-house decluttering process now. Tackle one room at a time so the project doesn’t feel entirely overwhelming. Sort every single item in your home into four distinct categories:
- Keep: Essential items that fit your future lifestyle and new floor plan.
- Donate: Clothing and household goods in good condition that you no longer need.
- Sell: High-value items, appliances, or oversized furniture you can offload on local marketplaces.
- Trash: Expired pantry items, broken toys, and damaged goods.
Assemble Your Physical Relocation Binder
Technology is incredibly helpful, but physical paperwork is absolutely mandatory when crossing state lines or international borders. Building a robust physical document hub is a cornerstone of any successful pcs move timeline checklist.
Gather all critical physical documents and place them in a brightly colored binder or waterproof file box. This must include medical records, dental records, birth certificates, marriage licenses, and sealed school transcripts. If you have a family member enrolled in the Exceptional Family Member Program (EFMP) or a child with an Individualized Education Program (IEP), hand-carrying those documents is vital for a seamless transition of care.
Crucial tip: Guard this binder with your life. Keep it in your vehicle or a locked closet on packing day so it is never accidentally boxed up and shipped by the movers.
Finalize Your Current Housing Situation
You cannot fully focus on your new duty station until you have cleanly managed your current home. If you are renting, it is time to notify your landlord of your upcoming departure in writing.
As a military renter, you are legally protected by the Servicemembers Civil Relief Act (SCRA). This federal law allows you to break a residential lease without penalty due to military orders. However, you must still provide proper written notice—often 30 days, though you should verify your specific state laws and lease terms to ensure full compliance.
If you own your home, the 60-day mark on your pcs move timeline checklist is the absolute deadline to decide your next steps. You must determine immediately if you will sell the property or convert it into a rental, and hire a real estate agent or property manager while you are still local to handle the transition.
Phase 3: The 30-Day Finalization Window (Packing & Admin)

With just one month left, the pace of your transition will noticeably accelerate. At the 30-day mark on your pcs move timeline checklist, your focus must narrow to the immediate logistics of getting your family safely across the country or overseas.
The heavy administrative paperwork should be mostly behind you. Now, it is time to finalize the physical details of your actual transit.
Solidify Your Travel and Lodging Logistics
Now is the time to finalize exactly how you are getting from point A to point B. Map out your driving route carefully, taking note of safe daily mileage limits and potential weather delays.
If you are traveling with animals, map out pet-friendly hotels along your entire route. A common mistake many moving families make is assuming on-base hotels will always have room, only to arrive exhausted to a fully booked military lodge.
Book your temporary lodging well in advance to guarantee a place to sleep while you wait for housing. Depending on whether you are staying stateside or heading overseas, you will utilize either the Temporary Lodging Expense (TLE) or Temporary Lodging Allowance (TLA) to help offset these hotel costs. Because authorized reimbursement days can fluctuate based on your specific destination, you should always verify the current DoD allowance for TLE/TLA days before booking your final stays.
Prep Your Vehicles for the Road Trip
If you are driving to your next installation, your vehicle needs to be in peak physical condition. The middle of a heavily loaded military relocation is the worst possible time to deal with a mechanical breakdown on the highway.
Schedule routine vehicle maintenance right away. Get your oil changed, tires rotated, fluids topped off, and brakes inspected before you start packing the trunk.
Additionally, verify that your auto insurance policies and vehicle registrations are fully up to date. If your vehicle registration is expiring soon, renew it now. Some states and insurance carriers have strict rules about coverage during cross-country moves, so be sure to verify your auto insurance portability and out-of-state coverage limits with your provider.
Isolate “Pro Gear” and High-Value Items
As packing day approaches, you must physically separate specific categories of belongings inside your home. This is a highly strategic step on your pcs move timeline checklist to protect your weight allowances and your most prized possessions.
Designate a specific, clearly marked corner of a room for your “Pro Gear”—officially known as Professional Books, Papers, and Equipment (PBP&E). This category includes specialized reference materials, field gear, and sometimes even spouse professional equipment. Because this gear does not count against your total household weight limit, the packers must weigh and inventory it completely separately from your standard household goods.
Similarly, set aside high-value items like expensive electronics, fine jewelry, and rare collectibles. You will need to fill out a specialized high-value inventory form for the moving company to ensure these items receive proper tracking and liability coverage.
Handle Essential Healthcare Needs
Transitioning your healthcare between duty stations and TRICARE regions often takes longer than families anticipate. You need a solid medical buffer to ensure continuous care upon arrival.
Contact your current doctors and local pharmacies to request prescription refills for every single family member. Ask for a generous 60-to-90-day supply of all essential medications so you are fully covered throughout the transition phase.
Many beneficiaries find that getting established with a new Primary Care Manager (PCM) can take several weeks after arriving at a new base. By padding your medication supply now, you cross a massive source of anxiety off your pcs move timeline checklist.
Phase 4: Navigating Your PCS Move Timeline Checklist on Move Week
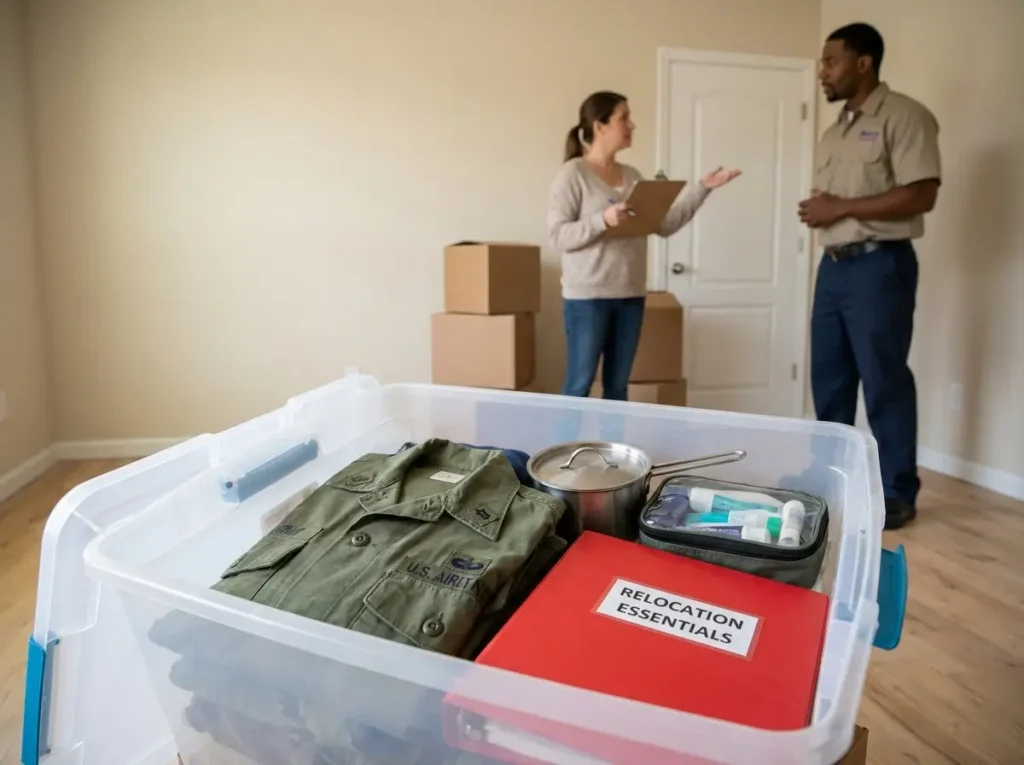
Move week has finally arrived. This is the moment when all of your early planning and administrative paperwork translate into organized, physical action.
Navigating the final days on your pcs move timeline checklist requires extreme focus and active management. You are officially transitioning from the planner to the on-site project manager. By establishing clear boundaries in your home, you can keep the loading process smooth and prevent catastrophic packing mistakes.
Pack Your Empty-House “Essentials Box”
Once the packing crew arrives, your home will quickly be stripped down to the bare walls. However, you still need a functional way to live during those final days before hitting the road.
Many families find that packing a dedicated “essentials box” is the key to surviving the empty house phase. This box should include everything you need to eat, sleep, and get dressed without having to dig through sealed cartons.
Be sure to purposefully set aside:
- Daily toiletries and toilet paper: The movers will pack your half-empty shampoo bottles and bathroom tissue if you let them.
- Required military uniforms: Do not risk having essential duty gear shipped away on the moving truck, which could delay checking in at your new command.
- Basic cookware and utensils: Keep a single pot, pan, and a few paper plates to manage meals without relying entirely on takeout.
- An air mattress and bedding: Ensure you have a comfortable place to sleep once your actual beds are disassembled and loaded onto the truck.
Enforce a Strict “Do Not Pack” Zone
Government-contracted movers work incredibly fast. If an item is sitting out in the open, you must assume it will end up wrapped in paper and tossed into a cardboard box.
To prevent logistical disasters, you must designate a strict “do not pack” zone before the crew even knocks on your front door. An empty bathroom with a locking door or the trunk of your personal vehicle are typically the safest locations.
Lock your physical relocation binder, your family’s travel suitcases, and all critical travel items in this secure space. Securing these items is arguably the most important physical safeguard on your pcs move timeline checklist.
Supervise the Packing and Loading Crews
When the moving company arrives, you cannot simply let them in and leave to run errands. You must actively supervise the entire HHG packout process from start to finish to ensure your belongings are handled appropriately.
Start by giving the packing crew chief a comprehensive tour of the home before a single box is taped. Be incredibly clear during this initial walk-through.
Point out explicitly what is going on the truck and what is staying behind (such as landlord-owned appliances or built-in shelving). If you have fragile heirlooms, large artwork, or glass tabletops, show them to the crew chief immediately so they can prep the necessary special crating.
Conduct the Final Property Walkthrough
Once the truck is fully loaded and the initial paperwork is signed, your first instinct will be to hit the highway. Resist that urge.
Before you officially hand over the keys to your landlord or the base housing office, you must conduct a meticulous final walkthrough. A common mistake during the chaos of move week is assuming the movers grabbed absolutely everything, only to leave behind valuable items in hidden areas.
Open every single drawer and check all kitchen and bathroom cabinets. Climb up to inspect the attic spaces, and walk outside to verify that the outdoor sheds and garage corners are completely empty. Completing this final, methodical sweep officially closes out the departing phase of your pcs move timeline checklist and clears you for travel.
Phase 5: Post-Move Settlement and Damage Claims

Arriving at your new duty station brings a massive sense of relief, but the work is not quite finished. The final phase of your relocation is about settling into your new community and protecting your physical assets.
Completing these closing tasks promptly is just as critical as your early planning. Here is how to navigate the post-move settlement phase of your pcs move timeline checklist.
Handle Official In-Processing and Travel Vouchers
The very first step upon arriving at your new installation is handling your official military in-processing. Report directly to your new command on or before your designated report date.
Update your contact information with your gaining unit so your leadership knows exactly how to reach you in case of an emergency. Next, register your family with the base ID card office and the Defense Enrollment Eligibility Reporting System (DEERS) to ensure continuous access to base facilities and commissaries.
Many servicemembers find that filing their travel vouchers immediately during this in-processing phase is the best way to secure prompt reimbursement for out-of-pocket road trip expenses.
Supervise the Delivery and Inventory Validation
When your household goods finally arrive at your new address, you must actively manage the unloading process. As the movers bring boxes into your home, systematically cross-reference every single delivered carton against the mover’s original inventory sheet.
A common mistake is allowing the crew to simply stack boxes in the living room without checking off the individual sticker numbers. If you do this, it becomes nearly impossible to prove if a carton was left behind at a transit warehouse.
Pay special attention to the high-value inventory sheet you created weeks ago. Require the moving crew to unpack those specific, expensive items on the spot so you can verify their condition before signing the final delivery paperwork.
Document and File Your Damage Claims
Unfortunately, damaged furniture or lost property is a frequent reality of military relocations. As you begin to unpack, meticulously document any broken items or missing boxes.
Take clear, well-lit photos of the damage, and keep all broken parts or crushed boxes as evidence. Immediately initiate your damage claims in the Defense Personal Property System (DPS) to trigger your Full Replacement Value (FRV) coverage.
You only have a specific, rigid window of time to file these initial notices of loss or damage. Because these timelines can shift based on current policy, always verify the exact number of days allowed by the DoD to submit your initial DPS loss and damage report to firmly protect your financial reimbursement rights.
Execute Widespread Address Updates
The final administrative hurdle on your pcs move timeline checklist is formally updating your geographic footprint across all civilian and military channels. Do not rely entirely on postal forwarding, as important tax documents or medical bills often fall through the cracks.
Take a dedicated afternoon to systematically change your mailing address with the following entities:
- Financial institutions: Update your banks, credit card companies, and auto loan providers.
- Healthcare providers: Contact TRICARE immediately to officially transfer your region and update your address so your medical coverage remains active and accessible.
- The Post Office: File an official change of address with the USPS to catch any lingering mail.
- Local schools: Provide your new lease or mortgage documents to local school districts to finalize your children’s enrollment.
Checking off these final administrative boxes officially completes your pcs move timeline checklist, allowing you to finally relax, unpack at your own pace, and enjoy your new home.
CONUS vs. OCONUS: Adjusting Your PCS Move Timeline Checklist

Not every military relocation follows the exact same rhythm. The geographic destination of your new duty station will fundamentally alter the intensity and length of your pcs move timeline checklist.
Understanding the difference between a domestic transfer and an international leap is critical to setting realistic expectations.
The Streamlined CONUS Relocation
Continental U.S. (CONUS) moves are generally the most straightforward to execute. Because you are staying within the lower 48 states, your planning will primarily focus on domestic logistics and ground transportation.
Your efforts will center on mapping out interstate driving routes, booking stateside temporary lodging along the highway, and managing a straightforward shipment of your household goods. In a CONUS move, you also have the freedom to execute a full or partial Personally Procured Move (PPM) to haul your own belongings.
While still physically exhausting, a standard 90-day window is usually plenty of time to prepare for this type of domestic transfer without feeling entirely overwhelmed.
Expanding Your Timeline for an OCONUS Move
Moving Outside the Continental U.S. (OCONUS) is an entirely different logistical beast. You must expand your pcs move timeline checklist significantly, as a 90-day window is rarely enough time to clear all international hurdles.
Many experienced military families find that preparing for an overseas tour requires starting the process up to six months in advance if possible. You must process complex international paperwork before you can even book a military flight or secure housing.
You will need to secure official “no-fee” government passports for all traveling dependents, alongside completing mandatory overseas medical and dental clearances. Furthermore, you must obtain Status of Forces Agreement (SOFA) paperwork or stamps to legally reside in the host nation. Delays in this paperwork will actively prevent your family from boarding the plane.
Managing Split Shipments and UAB
Unlike a stateside move where everything goes into one moving truck, an OCONUS relocation requires you to strategically split your belongings into multiple shipments.
Your main Household Goods (HHG) will be packed into wooden crates and sent by sea. Because ocean freight can take several months to reach locations like Germany, South Korea, or Japan, you must coordinate a separate Unaccompanied Baggage (UAB) shipment.
This much smaller UAB allocation is sent via air freight to arrive shortly after you do. You must pack this shipment very strategically with immediate essentials—such as seasonal clothing, basic pots and pans, a television, and critical baby gear—to bridge the gap until your main sea crate arrives.
Navigating Strict Pet Quarantine Rules
If you are bringing a dog or cat overseas, pet preparation must become your absolute top priority. You must begin researching country-specific pet quarantine rules the very moment you have soft orders in hand.
Many overseas locations, such as Hawaii, Guam, or Japan, are strictly rabies-free and enforce incredibly rigid entry requirements. These regulations almost always require months of specialized veterinary preparation. You will likely need updated microchips, highly specific rabies titer blood tests, and mandatory multi-month waiting periods before the animal is legally cleared for travel.
A common mistake is delaying these initial vet appointments, which can ultimately force families to leave pets behind with relatives or pay exorbitant quarantine boarding fees upon arrival. Because agricultural laws change frequently, you must always verify the exact destination country’s current quarantine regulations and timeline to keep your furry family members aligned with your overall pcs move timeline checklist.
Conclusion
Relocating your entire life is a massive logistical undertaking. But tackling it in strategic, time-blocked phases keeps the chaos at bay.
By following a strict 90/60/30 schedule, you protect your housing entitlements, prevent out-of-pocket costs, and maintain your sanity.
Bookmark this pcs move timeline checklist, start checking off those early planning tasks today, and set your family up for your smoothest transition yet.