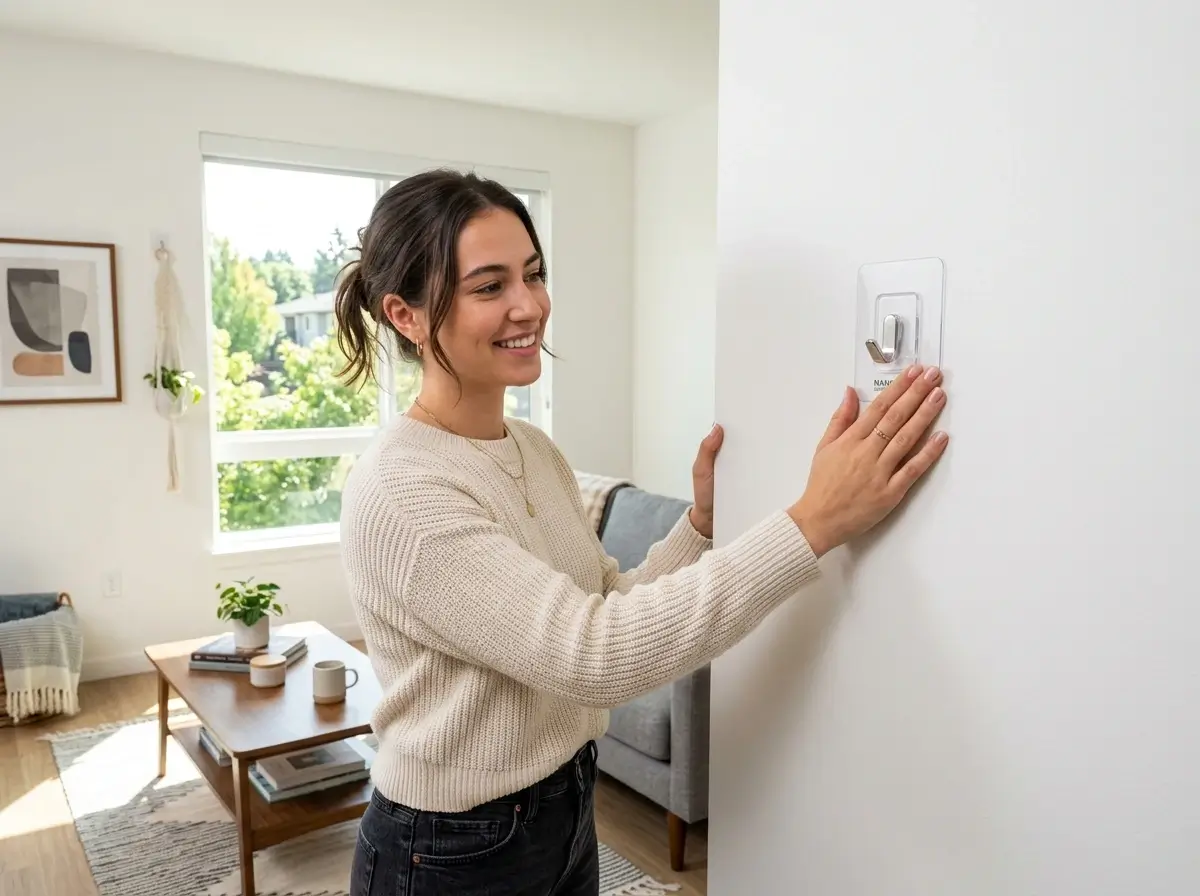
Losing your security deposit over a few drywall holes is a renter’s nightmare. But living out of moving boxes isn’t the answer, either.
If you want to maximize your apartment’s vertical space without angering your landlord, you need to master drill-free storage.
In this guide, we will show you exactly how to mount, hang, and secure heavy-duty storage systems without ever touching a power tool.
From high-capacity tension networks to foolproof adhesive removal techniques, here is your definitive blueprint for damage-free apartment organization.
The Short Answer: How to Safely Install Storage Without Drilling
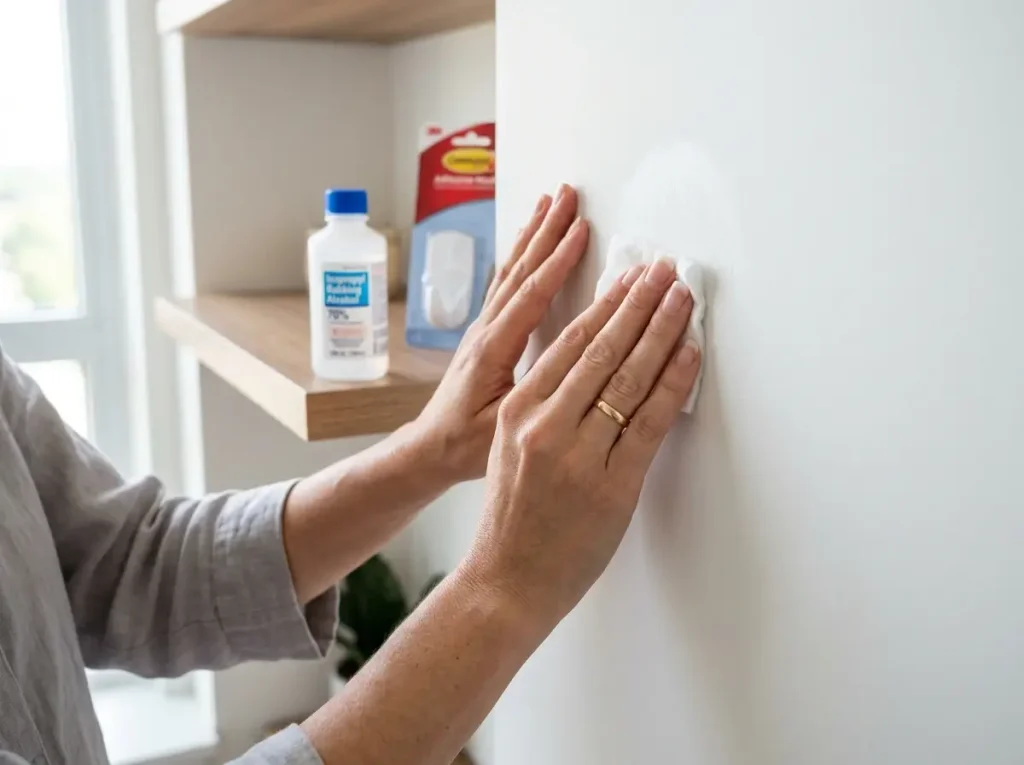
To safely install drill-free storage, rely on heavy-duty tension systems for load-bearing needs and high-quality adhesive mounts for lighter items.
Success requires proper surface preparation with rubbing alcohol, strict adherence to manufacturer weight limits, and using heat-assisted removal techniques to protect your drywall and save your deposit.
Renting an apartment often means signing a lease loaded with clauses protecting the pristine condition of the walls.
When you need to organize your space, reaching for a power drill is a surefire way to forfeit your hard-earned security deposit. However, avoiding permanent holes does not mean you are relegated to living out of cardboard boxes.
The engineering behind modern drill-free storage has advanced significantly. You are no longer limited to flimsy suction cups that fall in the middle of the night or weak putties that stain the paint.
By understanding the physics of tension and the chemistry of adhesion, you can mount surprisingly heavy organizational systems with total confidence.
To truly master these damage-free apartment storage strategies, you must adhere to three foundational pillars of installation:
- Surface Preparation is Non-Negotiable: The number one reason adhesive hooks fail is invisible wall grease and dust. Never skip the rubbing alcohol. You must vigorously clean the target area with 70% to 90% isopropyl alcohol and let it dry completely. Never use standard household glass cleaners or multi-purpose kitchen sprays, as they leave slippery, soapy residues that actively repel adhesive bonds and cause critical failures.
- Strict Adherence to Weight Thresholds: You must accurately weigh the items you intend to hang. If an adhesive strip claims an 8-pound maximum, aim for a 5-pound load to account for humidity fluctuations and dynamic force (the physical action of placing and removing items). Always check the manufacturer guidelines, such as the 3M Command weight limits, before trusting your valuables to an adhesive mount.
- Heat-Assisted Removal Protocols: Installation is only half the battle; proper removal is where deposits are lost. Cold adhesives tear drywall paper. Before removing any strip or hook, you must gently apply heat using a standard hairdryer on a low setting for exactly 30 seconds. This softens the polymer backing, allowing the adhesive to stretch cleanly parallel to the wall rather than gripping and tearing the landlord’s builder-grade paint.
When you rely on mechanical tension, you are leveraging the architectural strength of your floors, ceilings, and window frames.
High-capacity tension poles utilize screw-expansion mechanisms to lock tightly into place, offering robust support for heavy shelving without requiring a single nail. Conversely, adhesive systems distribute lighter weights across the surface area of your drywall.
By properly combining these two methods, you can build comprehensive, structural-feeling storage units.
Always prioritize tension for gravity-bearing heavy loads and reserve adhesives for lightweight, aesthetic hanging. This binary approach guarantees that your walls remain flawless from move-in to move-out.
How do I install floating shelves without leaving permanent holes in the drywall?
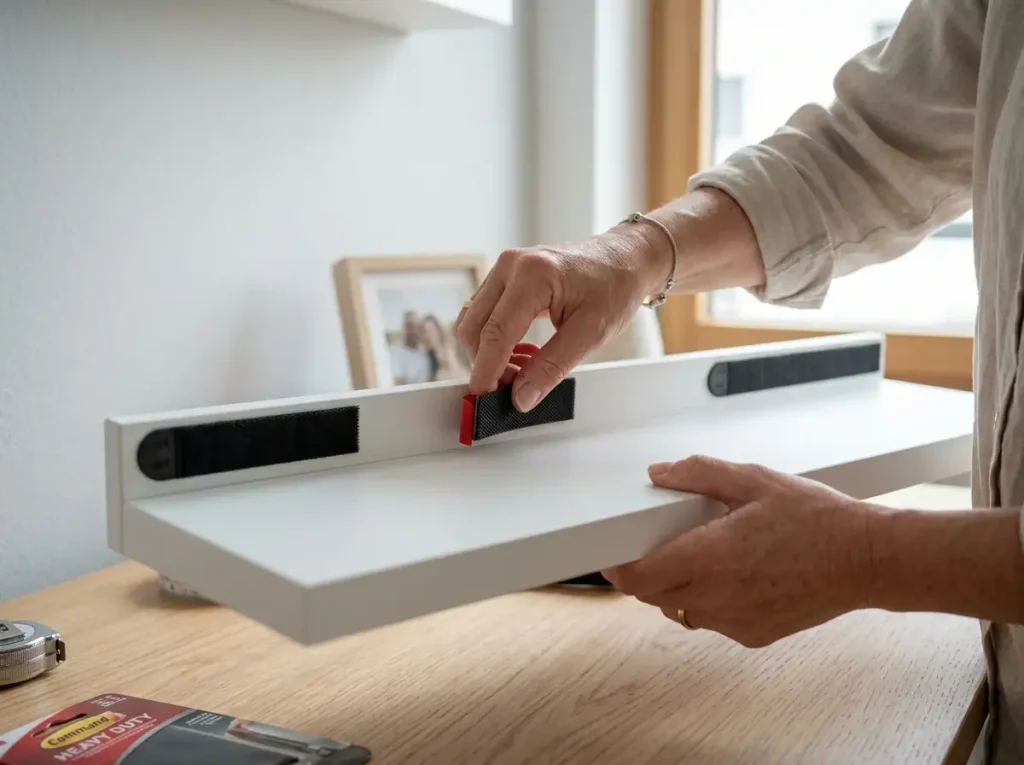
You can install floating shelves without a drill by utilizing specially engineered adhesive shelf brackets or heavy-duty interconnecting picture hanging strips.
Because shelves create outward leverage, you must use adhesives that distribute weight across a large, flat surface area.
It is absolutely critical that you wait exactly 24 hours after applying the adhesive before placing the shelf or adding any weight, strictly limiting your display to 5-10 pounds.
Achieving the sleek, modern aesthetic of floating shelves is the holy grail of apartment organizing, but it presents a unique physics problem for drill-free storage.
Unlike a picture frame that pulls weight straight down parallel to the wall (shear force), a shelf creates torque.
As you place an object on a shelf, especially near the front edge, it acts as a lever, actively pulling the top edge of the shelf away from the wall. This rotational force is why standard adhesive hooks will fail instantly if you attempt to balance a flat board on top of them.
To overcome this leverage and successfully integrate floating shelves into your drill-free storage plan, you must maximize surface area adhesion and respect the chemistry of the adhesive. Here is the precise, step-by-step methodology to mount aesthetic shelving securely:
- Assess the Wall Material: Not all apartment walls are created equal. You must first identify your interior drywall surface types. Adhesives perform optimally on flat, standard-painted drywall, high-gloss paint, or smooth tile. Do not attempt adhesive shelving on heavily textured plaster (like popcorn or heavy orange peel textures), exposed brick, or highly porous, matte-finish builder-grade paint that feels chalky to the touch. The adhesive simply cannot make sufficient microscopic contact with these uneven surfaces.
- Surface Decontamination: Vigorously wipe the targeted mounting area with 70% or 90% isopropyl alcohol. Let the alcohol completely evaporate for at least 5 minutes to ensure a perfectly dry, grease-free canvas.
- Apply the Mounting Hardware: If you are using specialized adhesive shelf brackets, press the adhesive plates firmly against the wall. If you are adapting a standard, lightweight floating shelf, apply heavy-duty interlocking strips (such as large picture hanging strips) vertically along the entire back edge of the shelf. Press the wall-side adhesive firmly against the drywall for at least 30 seconds per strip, applying heavy pressure to eliminate microscopic air bubbles and engage the polymer.
- The 24-Hour Cure Period: This is the most frequently violated rule in DIY renter projects. After sticking the brackets or the wall-side strips to the drywall, you must walk away for a full 24 hours. Do not attach the actual shelf body yet, and absolutely do not put any objects on it. The chemical bonds in the adhesive require a full day to cure and reach 100% of their maximum hold strength.
- Mount and Load Strategically: Once the 24-hour curing period has elapsed, snap the shelf into its adhesive brackets or press the interlocking strips together until you hear a distinct click. When styling the shelf, respect the hard, non-negotiable weight limit of 5 to 10 pounds total. To minimize outward leverage, place your heaviest items (like a small ceramic planter) at the very back of the shelf so they are physically touching the wall, and place only lightweight items (like photos or small paperbacks) near the front edge.
By understanding the physics of torque and respecting the chemical curing timeline, you can safely elevate your interior decor and display your favorite items without ever picking up a drill or sacrificing your security deposit.
Heavy-duty tension rods vs. adhesive hooks: Which is better for reliable, damage-free hanging?
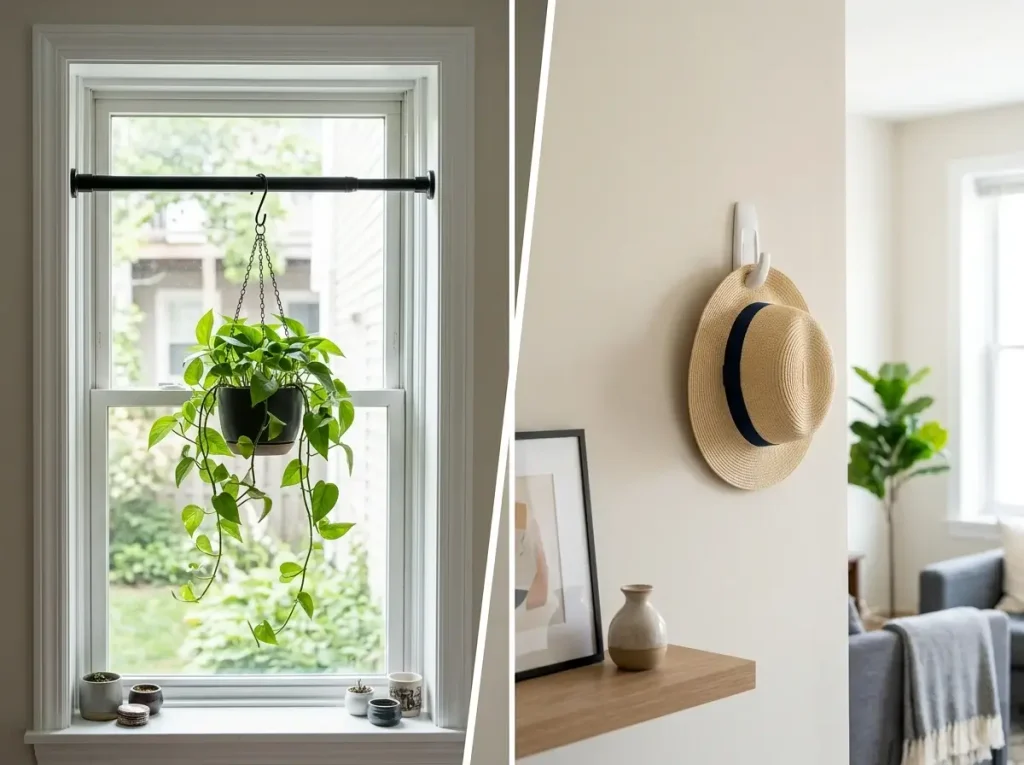
When engineering your drill-free storage system, choosing the correct hanging mechanism is the difference between a secure, long-lasting hold and a disastrous midnight crash that damages your belongings.
If you are directly comparing heavy-duty tension rods to adhesive hooks, the answer relies entirely on load capacity and environmental conditions.
Tension rods are structurally superior for heavy loads—safely handling up to 30 pounds horizontally—and thrive in humid or fluctuating environments.
Conversely, adhesive hooks excel on flat, open drywall for lightweight items strictly under 8 pounds, but they possess critical vulnerabilities to high moisture and textured paint.
To guarantee you never lose your security deposit, you must understand the exact physics behind mechanical pressure versus chemical adhesion.
The Power of Mechanical Pressure: Heavy-Duty Tension Rods
Tension systems do not rely on sticky residues or chemical bonds; instead, they utilize outward kinetic force to physically wedge themselves between two solid, parallel boundaries. This engineering makes them exceptionally reliable for load-bearing tasks.
A standard spring-loaded tension rod placed inside a window frame or securely between two close closet walls can easily support 15 to 30 pounds of static weight, such as heavy winter clothing or blackout curtains.
If you upgrade to a screw-expansion mechanism—where you manually twist the rod to lock and continuously increase the outward pressure—you can push that capacity even higher.
Because tension rods rely entirely on physical force, they are completely immune to the humidity effects on adhesives.
This makes tension the absolute best choice for bathrooms, shower stalls, laundry rooms, or over-sink window frames where steam and moisture are constant threats.
The Precision of Chemical Adhesion: Removable Hooks
Adhesive hooks are the most versatile option for expansive, open wall space, but they demand strict obedience to their physical limitations. A high-quality polymer adhesive strip creates a microscopic, surface-level bond with your paint.
Because this bond is only as strong as the top layer of paint itself, you should never exceed a strict 8-pound weight limit on a standard large hook, even if the packaging claims slightly higher.
You must also account for dynamic weight—the physical pulling force applied when you quickly yank a coat or towel off the hook.
Adhesives require flat, completely dry, and heavily climate-controlled environments to cure and survive.
If you place an adhesive hook in a bathroom that regularly fills with hot steam, the airborne moisture will inevitably penetrate the polymer backing, neutralize the chemical bond, and cause the hook to peel away.
Furthermore, adhesives cannot be used on highly textured walls (like heavy knockdown or popcorn finishes), as the bumps prevent the strip from making the necessary 100% surface contact.
Direct Comparison Matrix: Tension vs. Adhesion
To help you select the exact right hardware for every room in your drill-free storage setup, reference this detailed metric comparison:
| Feature / Metric | Heavy-Duty Tension Rods | Removable Adhesive Hooks |
| Primary Mechanism | Outward mechanical force | Surface-level chemical bond |
| Safe Static Weight Limit | 15 to 30 lbs (horizontal spans) | 1 to 8 lbs (depending on hook size) |
| Ideal Environment | Between walls, window frames, closets | Open drywall, dry rooms, entryways |
| Worst Environment | Wide, open wall spans with no anchors | Bathrooms, steamy kitchens, direct sunlight |
| Surface Requirements | Solid, parallel anchor points (wood/drywall) | Perfectly flat, smooth, clean surfaces |
| Humidity Tolerance | Exceptional (Immune to moisture changes) | Poor (Moisture breaks chemical bonds) |
By rigorously applying the correct method to the correct environment, your apartment organization will remain completely secure. The golden rule of renter organization is simple: never force an adhesive to do a tension rod’s heavy-lifting job.
Which tension-based storage systems actually hold the most weight without slipping?
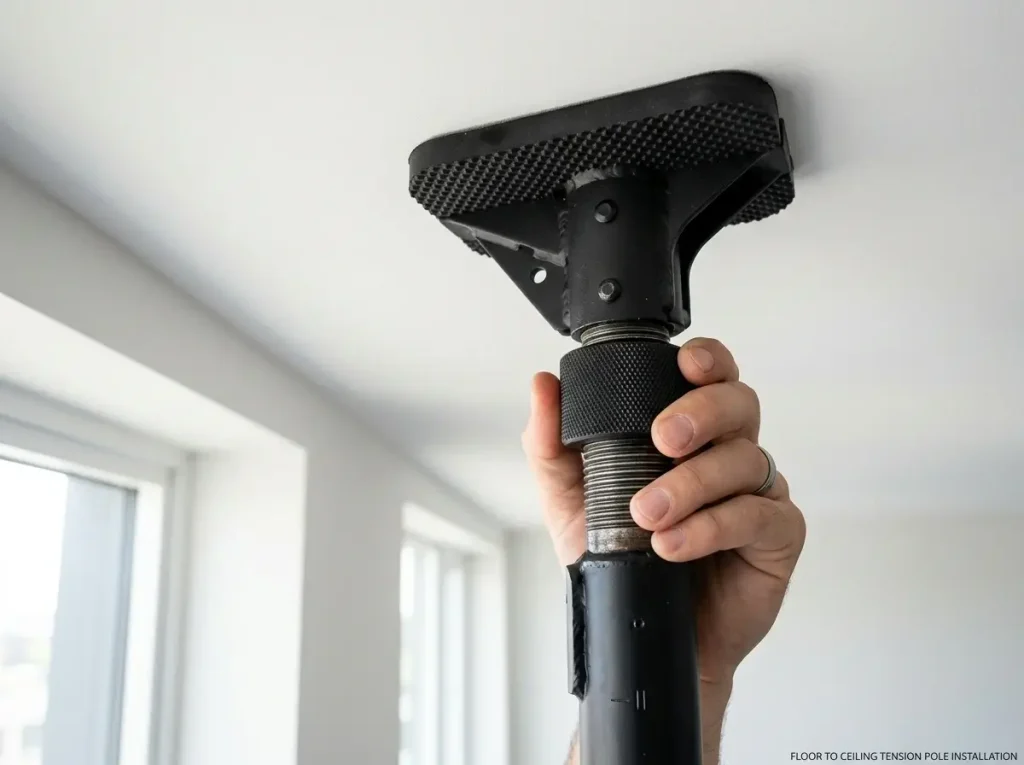
When you are trying to organize a small apartment, you will eventually hit the safe weight limits of standard horizontal rods.
To build a truly comprehensive drill-free storage system that can hold heavy winter coats, robust shelving, or even bicycles, you must upgrade to vertical floor-to-ceiling tension poles.
These heavy-duty vertical systems hold the most weight without slipping, often safely supporting up to 60 pounds of gear per pole because they transfer the physical load directly into the architectural solidity of your floors.
The secret to this massive load capacity lies in the internal engineering of the poles themselves. Standard, inexpensive window rods use simple spring-loaded mechanisms that continuously push outward.
While adequate for lightweight window treatments, internal springs fatigue and lose their elasticity over time under heavy, static loads. This leads to micro-slipping and, eventually, a collapsed wardrobe.
High-capacity systems abandon springs entirely and instead utilize screw-expansion mechanisms.
When you twist the outer casing of the pole, an internal threaded rod physically elongates the unit, locking it into place with unyielding mechanical pressure.
According to the principles of tension mechanism physics, this threaded expansion creates exponentially more kinetic friction against the anchor points than a compressed spring ever could, making slipping virtually impossible when installed correctly.
If you need to hang serious weight without damaging your apartment, these are the top-tier drill-free storage tension systems engineered specifically for maximum hold:
- Floor-to-Ceiling Wardrobe Systems: These utilize two or more vertical expansion poles wedged firmly between the floor and ceiling, bridged by horizontal hanging rods. Because the vertical poles transfer the gravitational downward force straight into the floor rather than pulling outward on the drywall, they can comfortably hold 50 to 60 pounds of heavy garments.
- Vertical Bicycle Mounts: Specialized tension poles designed to securely hold one or two adult bicycles inside an apartment. These use ultra-thick steel tubing and heavy-duty screw-expansion joints to wedge into place, easily supporting 40+ pounds of dynamic, awkwardly shaped weight without budging or tilting.
- Ratchet-Locking Horizontal Spans: If you must span a horizontal gap (like a wide closet frame or a hallway), you must look for rods that feature a ratcheting lock or a secondary tightening collar. Once extended to the proper width, you tighten this locking nut to freeze the threads in place, completely preventing the rod from telescoping back inward under a heavy load.
To guarantee these high-capacity systems never slip and cause catastrophic damage to your belongings, you must master the installation phase.
A tension pole is incredibly strong, but it is only as sturdy as the surface it is pushing against.
If you install a heavy-duty vertical pole directly under a thin, hollow section of drywall between the ceiling frame, the extreme upward pressure of the screw-mechanism can actually crack the ceiling before the pole achieves its maximum grip.
You must always locate a solid ceiling joist using a magnetic stud finder before tightening your vertical poles.
Furthermore, you must ensure your chosen system features thick, high-quality, non-marking rubber end caps.
These end caps serve two critical purposes: they protect the landlord’s floors and ceilings from permanent indentation or paint transfer, and they provide the vital surface friction needed to prevent lateral slipping.
By combining rigid screw-expansion engineering, solid architectural anchor points, and high-friction rubber footings, your drill-free storage setup can rival the structural strength of permanent, bolted-in furniture.
Why do adhesive hooks fail and tear off paint, and how can I properly remove them to avoid fees?
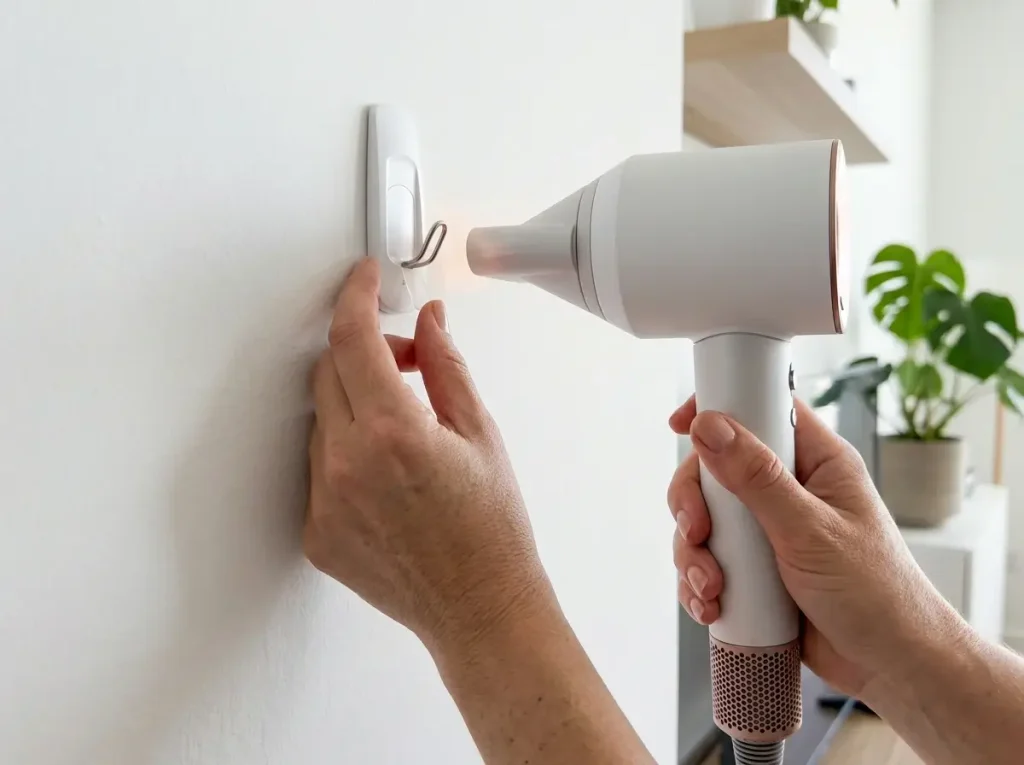
The ultimate goal of any drill-free storage system is to leave absolutely zero trace upon move-out. However, the most common nightmare renters face is pulling an adhesive tab, only to rip a massive chunk of drywall paper and paint right off the wall.
Adhesive hooks fail and tear paint for two primary reasons: improper physical removal technique (pulling outward instead of stretching downward) and attempting to bond to weak, chalky builder-grade paint.
Before applying any adhesive, it is crucial to understand that the chemical bond of the mounting strip is often stronger than the bond between the paint and the drywall itself.
Many rental properties are quickly sprayed with ultra-cheap, flat contractor paints that simply do not meet professional paint adhesion standards.
When you apply weight to these highly porous surfaces, the paint structure delaminates under the stress, pulling away from the wall and taking your hook down with it.
Assuming your paint is structurally sound, catastrophic damage usually occurs during the move-out phase due to user error. Standard removable adhesive strips are engineered using a highly stretchable polymer.
When you pull the tab straight down, the polymer stretches, the chemical bond breaks laterally, and it safely releases its grip.
If you pull outward—even at a slight 15-degree angle—the polymer acts like a vice grip, refusing to stretch and instead ripping the top layer of the wall completely off.
To safely dismantle your drill-free storage setup without forfeiting your security deposit, you must execute the following heat-assisted removal protocol:
- Empty and Expose the Hardware: Remove all weight from the hook or shelf. Do not attempt to remove the adhesive while the plastic hook or shelf bracket is still heavily loaded. If the hardware features a slide-off mechanism, push the plastic housing up and off the baseplate to fully expose the naked adhesive tab underneath.
- Apply the 30-Second Heat Rule: Never attempt to pull a cold adhesive strip. Cold polymers are incredibly brittle and stubborn, massively increasing the risk of tearing. Take a standard household hairdryer, set it to low or medium heat, and hold it roughly three to four inches away from the adhesive base. Move the heat back and forth for exactly 30 seconds. This gently warms the chemical composition, making the foam elastic and compliant without melting the plastic casing.
- The ‘Straight Down’ Stretch: Pinch the bottom removal tab securely between your thumb and index finger. Place your other hand flat against the plastic baseplate to stabilize it against the wall. Slowly, firmly, and steadily pull the tab straight down parallel to the wall. Do not pull toward your body. As you stretch the strip, it should elongate significantly—sometimes stretching up to 12 inches—before it quietly snaps off the wall with zero damage.
- The Dental Floss Backup Plan: Occasionally, an old or brittle tab will snap off flush underneath the baseplate, leaving you absolutely nothing to pull. Do not pry it off with a flathead screwdriver or a butter knife. Instead, grab a piece of standard waxed dental floss. Reheat the plastic baseplate with the hairdryer for another 30 seconds. Wrap the floss around your fingers, pull it taut, and gently saw it back and forth behind the top of the baseplate. The floss will cleanly cut through the warm adhesive foam until the plastic hook falls away.
- Clean the Residual Foam: If a thin film of sticky residue remains on the drywall after the floss trick, do not scrub it with a harsh kitchen sponge, as this will burnish the paint and leave a shiny bald spot. Gently rub the residue with your thumb; the friction will cause the adhesive to pill up and easily roll off.
By treating the removal process with the exact same precision and patience as the installation phase, you guarantee that your walls remain pristine from the day you sign your lease to the day you hand back your keys.
What are the worst DIY storage hacks that actually damage rental properties and cost you your security deposit?
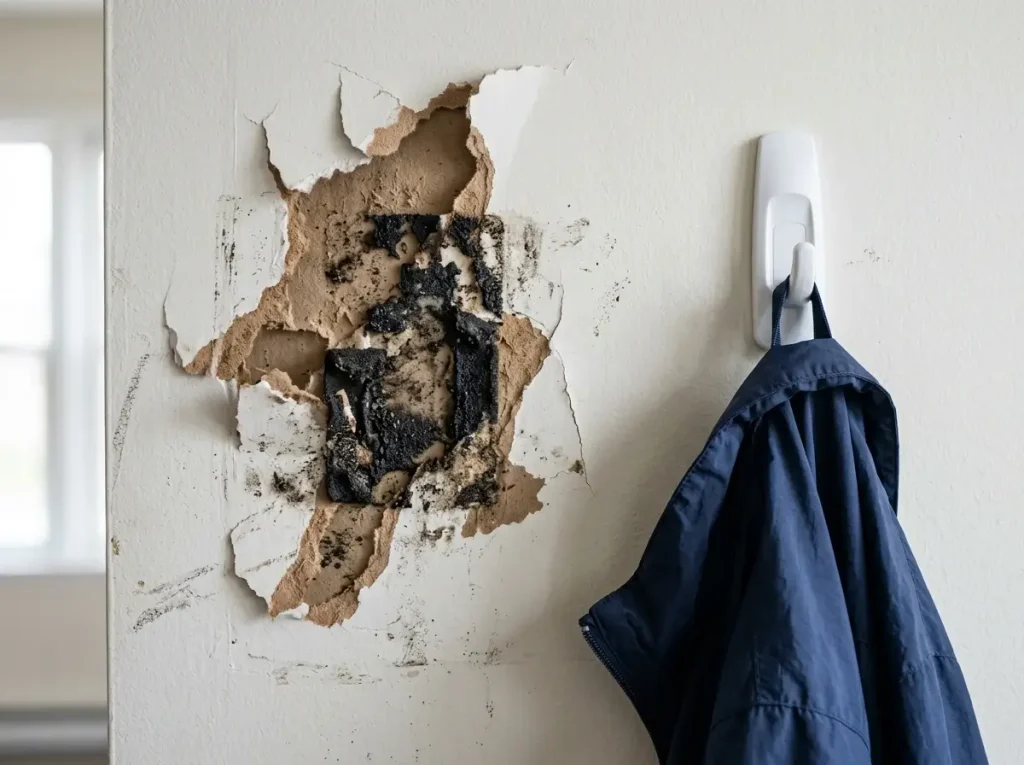
Social media is flooded with viral videos promising miraculous renter-friendly organization, but many of these shortcuts are actually catastrophic property damage disguised as clever life hacks.
When attempting to build a reliable drill-free storage system, desperation often leads renters to substitute proper, engineered hardware with cheap household items.
Unfortunately, landlords and property managers are highly trained to spot the aftermath of these viral trends, and they will absolutely deduct the costly drywall repairs from your security deposit.
If you want to protect your financial investment and keep your apartment walls completely intact, you must actively avoid these destructive, widely circulated DIY storage hacks:
- The Hot Glue Gun Illusion: A popular trend suggests using hot glue to stick lightweight baskets, acoustic panels, or plastic organizers directly to the wall. This is a guaranteed way to rip off your drywall paper. Hot glue creates a highly rigid, thermal bond. When the glue cools and hardens against builder-grade wall paint, it fuses the two surfaces together permanently. Attempting to peel or scrape the hardened glue off later will almost always tear straight through the paint layer and expose the brown gypsum paper underneath, requiring professional drywall mudding and sanding to repair.
- Permanent Double-Sided Mounting Tape: Not all double-sided tapes are created equal. Renters often confuse removable polymer strips with heavy-duty, permanent acrylic mounting tape (often sold in hardware stores as “VHB” or outdoor mounting tape). These permanent tapes are engineered for extreme weather resistance and automotive application. They do not stretch to release; they form a permanent chemical bond. Removing them usually requires chemical solvents like acetone, which will aggressively dissolve the landlord’s latex paint and leave massive, greasy, unpaintable stains on the wall. Always ensure your drill-free storage adhesive explicitly states it features a “stretch-release” or damage-free removable polymer backing.
- The Toothpaste Spackle Cover-Up: When a renter inevitably abandons proper tension methods, breaks out the power drill for a heavy shelf, and then tries to hide the damage upon move-out, they often resort to the classic “white toothpaste” trick. They squeeze minty paste into the screw hole and wipe it flat. Property managers spot this immediately. Toothpaste shrinks dramatically as it dries, leaving a noticeable concave divot. It also maintains a glossy sheen that clashes with flat wall paint, and it cannot be painted over without flaking. If a landlord discovers hidden holes, they will easily justify standard tenant repair deductions, charging you not just for the spackle, but for the professional labor required to properly patch, prime, and repaint the entire wall section.
- Clear Nail Polish as an Adhesive Reinforcement: Another terrible piece of internet advice involves using clear nail polish to “reinforce” weak suction cups or failing adhesive hooks. Nail polish is fundamentally a hardened enamel lacquer. When you apply it to a painted drywall surface, it acts as a permanent resin. When the hook inevitably falls due to weight overload, it will take a jagged, rigid plate of dried lacquer and wall paint down to the floor with it.
By strictly ignoring these viral “hacks” and adhering solely to scientifically engineered removable adhesives and heavy-duty mechanical tension systems, you completely eliminate the risk of accidental vandalism.
True renter-friendly organization requires patience and the correct materials, never dangerous chemical shortcuts.
Conclusion: Final Thoughts on Renter-Friendly Wall Storage
Securing your apartment belongings does not require sacrificing your security deposit.
By strategically combining heavy-duty tension systems for load-bearing needs and properly applied removable adhesives for lightweight decor, you can transform your entire space using drill-free storage.
If this guide helped you conquer your rental organization woes, please share it with fellow renters looking to organize their apartments damage-free!
Renting a home should not mean living in a state of temporary, chaotic compromise out of fear of property damage.
For decades, tenants have falsely believed that true structural organization required power tools, drywall anchors, and an inevitable, stressful fight with the landlord over deducted repair fees upon move-out.
The modern landscape of temporary organization has completely changed that narrative. As we have explored throughout this guide, the engineering behind non-destructive hardware has evolved far beyond the weak, unreliable suction cups and staining putties of the past.
When you commit to a comprehensive drill-free storage system, you are actually engaging in a strategic, calculated mix of basic physics and chemical application.
The ultimate key to long-term success is respecting the scientific boundaries of your hardware.
If you attempt to force a chemical adhesive to perform a heavy structural job, or if you install a mechanical tension pole against a weak, hollow architectural point, the system will inevitably fail.
However, when applied correctly, these renter-friendly methods rival the durability and aesthetic appeal of permanent fixtures.
Investing in high-quality screw-expansion tension poles and name-brand removable adhesive strips might cost slightly more upfront than cheap, permanent alternatives, but they act as a direct insurance policy for your security deposit.
Furthermore, unlike drilled-in shelving that you are forced to leave behind, your drill-free storage hardware is completely modular, scalable, and portable.
When your lease eventually ends, you can simply pack up your tension rods and reinstall the exact same organizational ecosystem in your next apartment, saving you immense time and money on your next move.
Before you begin your next weekend organization project, it is essential to review the foundational principles that guarantee a seamless, zero-damage installation. Master these renter-friendly storage rules, and you will never need to patch drywall or forfeit a deposit again:
- Respect the Weight Limits: Always calculate the weight of your items before hanging. Never max out an adhesive’s stated capacity, and always reserve your heaviest loads—like winter coats, heavy books, and adult bicycles—strictly for vertical floor-to-ceiling tension systems.
- Preparation is Everything: Isopropyl alcohol is your greatest ally. A microscopic layer of wall grease or dust is the number one cause of adhesive failure. Clean the surface thoroughly and let the alcohol evaporate entirely.
- Obey the 24-Hour Cure Time: Patience prevents catastrophe. Never load weight onto an adhesive strip or floating shelf bracket immediately after pressing it to the wall. The chemical polymers require a full day to reach their maximum bond.
- Heat is the Key to Removal: Cold removal guarantees torn paint. Always use a hairdryer on a low heat setting for exactly 30 seconds to soften the adhesive before pulling the stretch-tab slowly and steadily parallel to the wall.
- Avoid Viral Shortcuts: Reject the temptation of hot glue, heavy-duty automotive mounting tape, or the disastrous toothpaste spackle hack. True damage-free mounting requires scientifically engineered, removable hardware.
Living in an apartment doesn’t mean you have to surrender to a cluttered floor plan.
By methodically applying these tension and adhesion strategies, you can build a customized, highly functional home that leaves absolutely zero trace when it is time to pack up your boxes and hand over the keys.