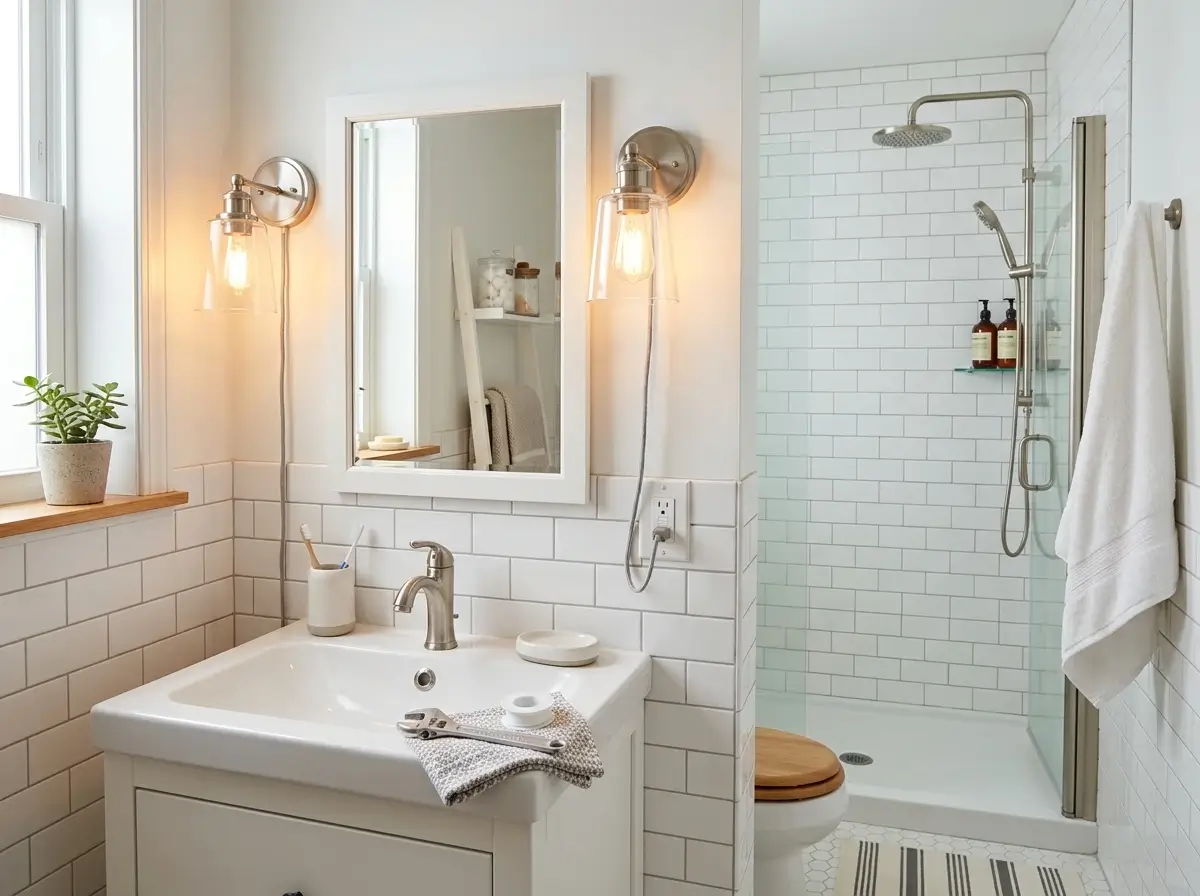
Stuck with a sputtering showerhead and harsh, yellow vanity lights in your apartment? You don’t have to live with builder-grade hardware just because you don’t own the property.
Upgrading your rental bathroom fixtures is one of the easiest ways to transform your daily routine without losing your security deposit.
The secret lies in reversible workarounds that completely avoid hardwiring electricity or altering plumbing pipes.
In this guide, we will show you exactly how to safely swap out your showerhead and install beautiful, functional lighting, all without calling a professional or angering your landlord.
The Short Answer: How to Safely Change Rental Bathroom Fixtures
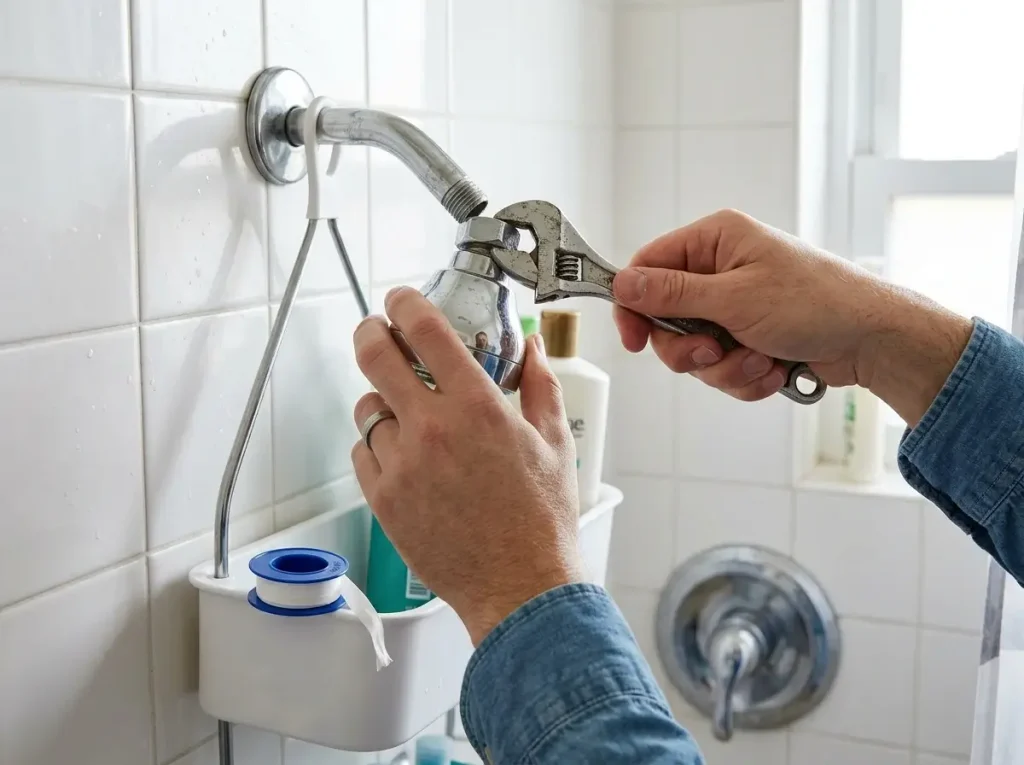
To safely upgrade your rental bathroom fixtures, exclusively use plug-in or battery-operated lighting to completely avoid electrical hardwiring, and swap the showerhead using an adjustable wrench and Teflon tape.
Always store the original landlord-provided hardware in a safe, dry place to reinstall before moving out, ensuring a full return of your security deposit.
When approaching any DIY project in an apartment, the stakes are directly tied to your wallet. Altering permanent systems can result in massive fines, loss of your deposit, or even eviction.
Therefore, upgrading your rental bathroom fixtures requires a highly strategic approach built strictly around reversibility. You are not renovating the property; you are simply instituting a temporary swap.
Before you unscrew a single lightbulb or attempt to unthread a shower arm, you must commit to the Two Golden Rules of Rental Upgrades:
Rule #1: Zero Wire Splicing (The Electrical Boundary)
You must never cut into the drywall to access structural wiring, and you must never attempt to splice a new light fixture into the existing electrical box.
Landlord-provided vanity lighting is notoriously harsh and uncomplimentary, but bypassing the internal wiring yourself is a severe fire and safety hazard.
Instead, you should rely entirely on plug-in wall sconces (concealing the wires with neatly managed, paintable cord covers) or high-lumen battery-operated LED light bars.
This strategy keeps your hands completely off the building’s electrical grid while dramatically improving the room’s overall ambiance and task lighting.
Rule #2: Zero Pipe Cutting (The Plumbing Boundary)
As a tenant, you are permitted to unscrew external attachments, but you must never cut, glue, or solder permanent plumbing pipes.
A standard showerhead replacement simply involves unthreading the old unit from the shower arm that projects from the wall.
You will need a basic adjustable wrench and fresh Teflon tape (also known as plumber’s tape) to ensure a watertight seal when attaching the new head.
If a fixture feels permanently seized to the pipe due to calcium buildup, do not force it—applying extreme torque can easily snap the pipe behind the drywall, leading to catastrophic internal wall flooding.
To keep your project completely damage-free, follow this strict checklist of Rental Hardware Do’s and Don’ts:
- DO clean the existing pipe threads thoroughly with an old toothbrush or wire brush before applying fresh Teflon tape.
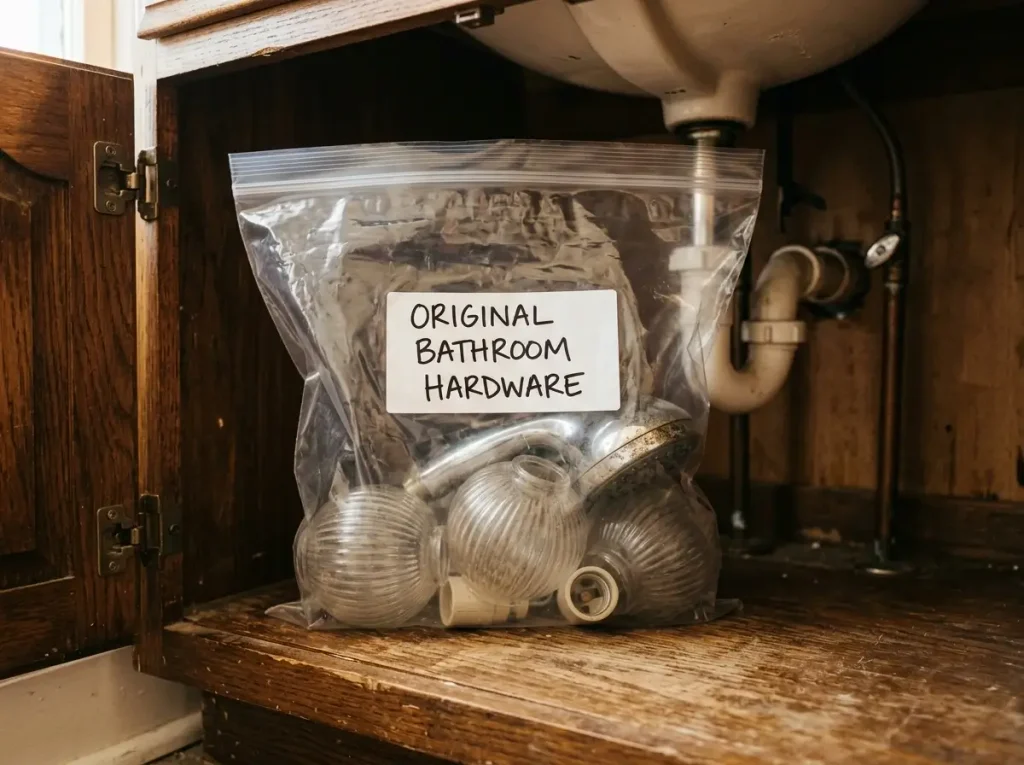
- DO label a heavy-duty storage bag with “Original Bathroom Hardware” and store the landlord’s old showerhead and light covers safely beneath the sink or in a closet.
- DON’T throw away any original components, no matter how cheap, ugly, or calcified they are. You will absolutely need to reinstall them to pass your move-out inspection.
- DON’T use permanent construction adhesives to mount lightweight, battery-operated fixtures. Stick strictly to heavy-duty, moisture-resistant Command strips or tenant-friendly adhesive hooks.
- DO check out our ultimate guide to upgrading a rental bathroom to see how swapping your hardware fits seamlessly into the larger picture of transforming your entire space without losing your deposit.
By strictly adhering to these mechanical and electrical boundaries, you can effectively modernize your daily routine.
The end goal is to build a highly functional, spa-like environment that feels premium and permanent to you, but completely vanishes without a trace the moment your lease ends.
How do I fix bad bathroom lighting without rewiring?
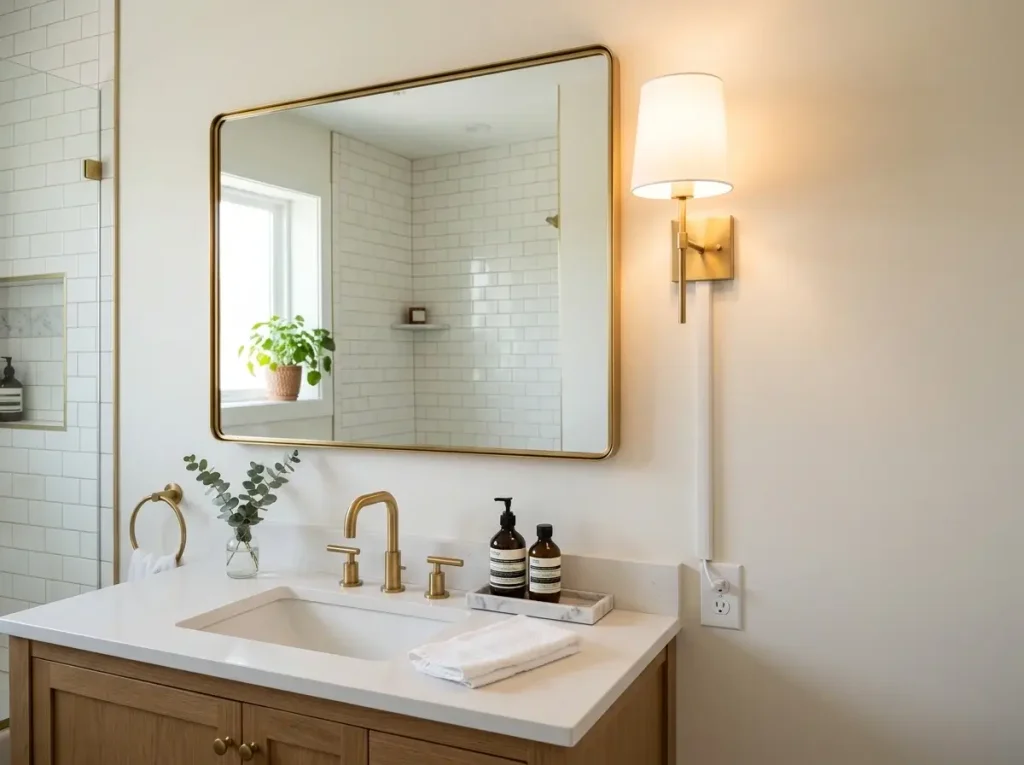
You can fix bad bathroom lighting without rewiring by utilizing plug-in wall sconces with cord covers, installing battery-operated LED light bars over the mirror, or simply swapping existing harsh bulbs for damp-rated LED bulbs with a 3000K to 4000K color temperature for a flattering, natural glow.
Overcoming a dark, cavernous apartment bathroom requires a layered approach that bypasses the structural electrical box completely.
When it comes to updating your rental bathroom fixtures, tackling the lighting is usually the most intimidating part.
However, by following this specific three-step sequence, you can drastically improve your bathroom’s illumination without ever touching a wire cutter:
1. Master the Bulb Swap (Color Temperature Control)
Before you buy new hardware, examine the bulbs in your existing, landlord-provided vanity light. Property managers often install cheap, mismatched bulbs that cast terrible shadows. Swap them all for damp-rated LED bulbs.
The secret to perfect grooming and makeup light is mastering the Kelvin (K) scale. Aim strictly for 3000K to 4000K—often labeled as “Soft White” or “Bright White.”
This specific range mimics natural daylight, preventing the sickly, sallow yellow cast of 2700K or the harsh, blue hospital glare of 5000K.
For more details on dialing in the right hue, you can reference this helpful breakdown on understanding LED color temperatures.
2. Install Plug-In Sconces with Paintable Cord Covers
If the existing overhead fixture is completely beyond saving, simply leave it turned off. Instead, flank your mirror with plug-in wall sconces.
These act as beautiful, modern rental bathroom fixtures that draw power directly from your existing GFCI vanity outlet.
To make them look fully hardwired and custom, run the cables through adhesive plastic cord concealers.
Stick the concealers to the wall using renter-friendly adhesive strips, and paint them the exact same color as your bathroom wall.
This lighting trick instantly elevates the whole room, pairing perfectly with other cosmetic upgrades, like covering up an ugly vanity without replacing it.
3. Deploy Battery-Operated Light Bars for Flexibility
If your vanity area lacks an available outlet, or the cord run would be too messy, battery-operated LED magnetic light bars are your safest bet.
Warning: Do not use the permanent foam VHB tape that typically comes included in the box, as it will tear the drywall paper straight down to the gypsum upon removal.
Instead, mount the lightweight magnetic backing plates directly to the wall or mirror frame using Command Heavy-Duty Picture Hanging Strips or removable silicone adhesive dots designed specifically to peel away cleanly from painted apartment walls.
Plug-in sconces vs. battery-operated puck lights for bathroom vanity lighting?
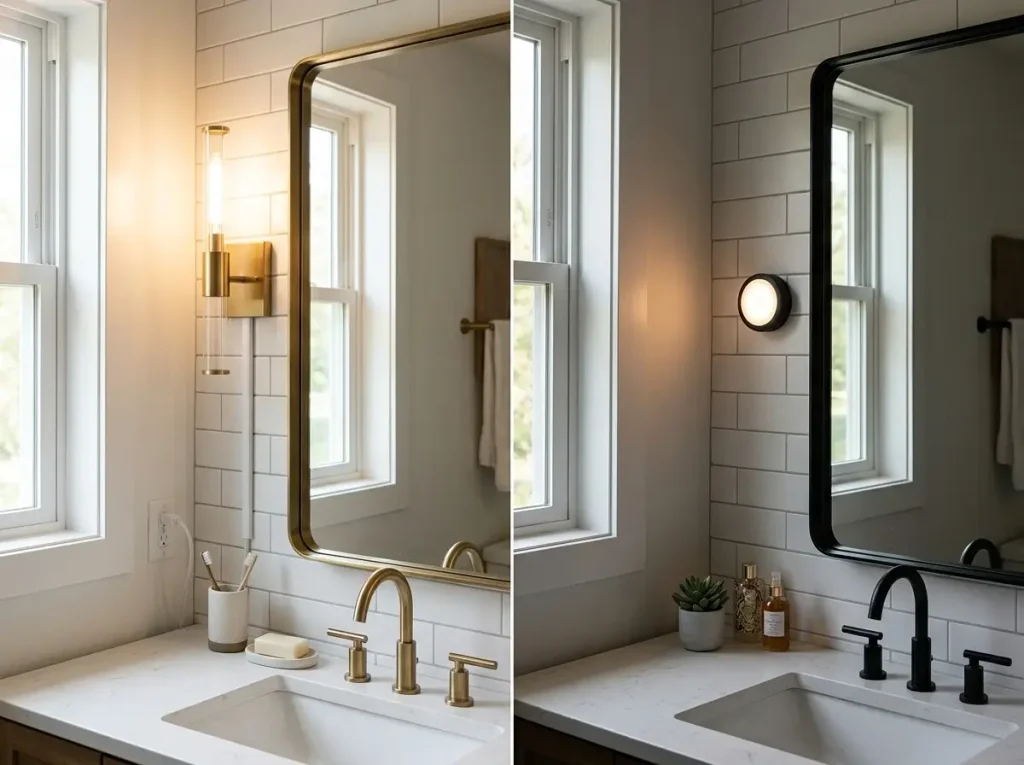
Plug-in sconces provide brighter, continuous light ideal for precise makeup application, but strictly require a nearby electrical outlet.
Battery-operated puck lights offer ultimate placement flexibility and seamless, cordless aesthetics, but they require frequent recharging and often lack the total lumen output necessary for detailed daily grooming tasks.
Choosing between these two specific rental bathroom fixtures ultimately depends on your daily routine priorities: uncompromising brightness or a completely wire-free aesthetic.
Since apartment bathrooms rarely feature perfectly placed electrical junction boxes behind the drywall, renters must bypass the internal wiring entirely. Let’s break down exactly how these two reversible lighting methods compare structurally and functionally.
Plug-In Sconces: The High-Output Choice
If your morning routine involves detailed shaving or precise color-matching for makeup, you require high, sustained visibility.
Plug-in wall sconces are the superior functional choice because they draw continuous power directly from a standard 120V US bathroom outlet. This means you can equip them with powerful, damp-rated LED bulbs that easily push 800 to 1,200 lumens per fixture.
The primary challenge with plug-in units is the visual clutter of cord management. Because you cannot fish wires behind the apartment drywall, the power cord will drop visibly from the base of the fixture down to your vanity outlet.
To solve this elegantly, you must run the wires through rigid plastic cord concealers.
When painted to match your exact wall color, these tracks practically vanish, giving you the high-end, custom look of hardwired rental bathroom fixtures without risking a deduction from your security deposit.
Furthermore, positioning two plug-in sconces at eye level on either side of the mirror is the most effective way to eliminate harsh, downward under-eye shadows.
Battery-Operated Puck Lights: The Cordless Solution
For tenants dealing with older buildings—where bathrooms often feature awkwardly placed outlets or lack a vanity GFCI outlet entirely—battery-operated puck lights (or magnetic LED light bars) offer an immediate, drill-free solution.
Because they rely entirely on internal lithium-ion batteries or standard AA/AAA cells, you have 100% freedom in where you mount them.
However, the functional trade-off is significant. Most battery-powered LEDs max out between 150 and 300 lumens.
This is enough for ambient mood lighting or navigating the space at night, but it is often grossly insufficient for precision grooming.
Furthermore, if you use them heavily, you will find yourself constantly dismounting the fixtures to recharge them via USB-C or swap out dead batteries.
When installing these, never use the factory-included foam VHB tape, as it will tear the drywall paper; stick strictly to heavy-duty, removable adhesive strips.
Direct Comparison: Which is Right for Your Space?
To determine the best fit for your specific vanity setup, review the technical comparison below:
| Feature | Plug-In Sconces | Battery-Operated Puck Lights / Bars |
| Power Source | Standard 120V wall outlet (continuous) | Internal rechargeable or AA/AAA batteries |
| Lumen Output | 800 – 1,500+ lumens (dependent on bulb) | 150 – 300 lumens (fixed by manufacturer) |
| Installation Difficulty | Moderate (requires routing/mounting cord covers) | Easy (simple peel-and-stick or magnetic mount) |
| Best Use Case | Primary task lighting (makeup, shaving) | Ambient lighting, decorative accents, no-outlet zones |
| Pros | Consistent brightness, no recharging, supports standard bulbs | Zero cords, infinite placement options, installs in seconds |
| Cons | Visible cord (needs concealer), ties up an outlet | Dimmer output, requires frequent recharging/battery swaps |
Before purchasing either option, inspect your vanity area.
Measure the exact distance from your mirror edge to the nearest outlet to ensure the plug-in cord will reach without creating a tripping hazard, or verify that your chosen battery light features a quick-release magnetic base for easy, daily removal.
Which temporary lighting solutions work best in wet bathroom environments?
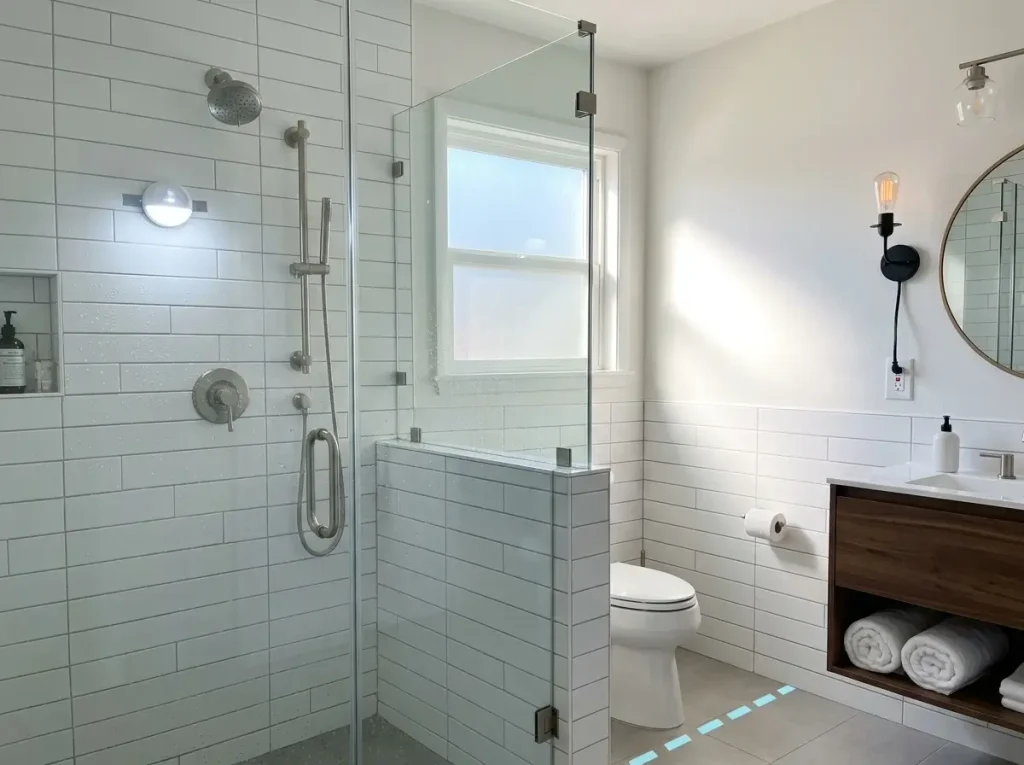
In wet bathroom environments, always look for temporary lighting solutions with an IP44 rating or higher, which indicates a certified resistance to splashing water from all directions.
Damp-rated battery LEDs are safe for shower niches, while plug-in rental bathroom fixtures must strictly be kept at least 3 feet away from the tub or shower basin to prevent severe electrocution hazards.
When upgrading your apartment’s lighting, water and electricity are a disastrous and potentially lethal combination.
You cannot simply grab a standard cheap puck light or bedside lamp from your bedroom and bring it into the washroom.
The safety of your rental bathroom fixtures relies heavily on understanding and utilizing the Ingress Protection (IP) rating system.
The first digit in an IP rating represents dust resistance, while the second, more critical digit represents water resistance. An IP44 rating is the absolute minimum standard for humid bathroom environments.
However, if a fixture might sustain a direct spray of water—such as a light mounted inside a shower enclosure—you must look for a minimum of an IP65 rating (water jet resistant).
When buying battery-operated units for high-humidity areas, opt for devices with dedicated rubber gaskets around the battery compartment.
Steam is incredibly insidious; without a proper silicone or rubber seal, the daily condensation will bypass the cheap plastic casing and rust the internal alkaline batteries, ruining the fixture within months and potentially leaking dangerous battery acid onto your rental property surfaces.
Furthermore, standard US National Electrical Code (NEC) guidelines dictate strict safety zones for electrical fixtures in wet rooms. You must treat your temporary, reversible lighting with the exact same respect and caution as hardwired electricity.
To safely plan your temporary lighting layout, you must divide your bathroom into specific moisture zones. (For a deeper understanding of these structural parameters and hardwiring laws, review this expert guide on bathroom electrical safety zones.
Here is exactly how you should categorize and position your temporary fixtures based on standard bathroom wet zones:
- Zone 0 (Inside the tub or shower base): This area is completely submerged. Strictly no plug-in devices are permitted under any circumstances. If lighting is necessary here, you should only use fully waterproof, submersible battery-operated LEDs (IP67 or IP68 rated), though they are rarely necessary for daily grooming.
- Zone 1 (Directly above the shower/tub up to 7 feet): This area is highly susceptible to direct water spray. Again, no plug-in cords are permitted. Stick exclusively to heavy-duty, battery-operated sealed puck lights with an IP65 rating if you absolutely must add light to a dark shower stall. Mount them with waterproof silicone adhesive dots, as standard foam tape will quickly fail in the humidity.
- Zone 2 (The area immediately surrounding Zone 1, extending 2 feet out, and the radius around the vanity sink): This zone experiences high ambient humidity and occasional splashing. Here, IP44-rated fixtures are ideal. If you are using plug-in wall sconces near the sink, the cord and the fixture base must remain a minimum of 3 feet (36 inches) horizontally from the edge of the bathtub or shower threshold.
- Zone 3 (General ceiling and areas outside Zones 0-2): This covers the rest of the bathroom space. While direct water splashing is unlikely, ambient steam from hot showers is guaranteed. Any temporary lighting used here should still be explicitly marked as “damp-rated” by the manufacturer to prevent internal corrosion over time.
By strictly adhering to these IP ratings and clearance distances, you ensure that your cosmetic upgrades never compromise the structural safety of the apartment or your personal well-being.
How to change a showerhead in a rental apartment without breaking the pipe?
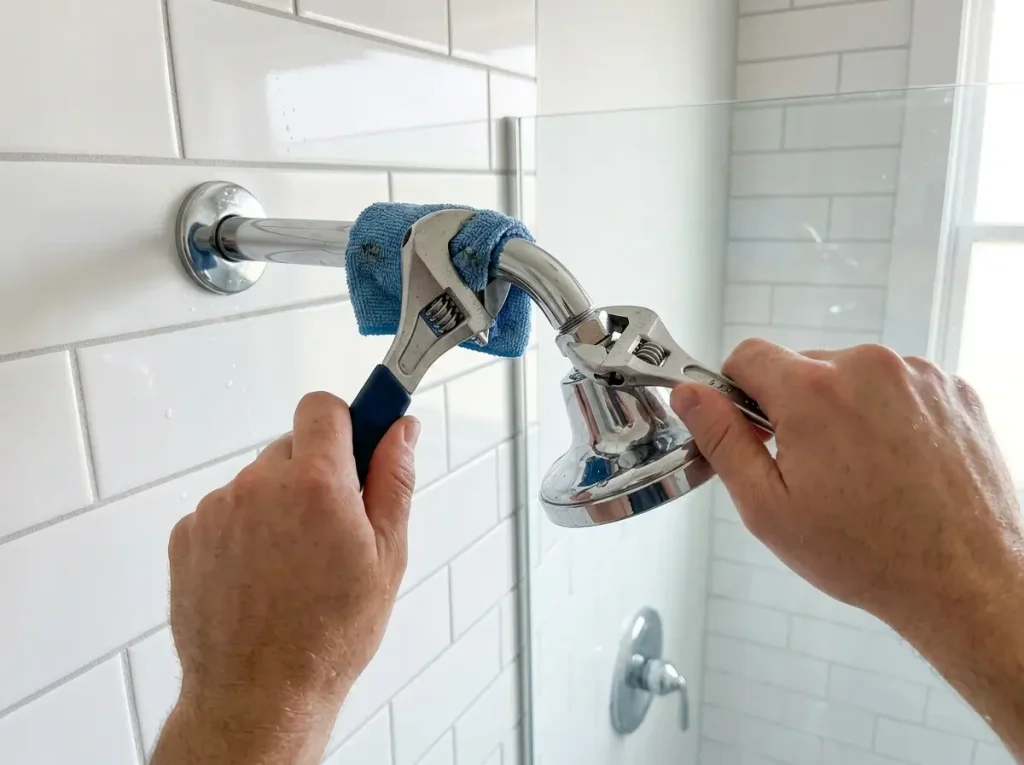
Replacing the crusty, low-pressure showerhead your landlord provided is arguably the most satisfying upgrade you can make to your daily routine.
However, swapping out plumbing-based rental bathroom fixtures carries a unique, high-stakes risk: if you apply too much torque and snap the shower arm behind the drywall, you are liable for catastrophic internal water damage.
To execute this upgrade safely, you must utilize proper mechanical leverage rather than brute force. Furthermore, choosing the right replacement can dramatically improve your bathroom’s functionality.
For instance, upgrading to a showerhead with a detachable handheld wand not only makes cleaning the tub much easier, but it also frees up valuable vertical space on the shower wall for drill-free bathroom storage caddies.
To safely remove the old unit and install your new hardware without risking a plumbing disaster, follow this precise sequence:
1. Plug the Drain and Prep the Area
Before you begin, place a thick washcloth flat over the shower drain. When removing plumbing components, tiny rubber O-rings, mesh filter screens, or rusted metal flakes frequently drop; the washcloth guarantees nothing falls down the drain to cause a clog.
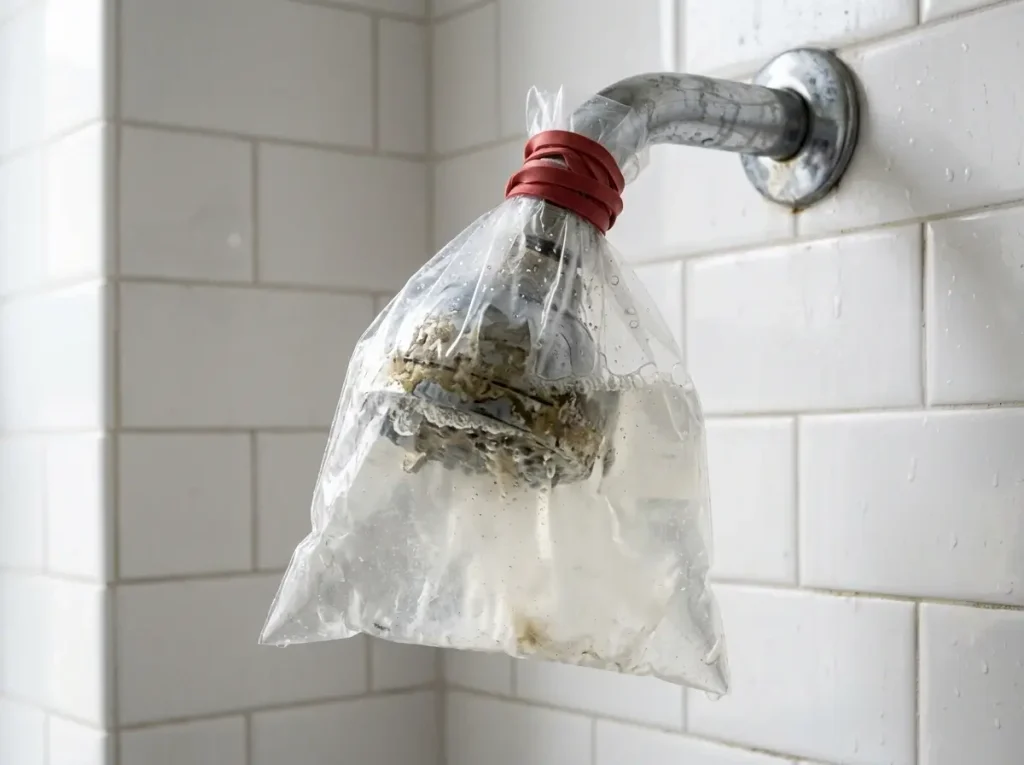
If the current showerhead is visibly crusted with white mineral deposits, wrap it in a plastic bag filled with white vinegar and secure it with a rubber band for a few hours prior to removal.
This dissolves the calcium and breaks the chemical bond, requiring significantly less force to unscrew.
2. Execute the “Two-Wrench Method”
This is the single most critical step in protecting the property. The metal pipe protruding from the wall (the shower arm) is often secured behind the drywall by a flimsy, thin copper strap.
If you simply grab the showerhead and twist with all your might, that strap will snap, and the pipe will break off inside the wall.
Instead, wrap a rag around the shower arm to protect its finish, and grip it firmly with a pair of slip-joint pliers or a wrench to hold it completely stationary.
With your other hand, use an adjustable crescent wrench to grip the flat grooves on the base of the showerhead, turning it counterclockwise to loosen it. The opposing forces cancel out the torque against the wall.
3. Clean the Pipe Threads Thoroughly
Once the old unit is off, you will likely see a messy residue of old, hardened plumber’s putty or frayed tape on the exposed pipe threads.
You must completely remove this debris using an old toothbrush or a stiff wire brush. If you apply new sealant over old debris, your new rental bathroom fixtures will almost certainly leak.
4. Apply Fresh Teflon Tape Correctly
Standard residential plumbing relies on a standard 1/2-inch NPT (National Pipe Thread) connection.
To ensure a watertight seal, you must apply fresh white Teflon tape (plumber’s tape) to the exposed threads of the shower arm. The most common DIY error is wrapping the tape in the wrong direction.
You must wrap the tape clockwise (in the same direction you will be screwing on the new head) so that it doesn’t unravel during installation. Pull the tape taut so it sinks into the grooves, and apply exactly three full wraps before tearing it off.
5. Hand-Tighten and Test for Leaks
Align your new showerhead with the taped threads and begin screwing it on slowly by hand turning it clockwise.
Do not use a wrench for this initial installation. Overtightening can easily crack the plastic housing found inside many modern showerheads. Hand-tighten the unit until it is completely snug, then turn on the water supply.
If you see micro-droplets weeping from the connection joint, turn off the water and use your wrench to give it a cautious one-quarter turn until the dripping stops.
For further visual guidance on securing this watertight seal, consult expert building resources on how to replace a showerhead.
What is the biggest mistake renters make when changing a showerhead?
The biggest mistake renters make when changing a showerhead is using brute force to twist off a stuck fixture without stabilizing the shower arm, which easily snaps the pipe inside the wall and causes catastrophic water damage.
Additionally, immediately discarding the landlord’s original showerhead instead of safely storing it guarantees a hefty deduction from your security deposit during move-out.
When it comes to upgrading rental bathroom fixtures, the line between a brilliant DIY workaround and an expensive eviction notice is incredibly thin.
Most apartment buildings utilize standard copper or galvanized steel plumbing that is secured behind the drywall by a single, flimsy metal strap.
Over years of use, hard water deposits essentially cement the old showerhead to the shower arm threads.
When a tenant inevitably grabs the calcified showerhead and twists with all their might, the torque transfers directly into the wall. The securing strap snaps, the pipe shears off, and water immediately begins flooding the internal wall cavity.
To successfully manage your rental bathroom fixtures without losing your deposit, you must treat the hardware with surgical care.
Never assume that the property manager will appreciate you leaving a premium fixture behind when your lease is up. Lease agreements stipulate that the unit must be returned in its exact original condition.
Even if you replace a sputtering $5 plastic nozzle with a $150 luxury rainfall shower system, an inspector will view the missing original fixture as property damage and charge you for a replacement plus maintenance labor.
To prevent these costly disasters, you must actively avoid the top three critical errors tenants make during plumbing swaps:
- Mistake #1: The Brute Force Error (Snapping the Pipe)
- The Trap: Attempting to unscrew a stuck fixture using only your hands or a single wrench, transferring dangerous torque into the drywall.
- The Fix: Always utilize the “two-wrench method.” Use slip-joint pliers (wrapped in a rag to protect the metal finish) to grip and hold the shower arm completely stationary. Use your second adjustable wrench to grip the showerhead nut and turn it counterclockwise.
- Mistake #2: Skipping the Vinegar Soak (Fighting Calcification)
- The Trap: Trying to force apart metal threads that have been chemically fused together by years of hard water scale and calcium build-up.
- The Fix: If the fixture refuses to budge with moderate pressure, stop immediately. Fill a heavy-duty plastic sandwich bag with pure white vinegar. Submerge the entire showerhead in the bag, tie it tightly around the shower arm with a rubber band, and let it sit for a minimum of 4 to 6 hours (or overnight). The acetic acid safely dissolves the mineral bonds, allowing the fixture to unscrew with minimal effort.
- Mistake #3: Trashing the Original Hardware (The Deposit Killer)
- The Trap: Throwing the ugly, crusty landlord-provided showerhead into the trash because you never intend to use it again.
- The Fix: The moment you remove the old fixture, let it dry completely. Place it inside a Ziploc bag, label it “Original Showerhead,” and store it in the very back of your bathroom vanity cabinet. Reinstall it the week before your final move-out inspection.
Conclusion: Final Thoughts on Upgrading Rental Bathroom Fixtures
Swapping out basic hardware allows you to completely revitalize your daily routine without risking your deposit.
By sticking strictly to reversible lighting workarounds and utilizing the proper tools for plumbing changes, you can safely elevate your space.
If you found this guide to upgrading rental bathroom fixtures helpful, please share it with a fellow renter who might be struggling with a dismal, builder-grade washroom!
A renter-friendly renovation is entirely about mastering the illusion of permanence. You do not need to demolish drywall, splice electrical wires, or hire a professional plumber to craft a highly functional, spa-like retreat.
By addressing the hardware you interact with every single day—the water pressure from your daily shower and the task lighting illuminating your morning mirror—you instantly improve the room’s core utility.
The best rental bathroom fixtures are the ones that look and feel like they belong to a luxury, custom build, yet can be unscrewed, unplugged, and packed into a moving box in under ten minutes.
Of course, hardware is only one piece of the apartment transformation puzzle. Once your lighting and water flow are perfectly dialed in, you can shift your focus to aesthetic camouflage, peel-and-stick surfaces, and vertical organization systems.
To see exactly how these reversible hardware swaps fit into a complete, top-to-bottom room makeover, be sure to read our comprehensive upgrading a rental bathroom guide.
However, your hardware upgrade project is not truly finished until you have successfully prepared for the inevitable move-out day.
Property managers are notoriously meticulous during final walk-through inspections.
Any missing original hardware—even if you replaced it with something exponentially more expensive—will be treated strictly as property damage, resulting in deductions that easily exceed the cost of the items themselves.
To guarantee you get your full security deposit back, you must follow this strict Moving-Out Restoration Checklist:
- Bag and Tag Immediately: The exact moment you remove the landlord’s original showerhead, light bulbs, or plastic vanity covers, place them all inside a heavy-duty, sealable plastic bag. Label the bag clearly with a permanent marker (e.g., “Original Bathroom Hardware – Do Not Throw Away”).
- Strategic Storage Placement: Store this labeled bag in the very back of your bathroom vanity cabinet or on the highest, least-used shelf of your hallway linen closet. Do not mix this bag with your general toolboxes or moving supplies, where it is highly likely to get lost in the shuffle of a move.
- The “Reverse Swap” Timeline: Do not wait until the chaotic morning of moving day to reinstall the old hardware. Plan to perform your “reverse swap” exactly one week prior to your final lease inspection. This provides a buffer to address any minor leaks or lingering adhesive residue.
- Clean the Pipe Threads Again: When removing your upgraded showerhead to take to your next apartment, meticulously clean off all the white Teflon tape you previously applied. You must wrap the pipe with fresh tape before screwing the old landlord fixture back onto the shower arm to prevent any parting leaks.
- Safe Adhesive Removal: Carefully stretch and pull straight down on the tabs of any Command strips or silicone adhesive dots used to mount your temporary vanity lighting. If any sticky residue remains on the drywall, use a damp microfiber cloth and a single drop of mild dish soap—never use harsh chemical solvents or abrasive sponges that might strip or discolor the apartment’s cheap, flat paint.
- Document the Restoration: Once the original hardware is back in place, take clear, well-lit photographs of the shower and vanity area. If a landlord ever mistakenly claims a fixture is missing, you will have time-stamped visual proof of the bathroom’s fully restored condition.